Smart Plant - Measuring Plant Data
This is the first part of a multi-step project where we’ll make one of your plants smart! For now, we’ll measure and display the soil moisture level of your plant.
Overview
Skill Level: Beginner-Intermediate
Time Required: 45 minutes
We’ll be using the Arduino Dock to read the analog measurement from a soil moisture sensor. The code is written in Python and makes use of the UART1 serial port on the Omega to communicate with the Arduino Dock’s microcontroller. We’re also using Onion’s pyOledExp module to provide control of the OLED Expansion.
The complete project code can be found in Onion’s smart-plant repo on GitHub.
In this project series, we’ll be doing the following:
- Adding smarts to your plant by measuring it’s soil moisture level
- Sending plant data to the Losant IoT Platform and check in on your plant from anywhere by looking at the nicely visualized data
- Updating the Losant workflow to notify you with a Tweet when your plant needs watering
- Adding a water pump to your setup and update the Losant workflow to automatically water your plant when it needs watering
- Updating the smart plant setup so the Omega and pump can be powered with a single supply
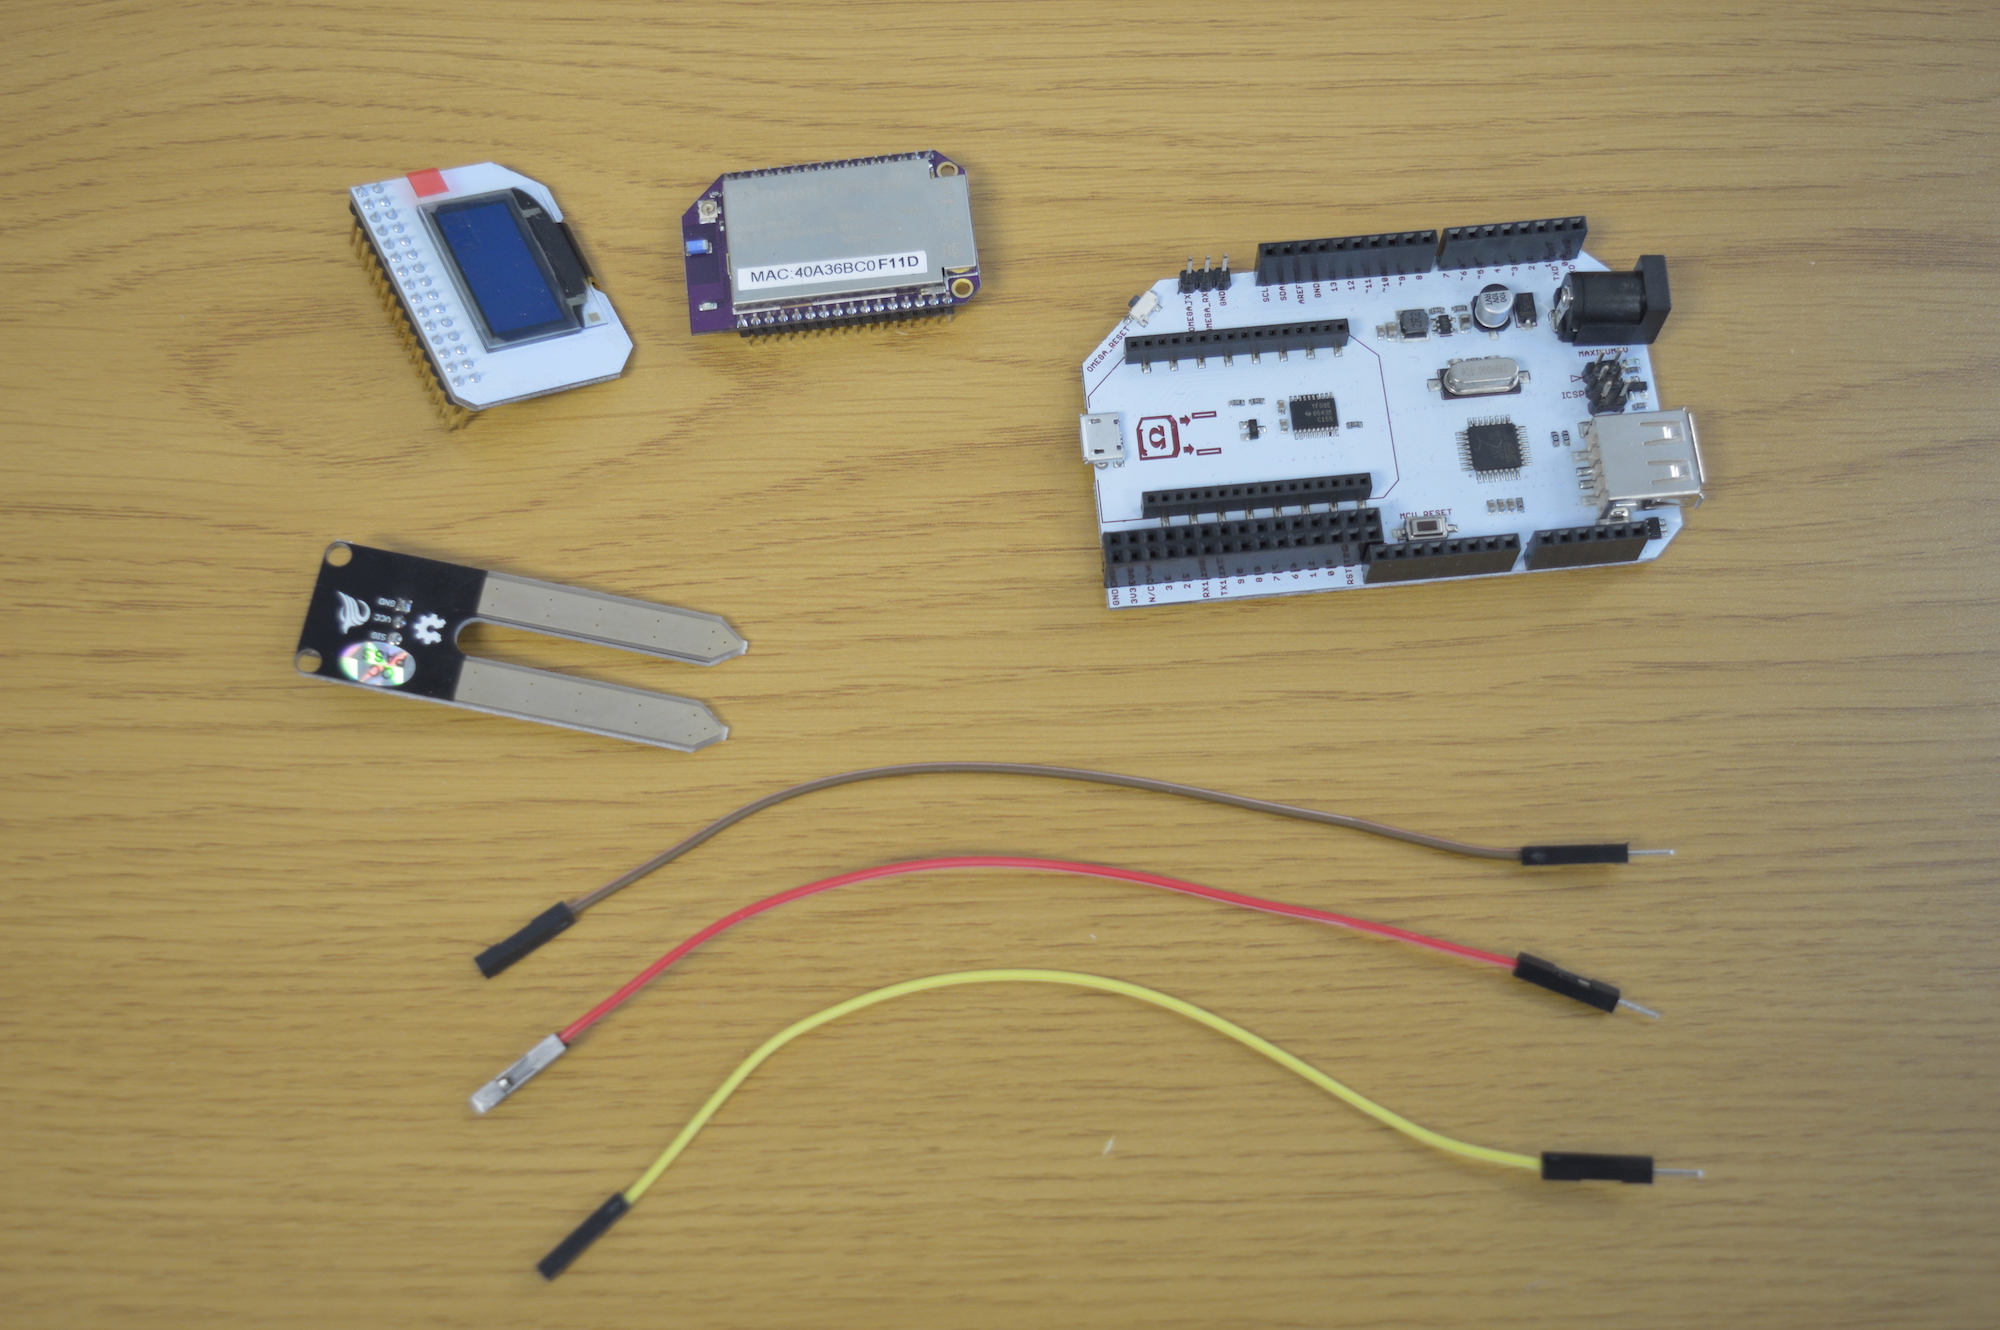
Ingredients
- Onion Omega2 or Omega2+
- Onion Arduino Dock 2
- Onion OLED Expansion (optional but recommended)
- Soil Moisture Sensor
- 3x Male-to-Female Jumper Wires
Step-by-Step
Follow these instructions to setup the Smart Plant project on your very own Omega!
1. Prepare
You’ll need to have an Omega2 ready to go, complete the First Time Setup Guide to connect your Omega to WiFi and update to the latest firmware.
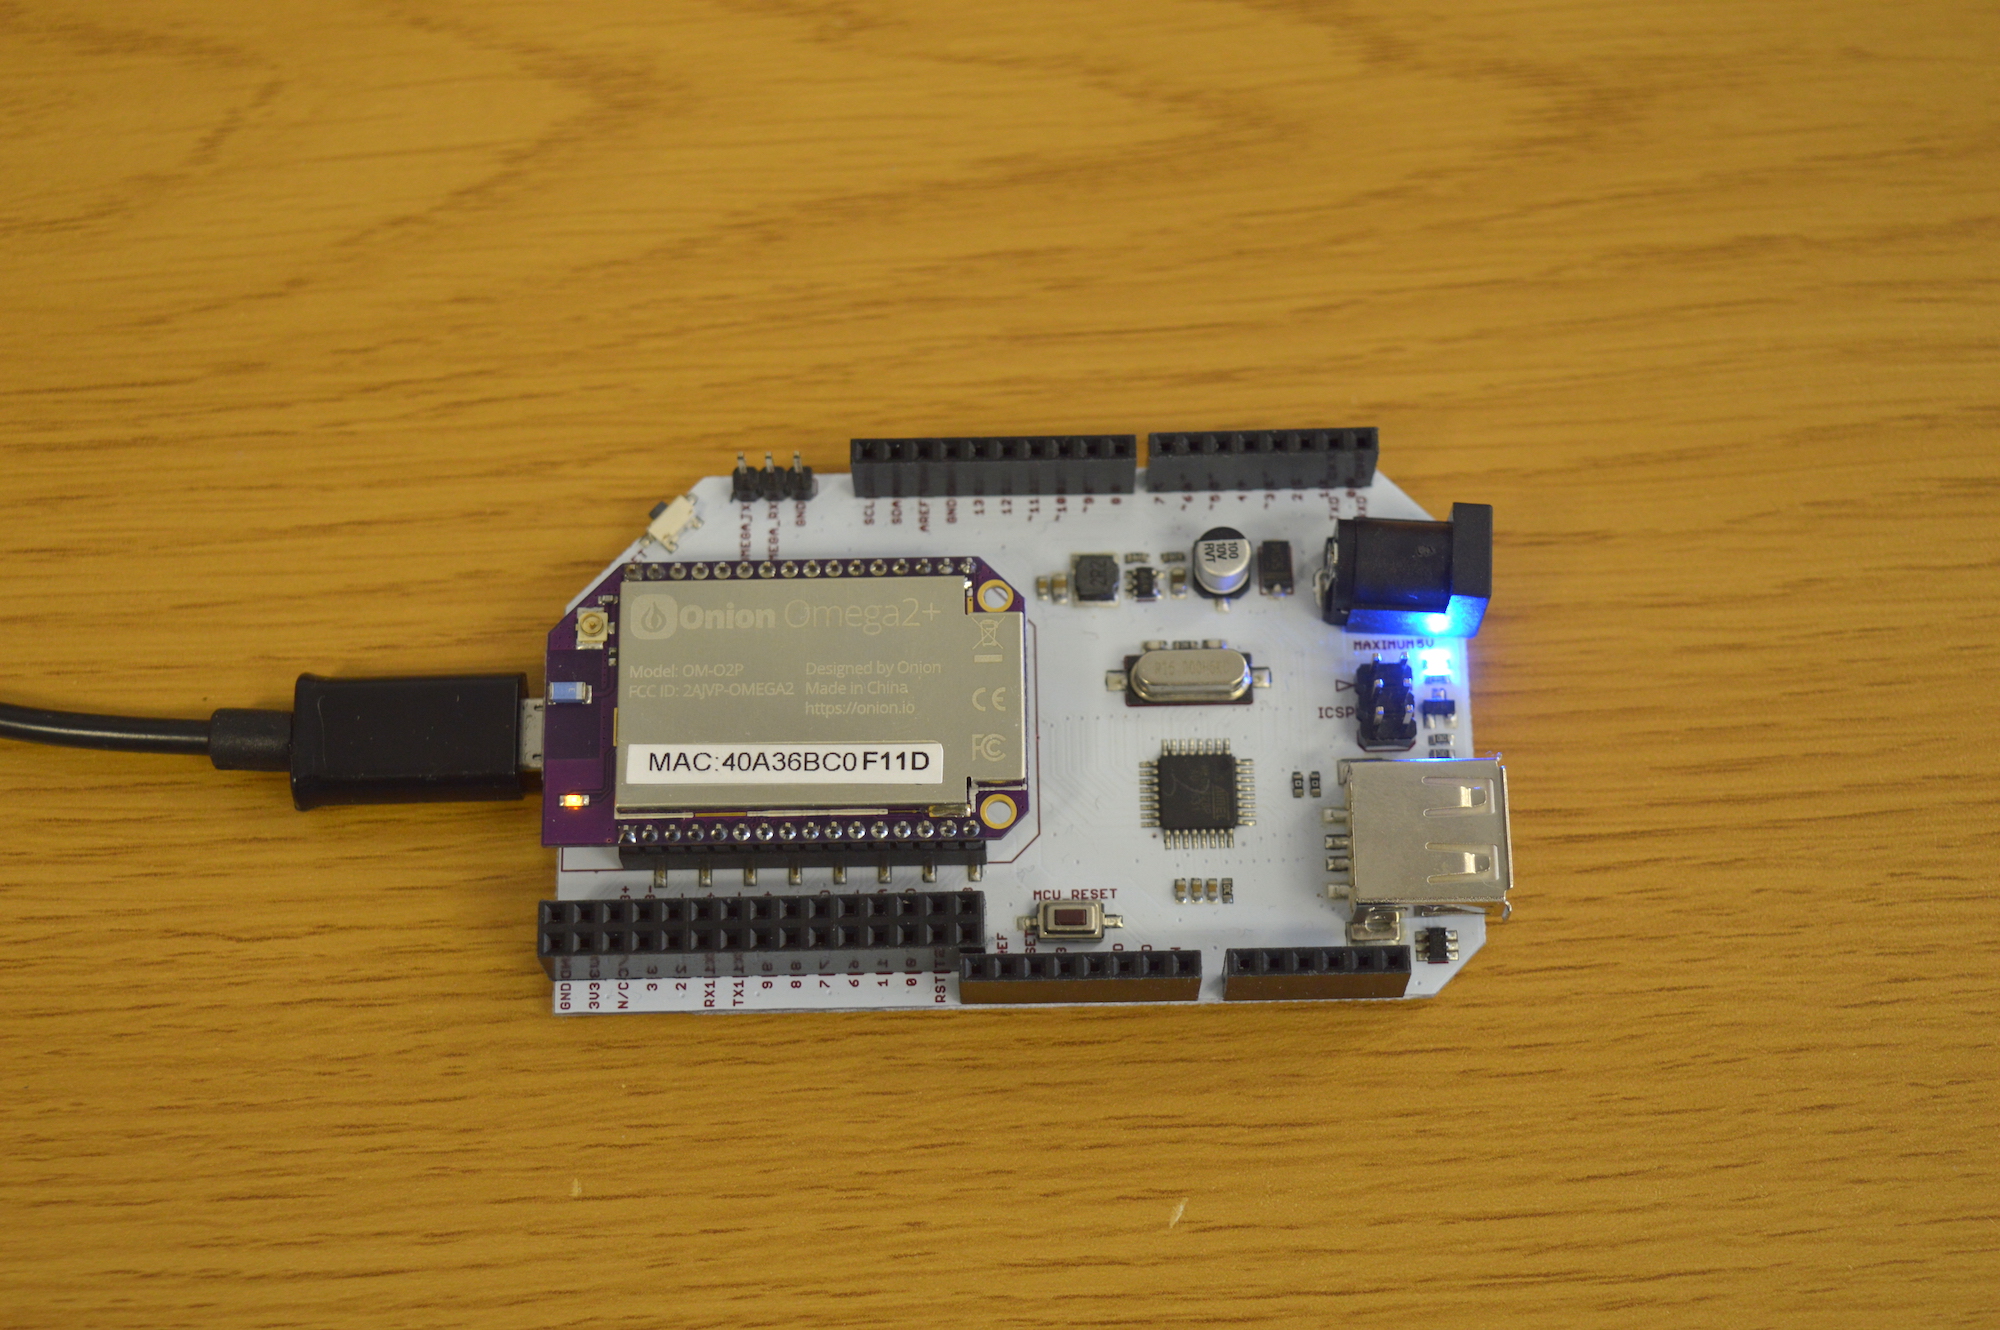
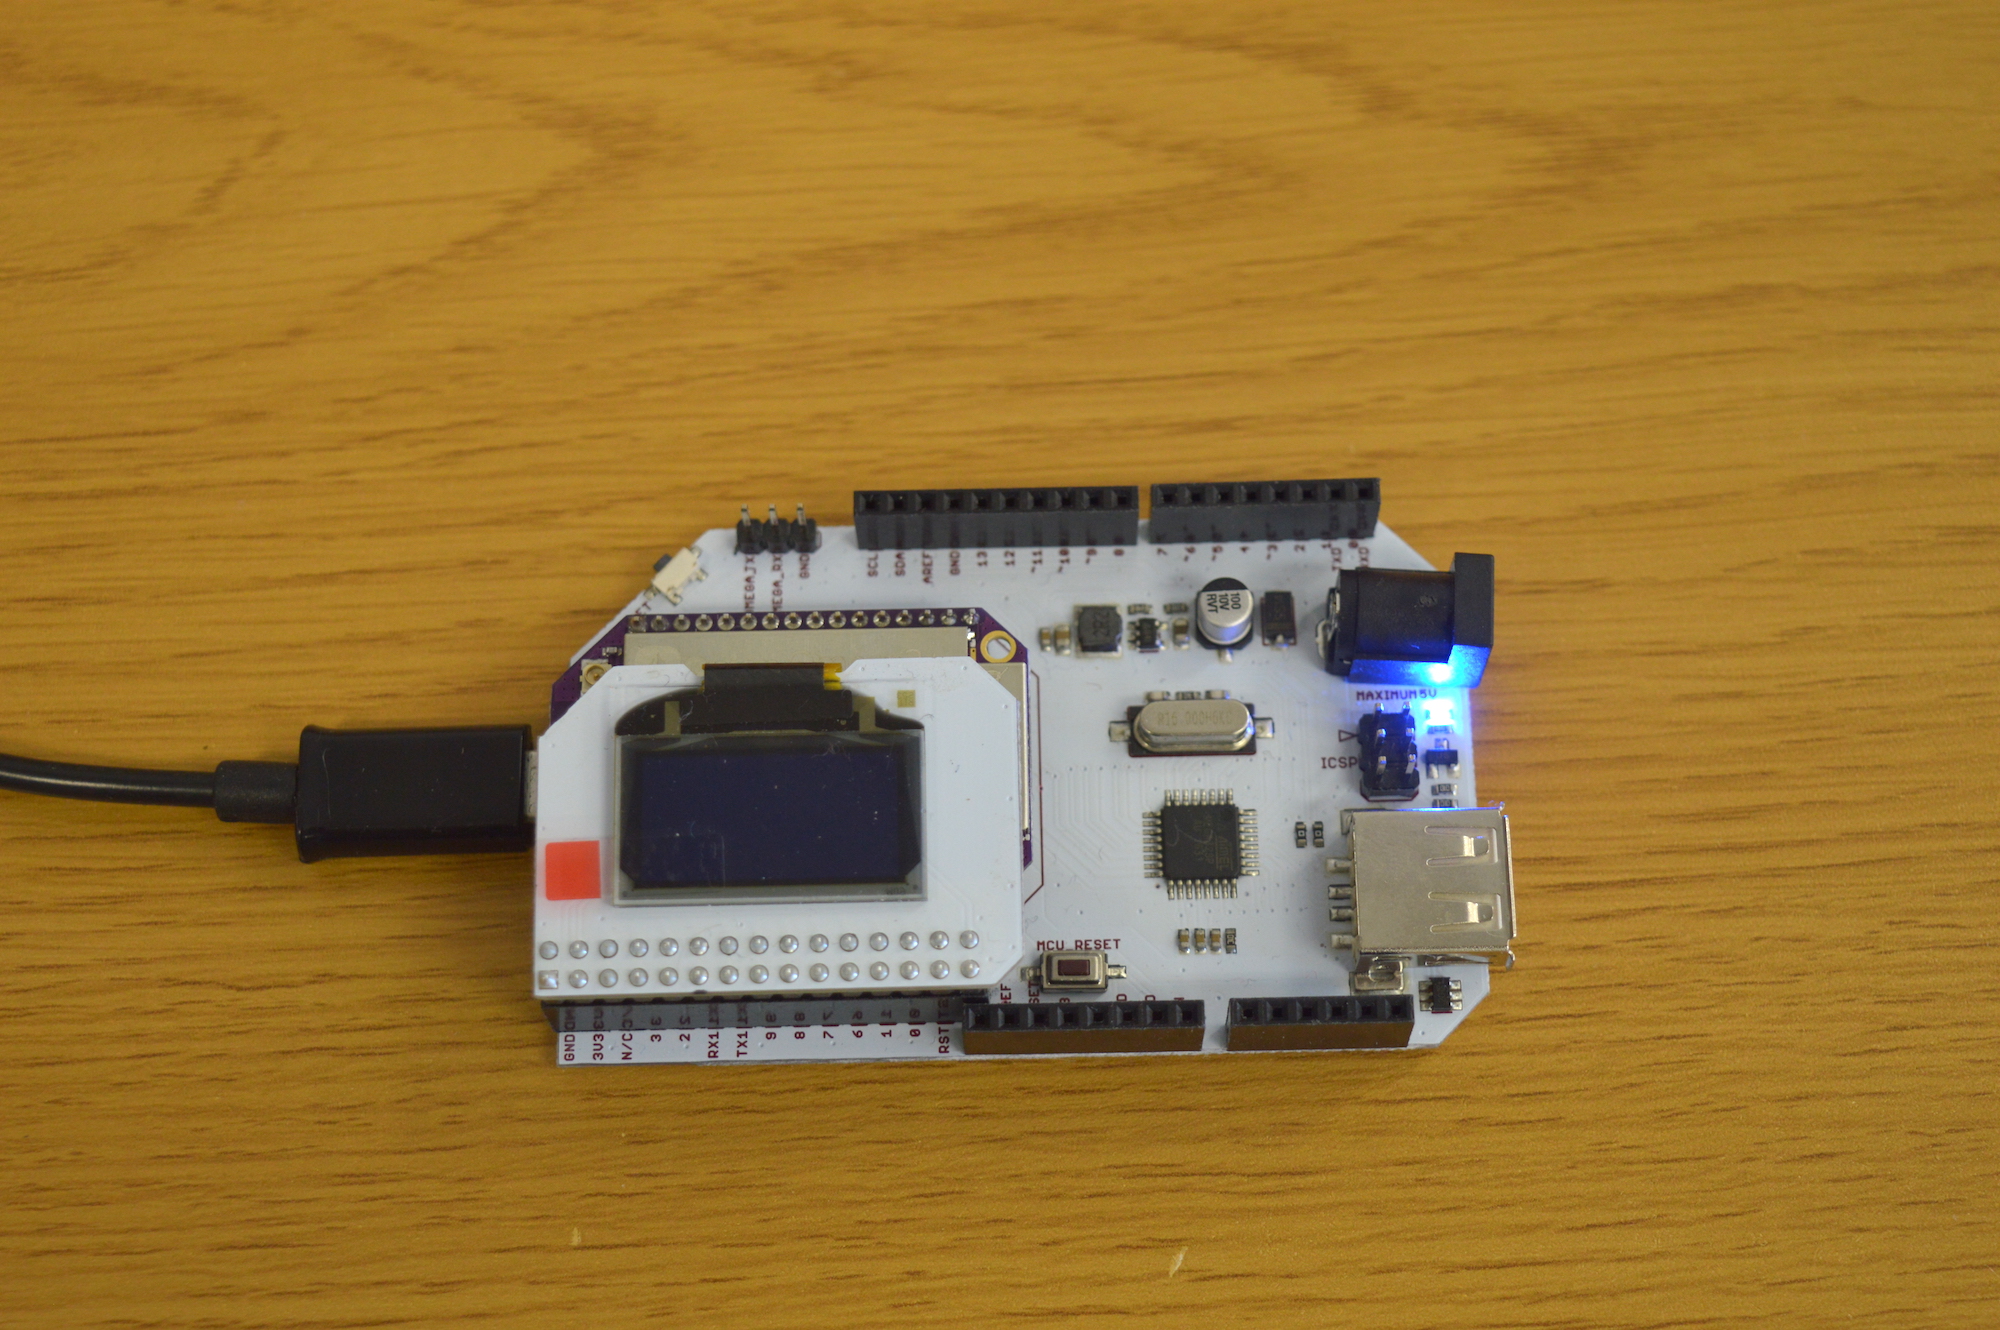
Once that’s done, plug in your OLED Expansion:
2. Install Required Software on the Omega
Connect to the Omega’s command line and install Python as well as some of the packages we need:
opkg update
opkg install arduino-dock-2 python python-pyserial pyOledExp git git-http ca-bundle
The arduino-dock-2 package installs all the software required to interact with and flash the Arduino Dock. We’re also installing the python programming language and python-pyserial, a module that will allow us to communicate with the microcontroller via the UART1 serial port.
The git, git-http, and ca-bundle packages will allow us to download the project code from GitHub.
3. Arduino IDE Setup
If you don’t already have it, install the Arduino IDE on your computer.
Then you’ll need to install the Onion Arduino Library by doing the following:
- In your web browser, download the Onion Arduino Library ZIP file.
- Install the ZIP library by following the instructions in the Arduino Library Installation guide.
- Restart your Arduino IDE to reload the library.
Finally, follow our Arduino Dock setup instructions to setup the Arduino IDE to wirelessly flash the Arduino Dock 2.

4. Flash the Arduino Dock’s Microcontroller
We’re going to upload one of the example sketches from the library to the microcontroller on your Arduino Dock.
Go to File -> Examples -> Onion -> readAnalogValue
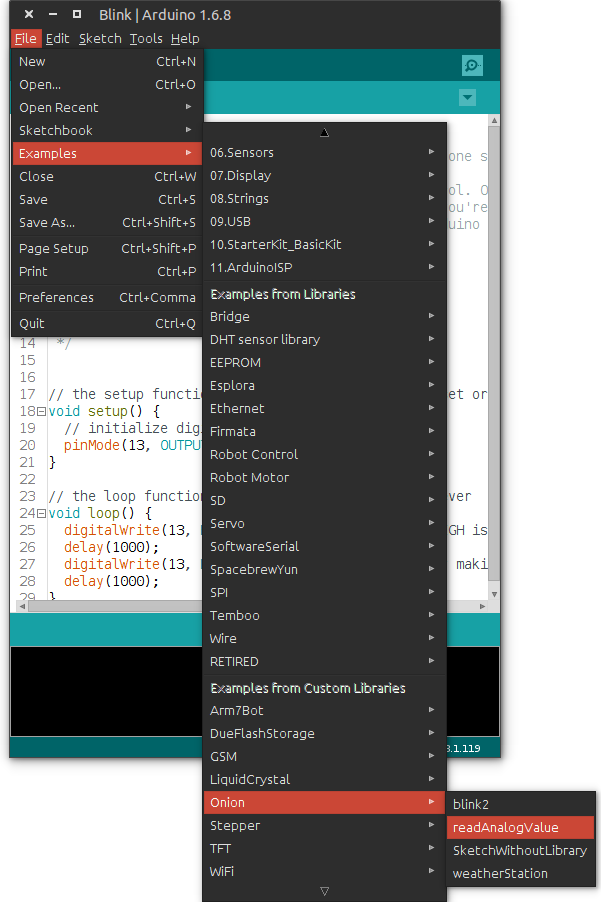
This sketch will read the signal on Analog pin A0 and will transmit the value via serial if the correct command is received from the other end.
Select your Omega from the listed Network Ports when you open the Tools menu and then Port:
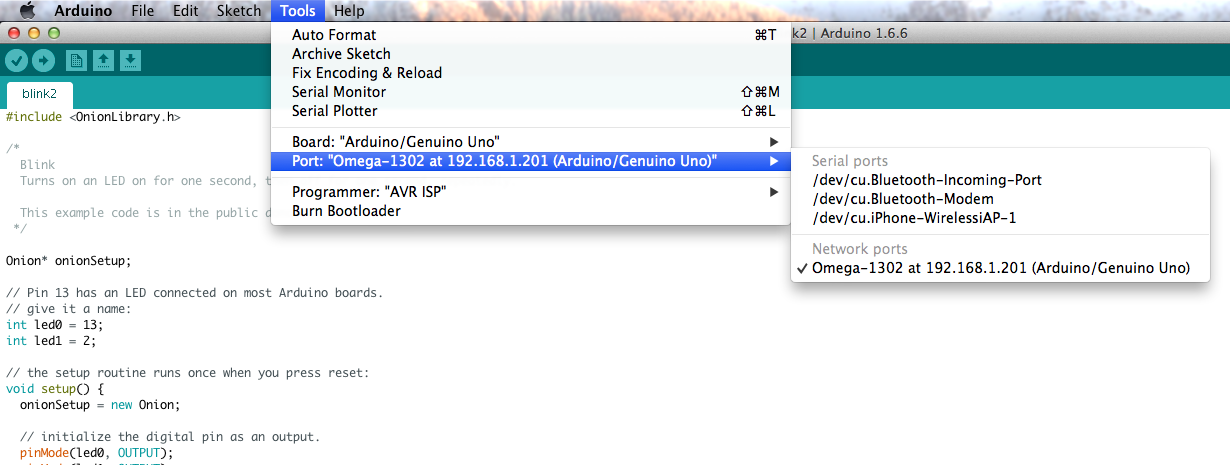
If your Omega doesn’t show up in the list of Network Ports, run
/etc/init.d/avahi-daemon restartand it should show up in about 15 seconds.
Hit the Arrow button to upload your sketch to the Arduino Dock. It will ask for a password during the flashing sequence, this is the Omega’s password that it’s asking for, by default it is onioneer.
See our guide on using the Arduino Dock for more details on this process.
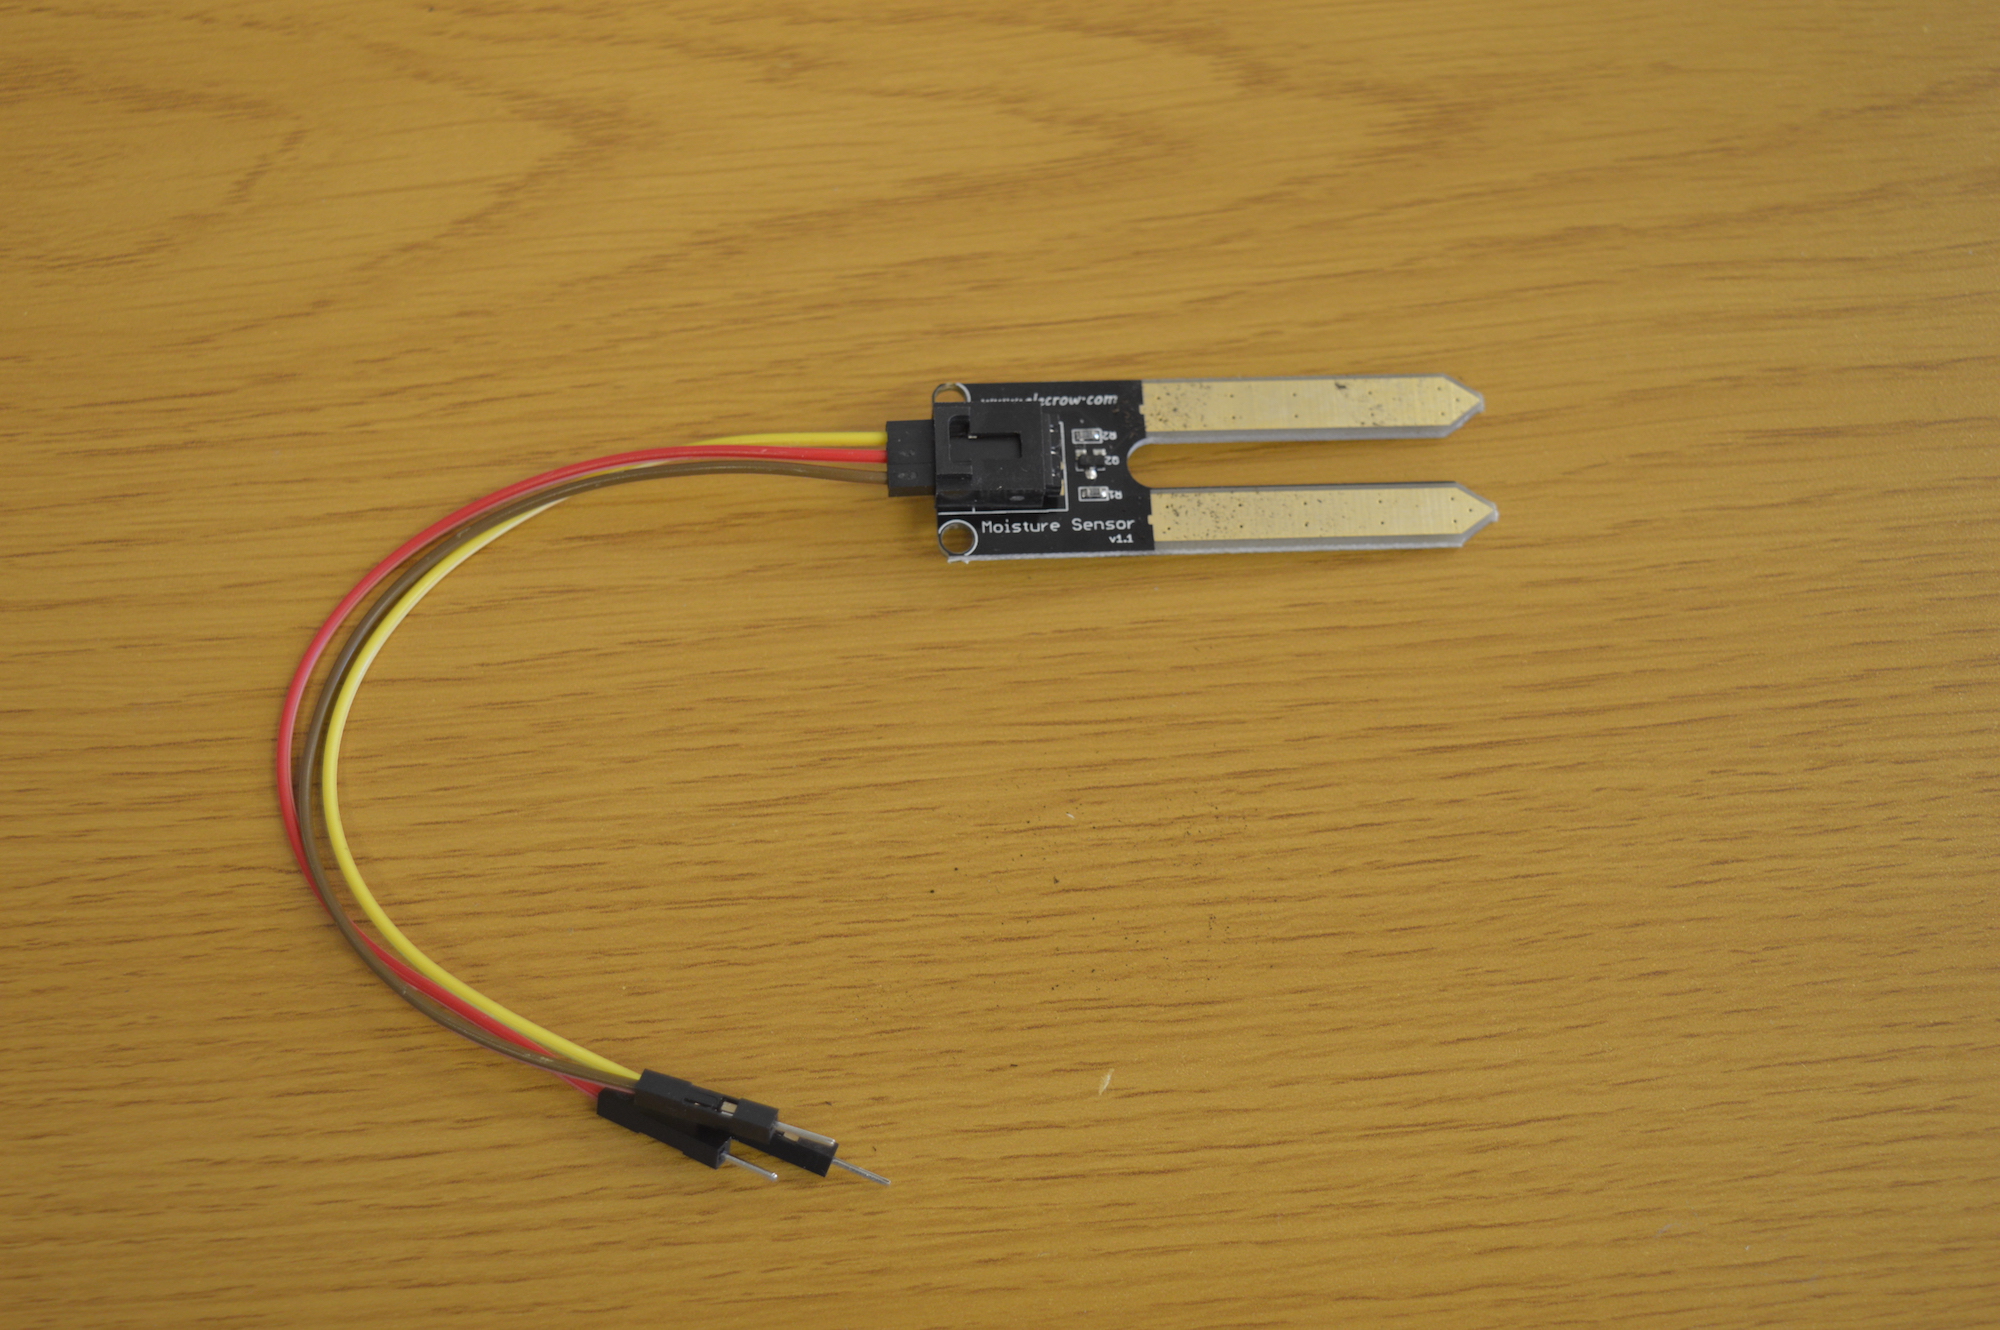
5. Connect the Sensor
There are three connections we’ll have to make to wire up the soil moisture sensor to your Arduino:
Use jumper wires to make the following connections:
| Soil Moisture Sensor Pin | Arduino Dock Pin |
|---|---|
| GND | GND |
| VCC | 5V |
| SIG | A0 |
Depending on where you got your sensor, the labelling might be a little different, but they should all follow the same sort of pattern as above.
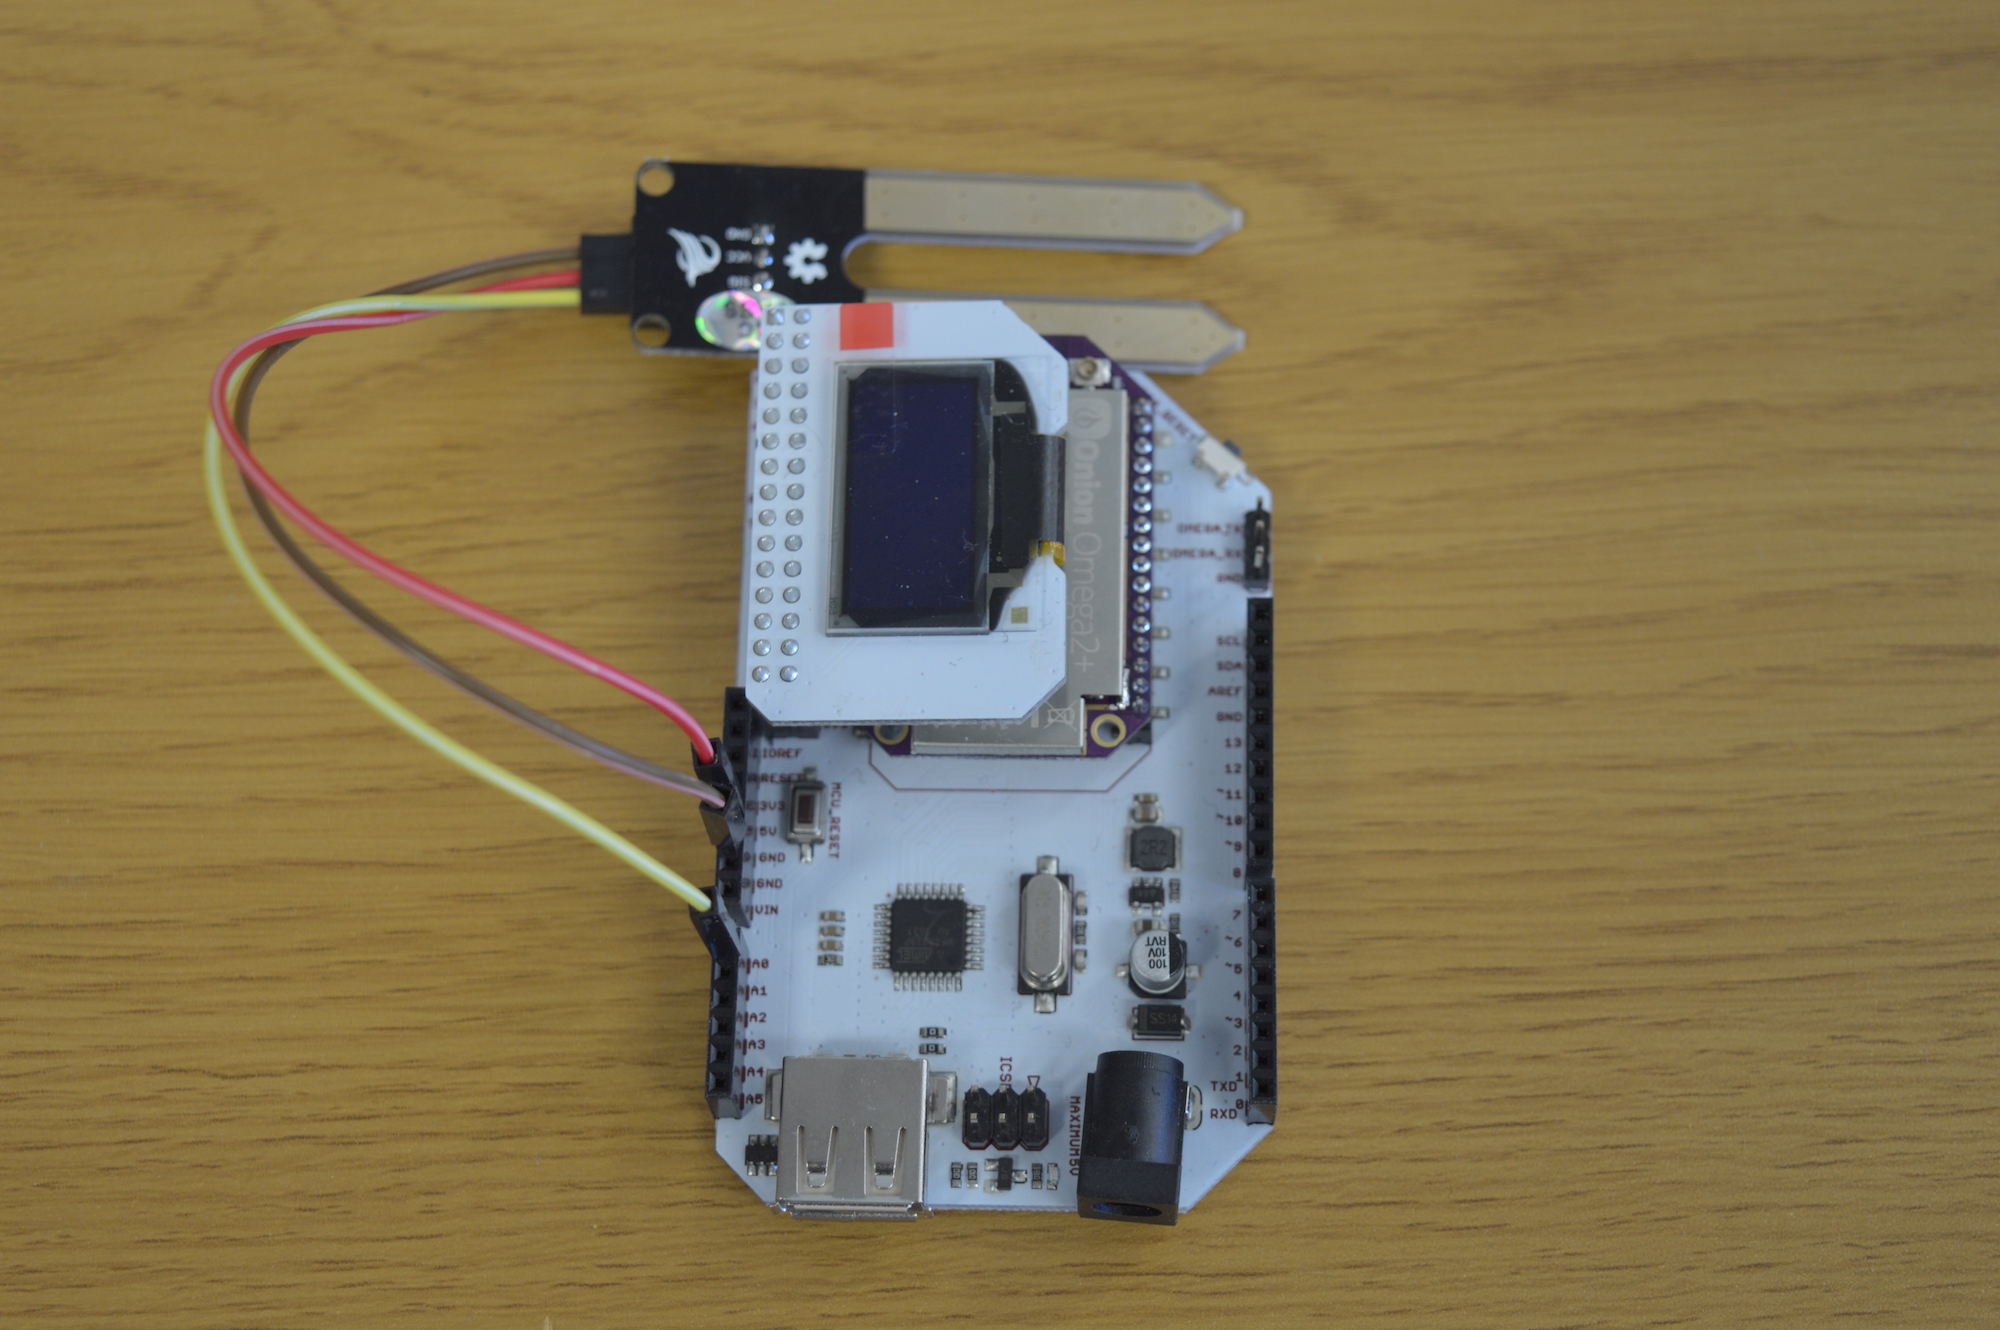
Plug in the female ends of the jumper wires into the sensor:
And then the male ends of the jumper wires into the appropriate Arduino Dock pins.
6. Sensor -> Plant
To be able to measure the moisture level of the plant’s soil, we’ll need to put the sensor into the pot!
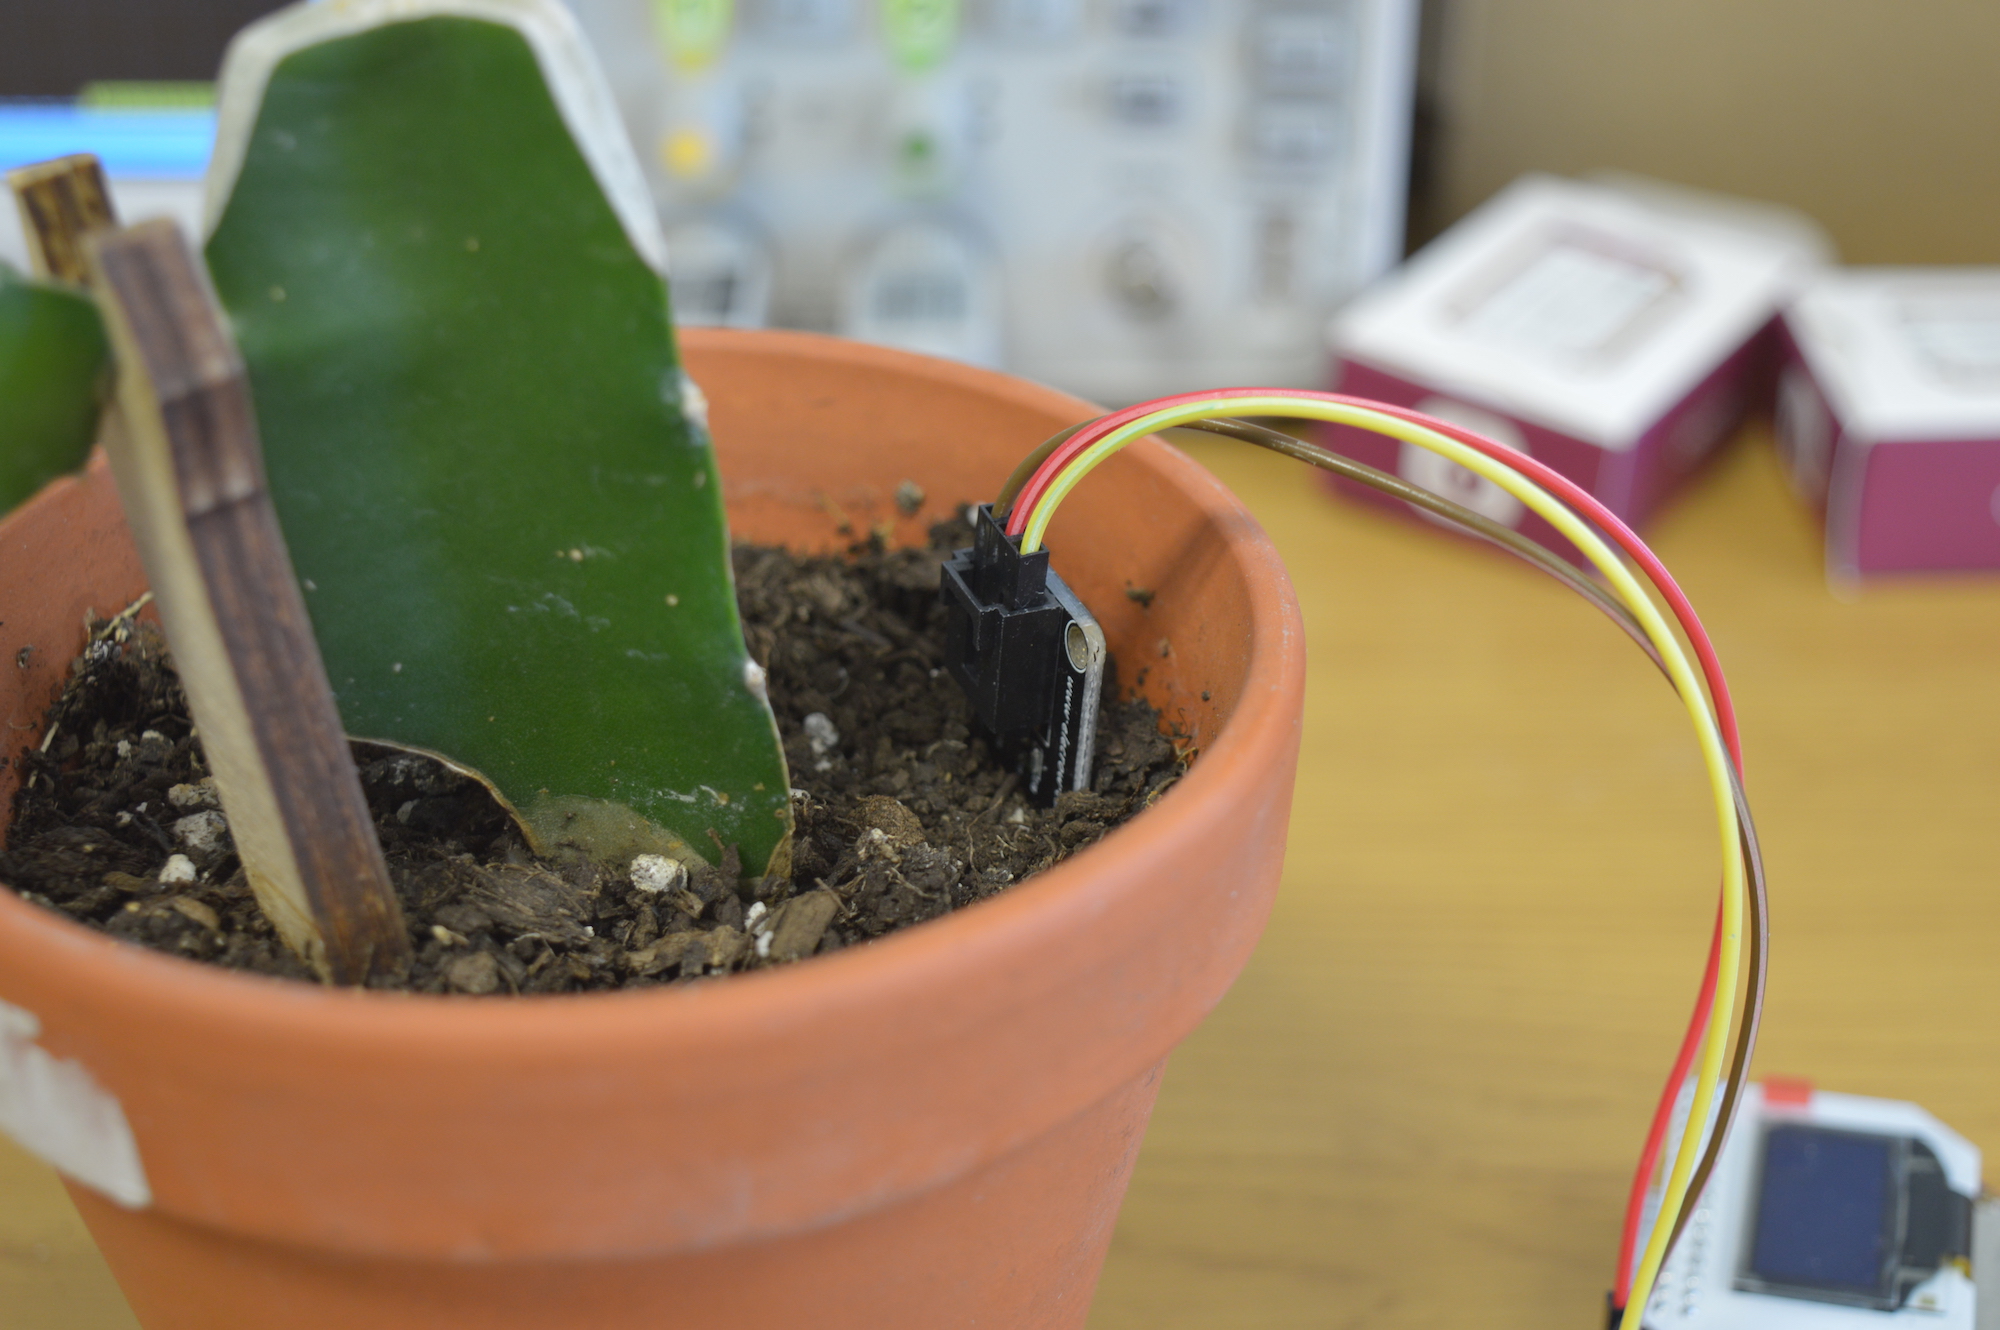
Insert the sensor into the soil so that the metallic parts are completely covered by the soil.
The sensor isn’t super water-proof, so when watering your plant, avoid pouring water directly on the sensor.
7. Download the Project Code
The code for the Smart Plant can be found in Onion’s smart-plant repo on Github. We’ll use git to download the code to your Omega: navigate to the /root directory on the Omega, and clone the GitHub repo:
cd /root
git clone https://github.com/OnionIoT/smart-plant.git
Now all of the code will be in the new /root/smart-plant/ directory on your Omega.
8. Run the Code
Let’s run the code!
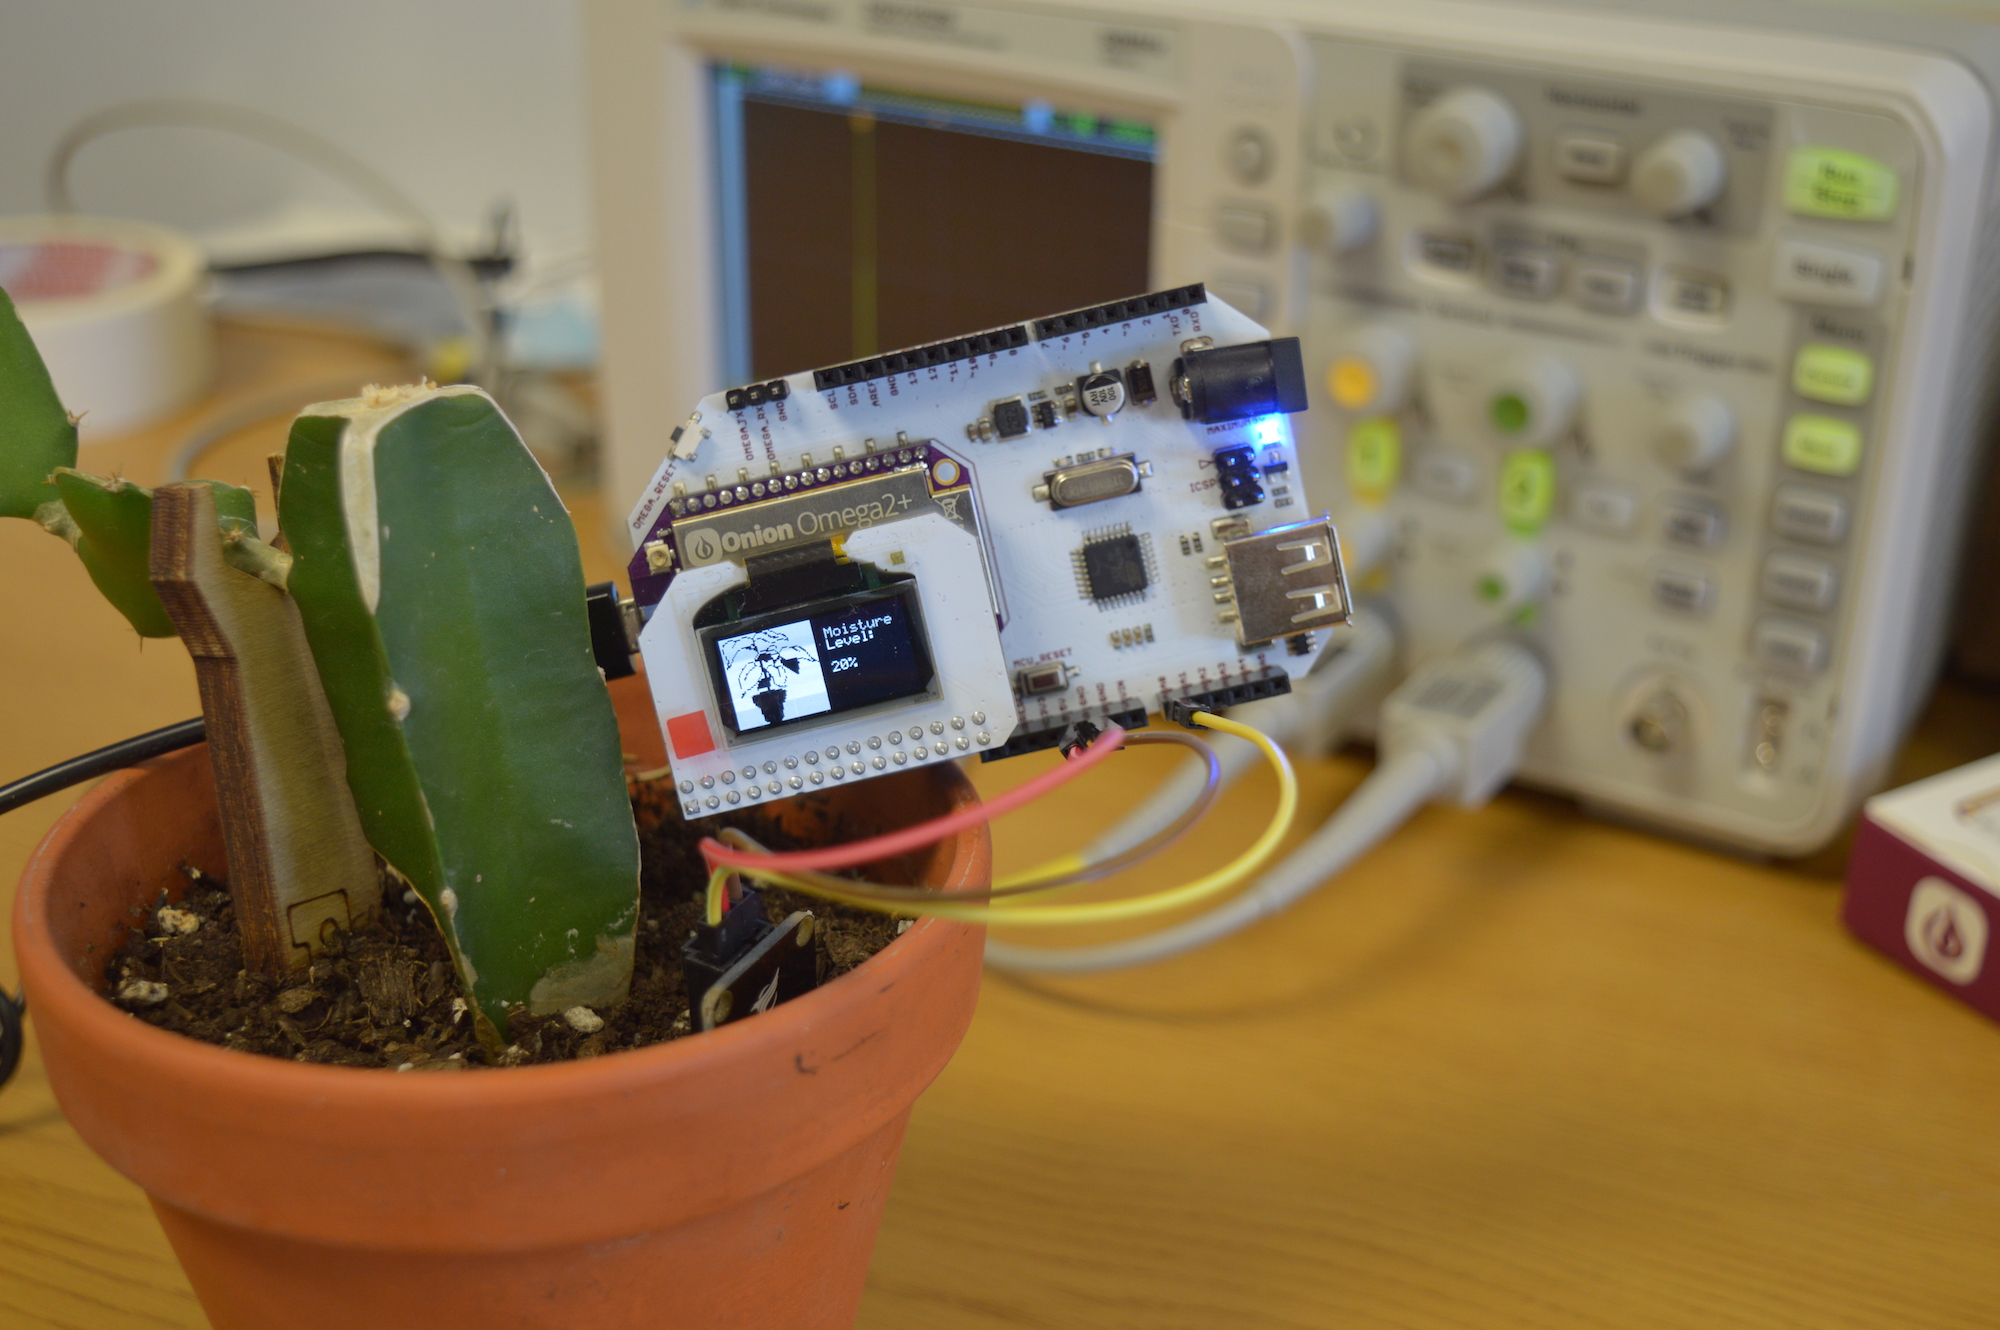
python /root/smart-plant/smartPlant.py --oledThe program will run and collect a moisture level measurement through the Arduino Dock about once a second. The measurement will be displayed on the command line as well as the OLED Expansion:
root@Omega-F11D:~# python /root/smart-plant/smartPlant.py --oled
> Latest measurement:  201
 > Measurement List: 19%
 >> Average Value: 19%
> Latest measurement:  200
 > Measurement List:  19%  19%
 >> Average Value: 19%
> Latest measurement:  201
 > Measurement List:  19%  19%  19%
 >> Average Value: 19%
> Latest measurement:  202
 > Measurement List:  19%  19%  19%  19%
 >> Average Value: 19%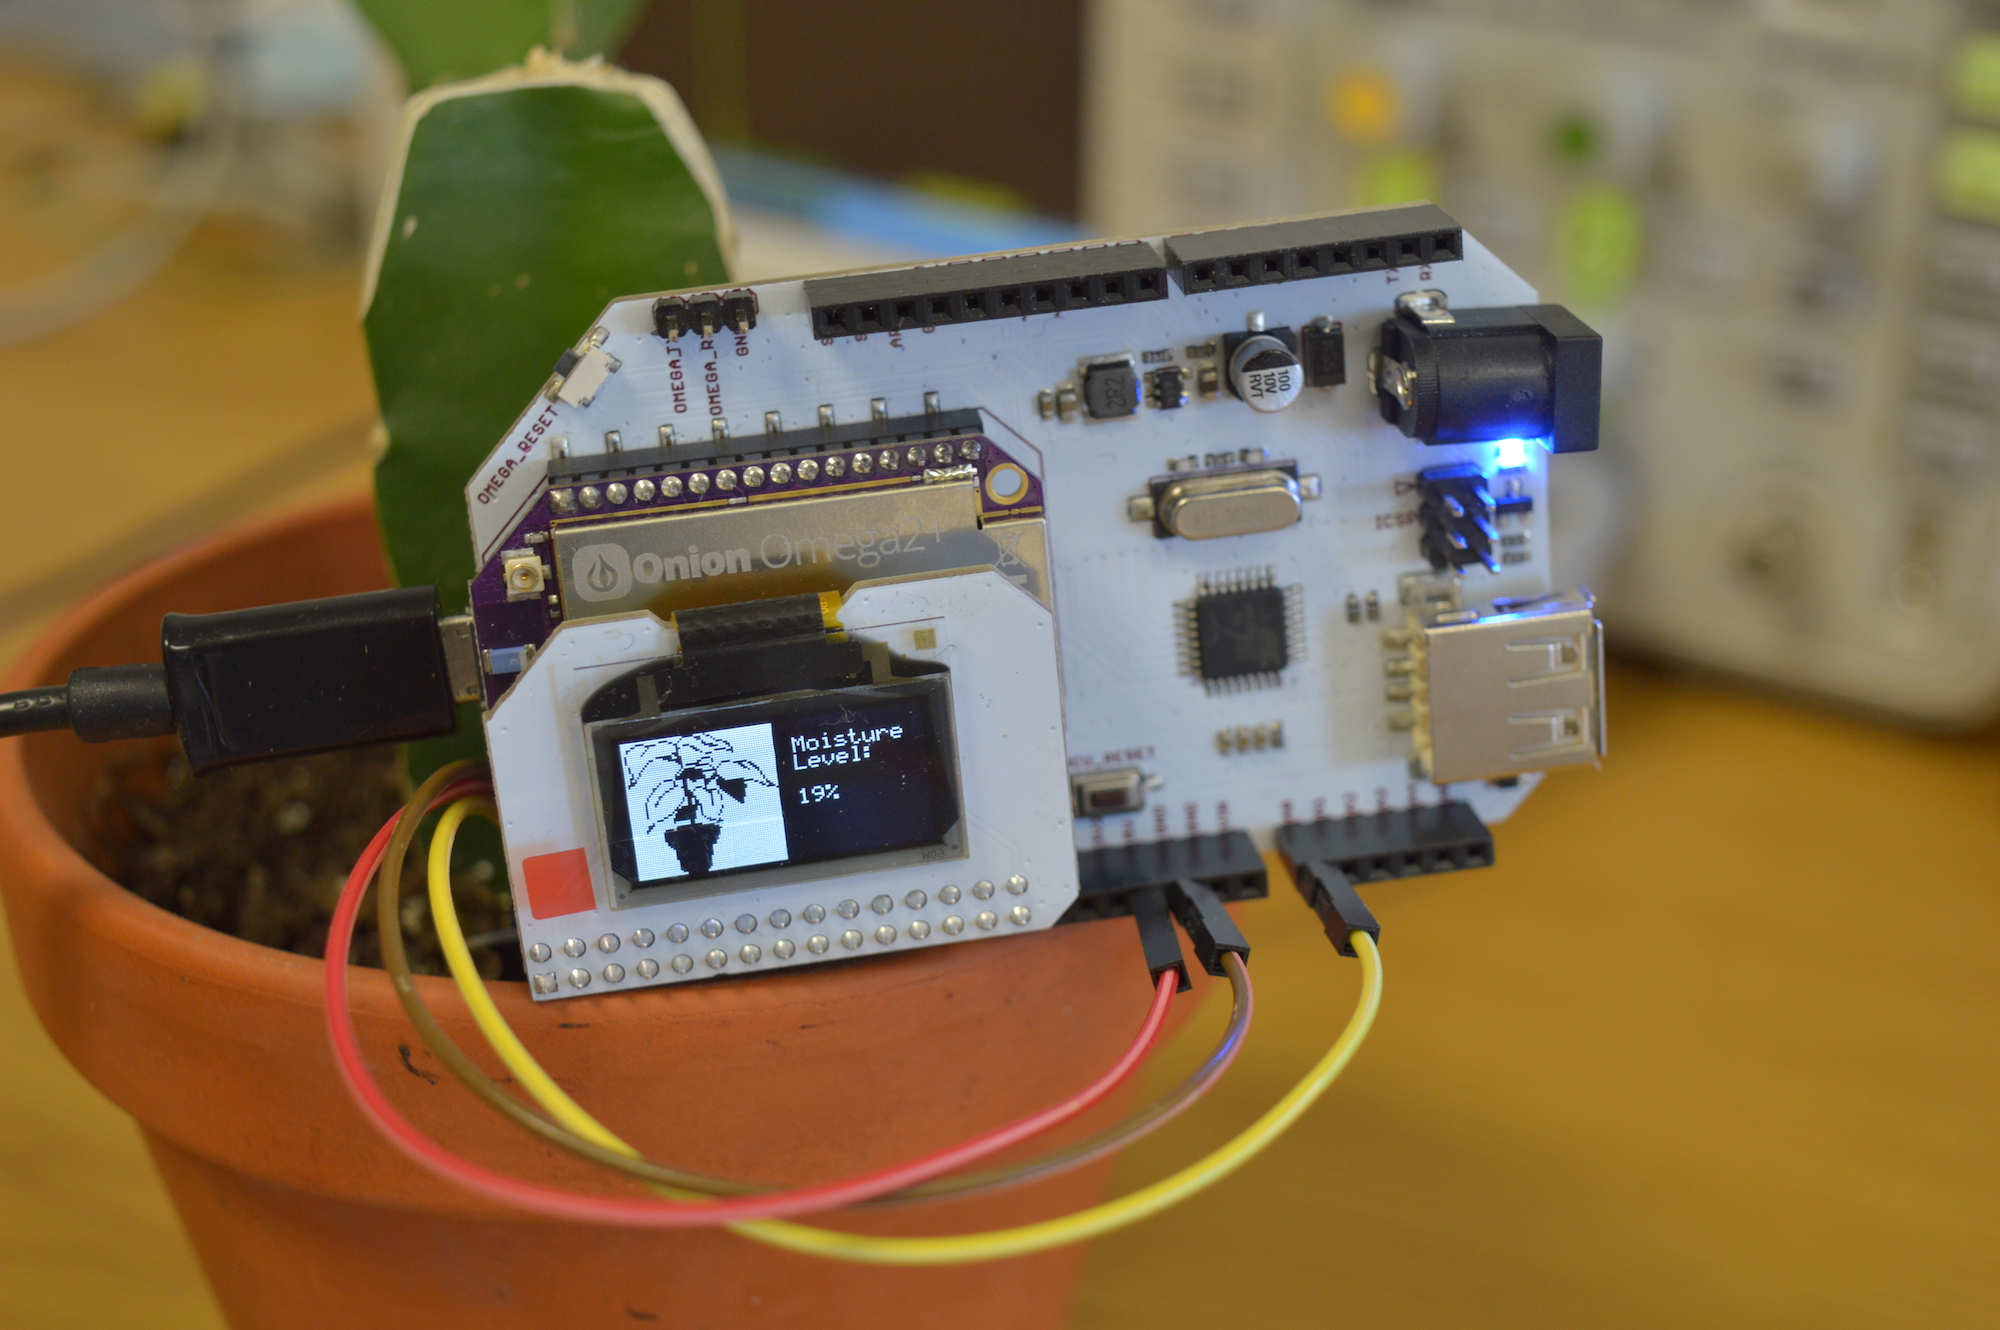
If you don’t have an OLED Expansion, leave out the --oled part of the command.
The soil moisture sensor is an analog sensor, meaning that the signal it outputs to the Arduino Dock is anywhere from 0V to 5V. The microcontroller sketch will read this as a value between 0 and 1023, where 0 represents 0V and 1023 represents 5V. This number isn’t particularly meaningful to us, so on the Omega, we convert it to a percentage. If you take a look at the above example, the first reading is 201, 201/1023*100% is 19%. And 19% is what we display on the OLED.
Changing the Program Operation
This part is optional!
To avoid fluctuations, the value from the moisture level sensor is averaged out from the previous 15 readings. This number can be changed with the command line arguments that are passed when the program is run.
To have the value averaged out from the 3 latest readings, that is, to make it more reactive to changes, run the following command:
python /root/smart-plant/smartPlant.py --oled --number=3If you would like to make the readings less reactive to changes, we can also have the value averaged out from the last 60 readings:
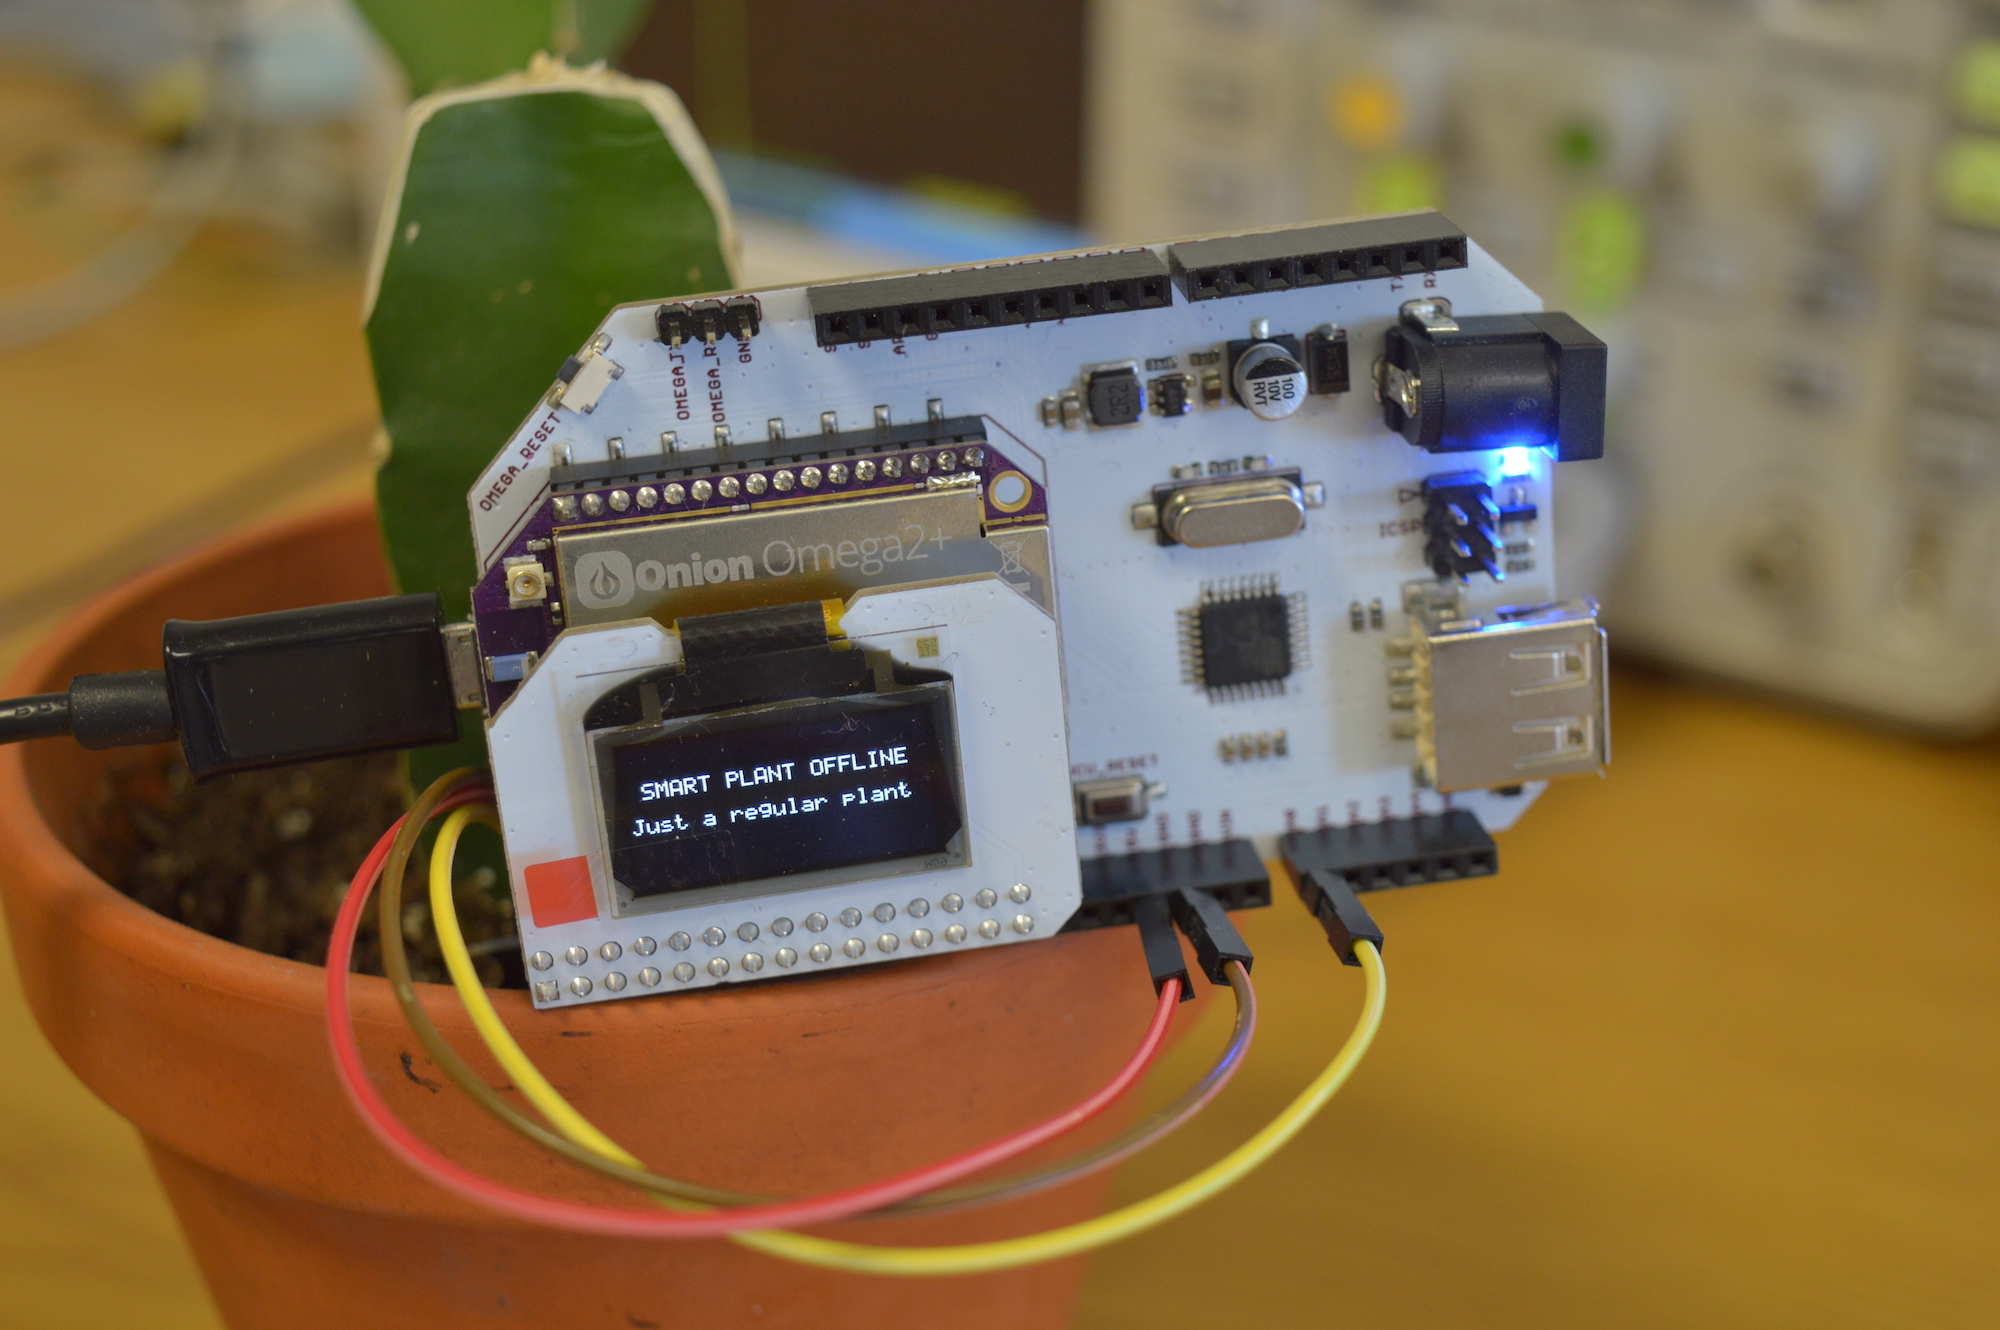
python /root/smart-plant/smartPlant.py --oled --number=60Exiting the Program
Hit ‘ctrl+c’ to end the program. You’ll notice that the OLED will change so that you know your smart plant is now just a regular plant:
9. Automate the Program to Run at Boot
To make sure your plant is always smart, we can configure the system so that the smart plant program runs whenever the Omega boots up. We’ll use LEDE’s init.d system to create a service that ensures the smart plant program will run in the background.
The etc/init.d/smart-plant script included in the project repository is configured to run the smart plant program. To set it up, make the etc/init.d/smart-plant file executable, copy it into /etc/init.d, then enable it by running the following commands:
chmod +x etc/init.d/smart-plant
cp etc/init.d/smart-plant /etc/init.d/
/etc/init.d/smart-plant enable
The smart plant program will now run as a service whenever the Omega is turned on. Try rebooting your Omega (enter reboot in the command line), and you’ll see that your program will start up again when the Omega boots up.
Code Highlight
In this project, the Omega communicates with the Arduino Dock over the serial port. This can be seen in the measurementHelper.py module and the Arduino readAnalogValue sketch:
# read analog value (0-1023) from the microcontroller
#   returns None if value is not read successfully
def readMoistureLevel(serialPort):
    # need to write an 'r' character to trigger a measurement response
    serialPort.write('r')

    # read the response
    try:
        value = serialPort.readline()

        if value == "":
            print("Got blank value!")
            value = None
        else:
            value = value.rstrip()  #chomp the newline at the end of the response
    except:
        value = None

    return value
// respond only if correct command is received
if ((char)inByte == 'r') {
// respond with analog measurement
Serial.println(analogValue, DEC);
}We are also able to easily check and parse command line arguments using Python’s getopt module in smartPlant.py:
# read the command line arguments
try:
    opts, args = getopt.getopt(sys.argv[1:], "hvqn:ol:p", ["help", "verbose", "quiet", "number=", "oled", "losant=", "pump"])
except getopt.GetoptError:
    printUsage()
    sys.exit(2)
for opt, arg, in opts:
    if opt in ("-h", "--help"):
        printUsage()
        sys.exit()
    elif opt in ("-v", "--verbose"):
        VERBOSE = True


    # and so on
Going Further
Next we’ll make your plant a little smart by connecting it to a cloud data service so you can remotely monitor it from anywhere in the world!