Smart Plant - A Single Power Supply
We’ve built out some really cool features on our smart plant in the previous parts. Now to top it all off, let’s upgrade the power circuitry so we can run the entire project on a single 12V power supply!
Overview
Skill Level: Intermediate
Time Required: 20 minutes
When you were building the smart plant, you had to power the pump and Arduino separately. Let’s change that by replacing the USB power supply with a regulator that can convert the motor’s 12V into 5V. This way, when you plug in the 12V supply, the entire project comes to life!
Ingredients
We’ll need all of the same materials as in the previous part:
- Onion Omega2 or Omega2+
- Onion Arduino Dock 2
- Onion OLED Expansion (optional but recommended)
- Soil Moisture Sensor
- Onion Relay Expansion
- DC Barrel Jack Adapter
- 12V 1A DC Power Supply
- 3x Male-to-Male Jumper Wires
- Water Pump (12V DC)
- Flexible Plastic Tubing
- A piece of paper the size of your hand to test the pump’s polarity
- A plate or bowl to hold your plant and collect excess water
A glass or bowl of water you can use as a reservoir
We’ll need some new ingredients:
Tools:
Step-by-Step
Follow these instructions to set this project up on your very own Omega!
1. Prepare
You’ll have to have an Omega2 ready to go, complete the First Time Setup Guide to connect your Omega to WiFi and update to the latest firmware.
2. Complete the Previous Parts of the Project
This project builds on the previous parts of the Smart Plant project. If you haven’t already completed the first, second, third, and fourth parts, go back and do them now!
3. Prep
Before you start, take apart the wiring and tubing we did in the previous part of the project and unplug your Arduino Dock. Now you should have:

IMPORTANT: Make sure your Power Supply is no longer connected to the DC Barrel Jack Adapter!
4. Wiring the Circuit
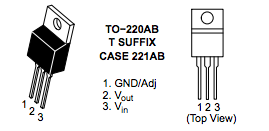
This is the pinout diagram for the MC33269T. We’ll be referring back to this when wiring it up.
We’ll assemble the circuit in a few sub-steps:
- Regulator input
- Regulator output
- Water pump
- Arduino Dock
- Moisture sensor
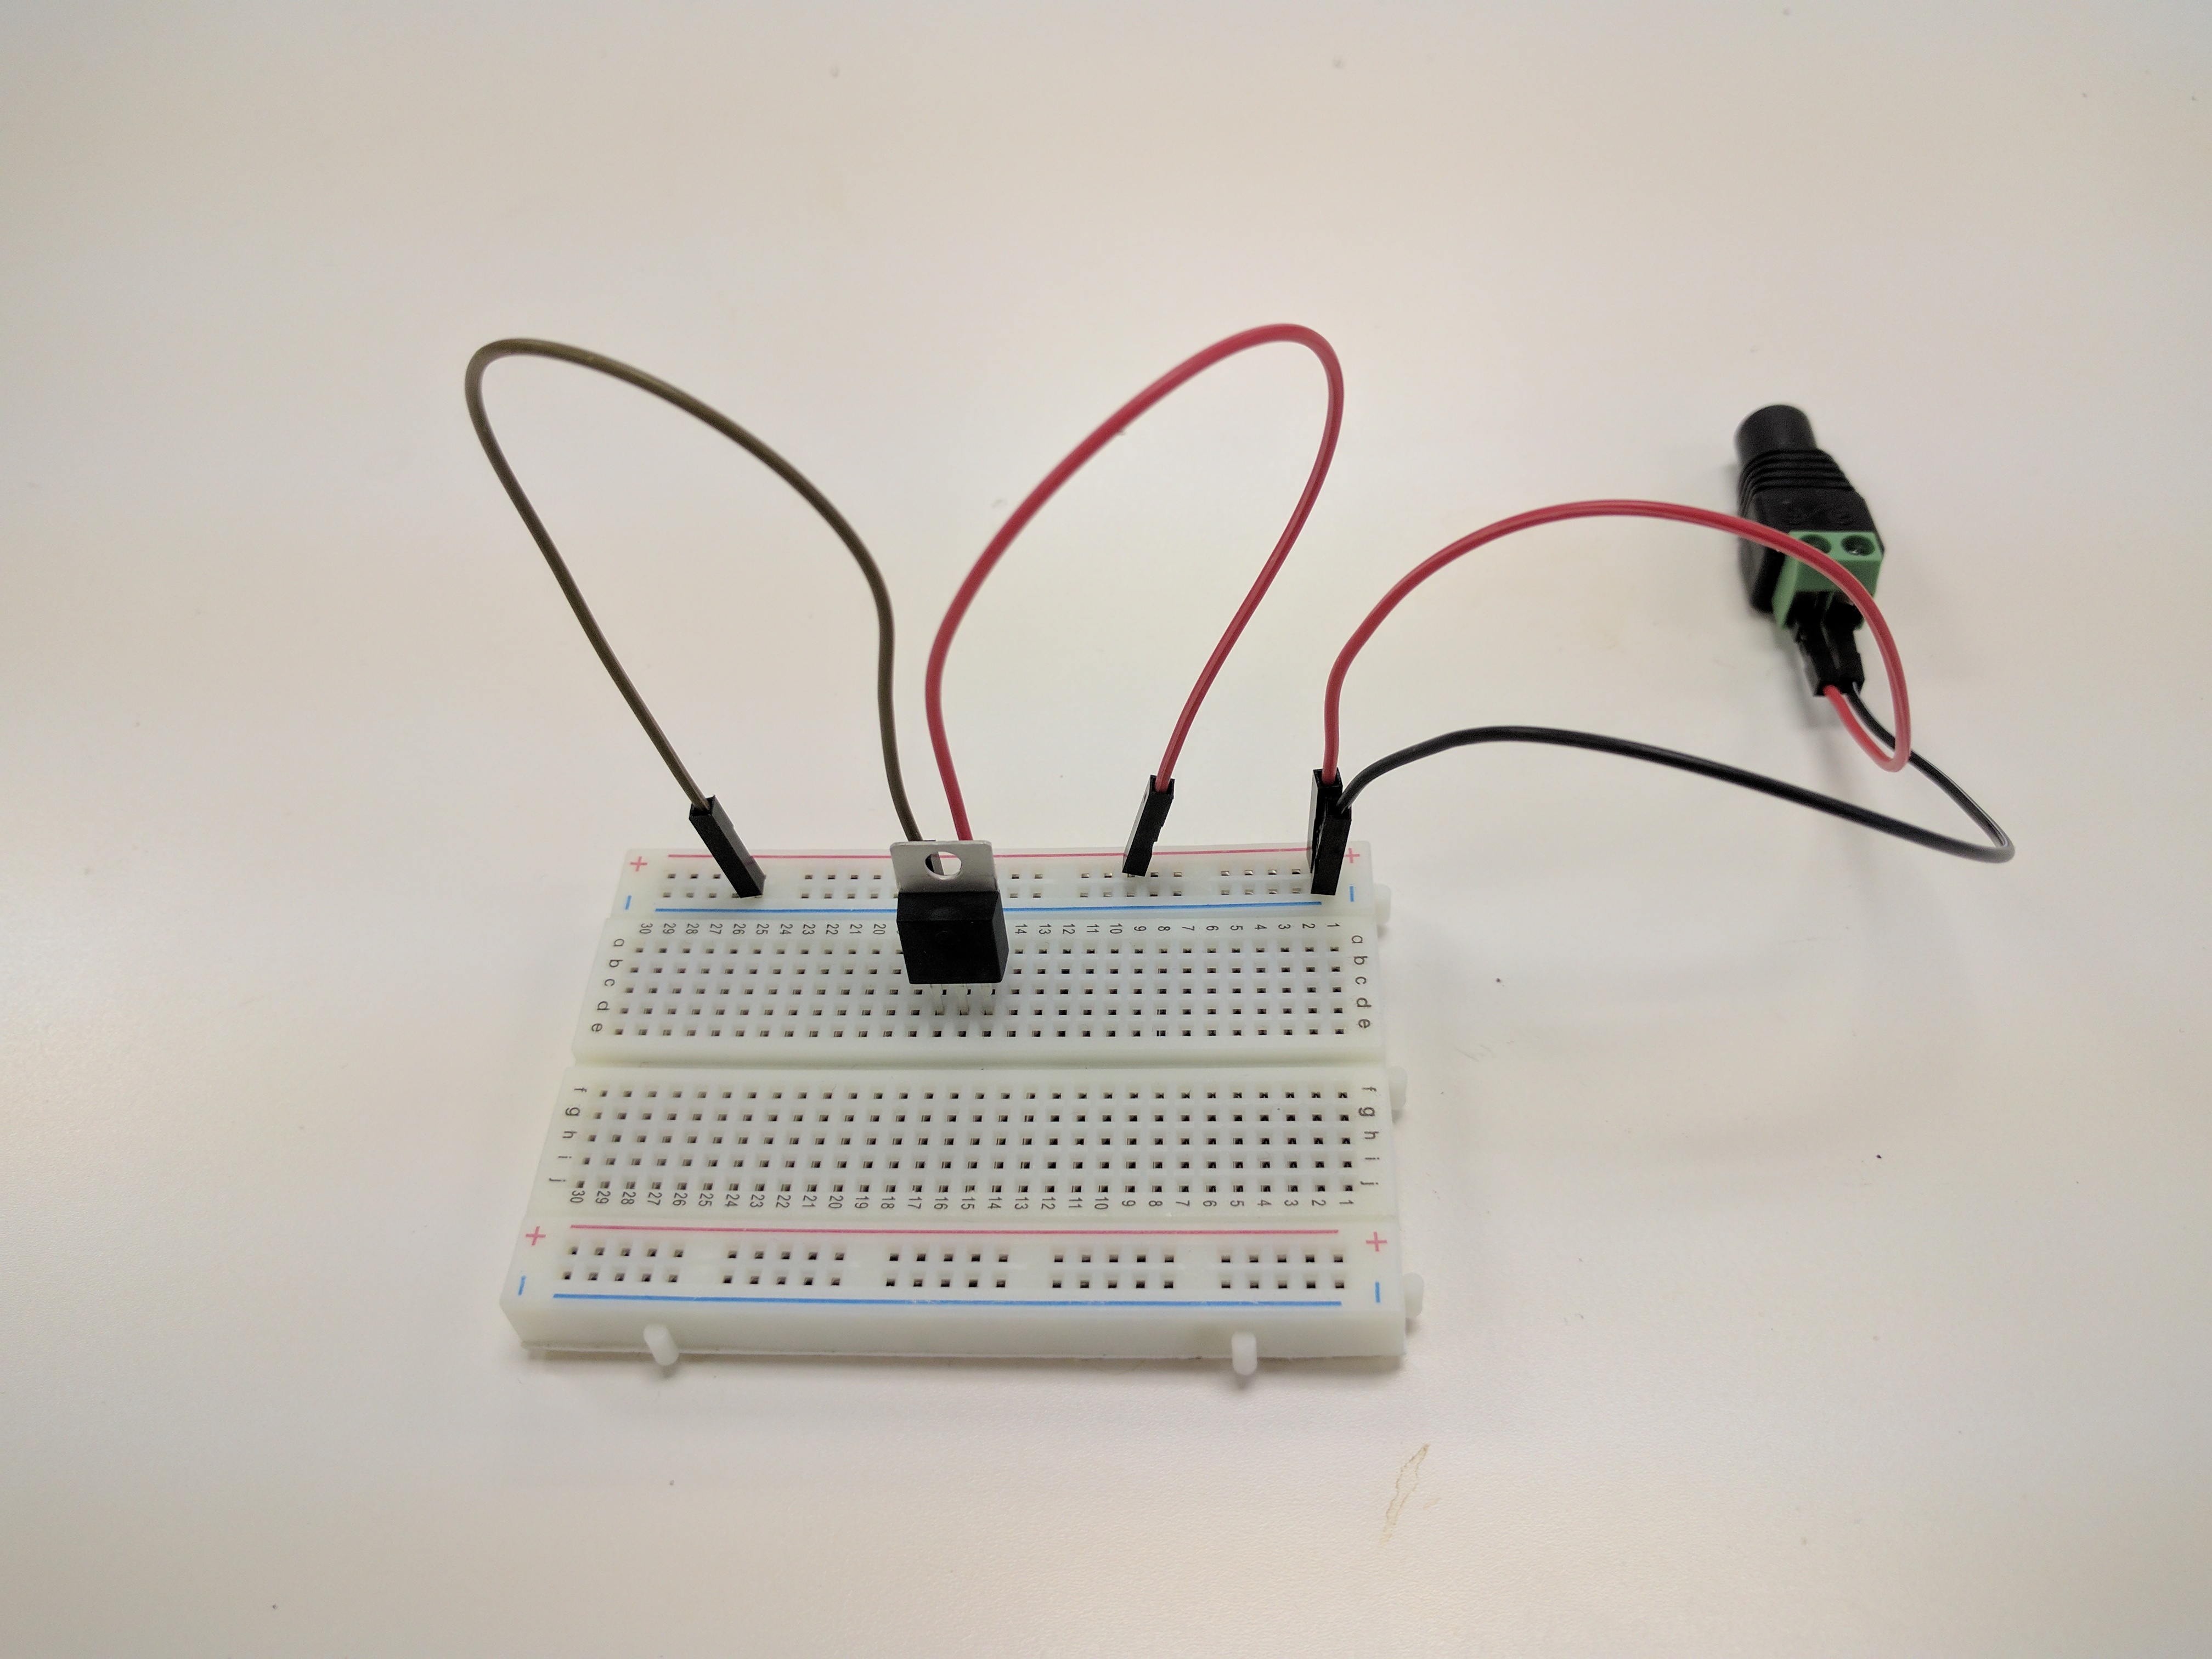
Regulator Input
- Connect jumper wires to both DC Barrel Jack Adapter terminals.
- Connect the DC Barrel Jack to one pair of the
+and-rails on the breadboard.- We’ll call this the 12V rail.
- Plug the MC33269T regulator into the Breadboard across three empty rows.
- Connect the 12V
-rail to the GND pin of the regulator with a jumper wire.- The left most pin when looking from the front.
- Connect the 12V
+rail to the Vin pin of the regulator with a jumper wire.- The right most pin when looking form the front.
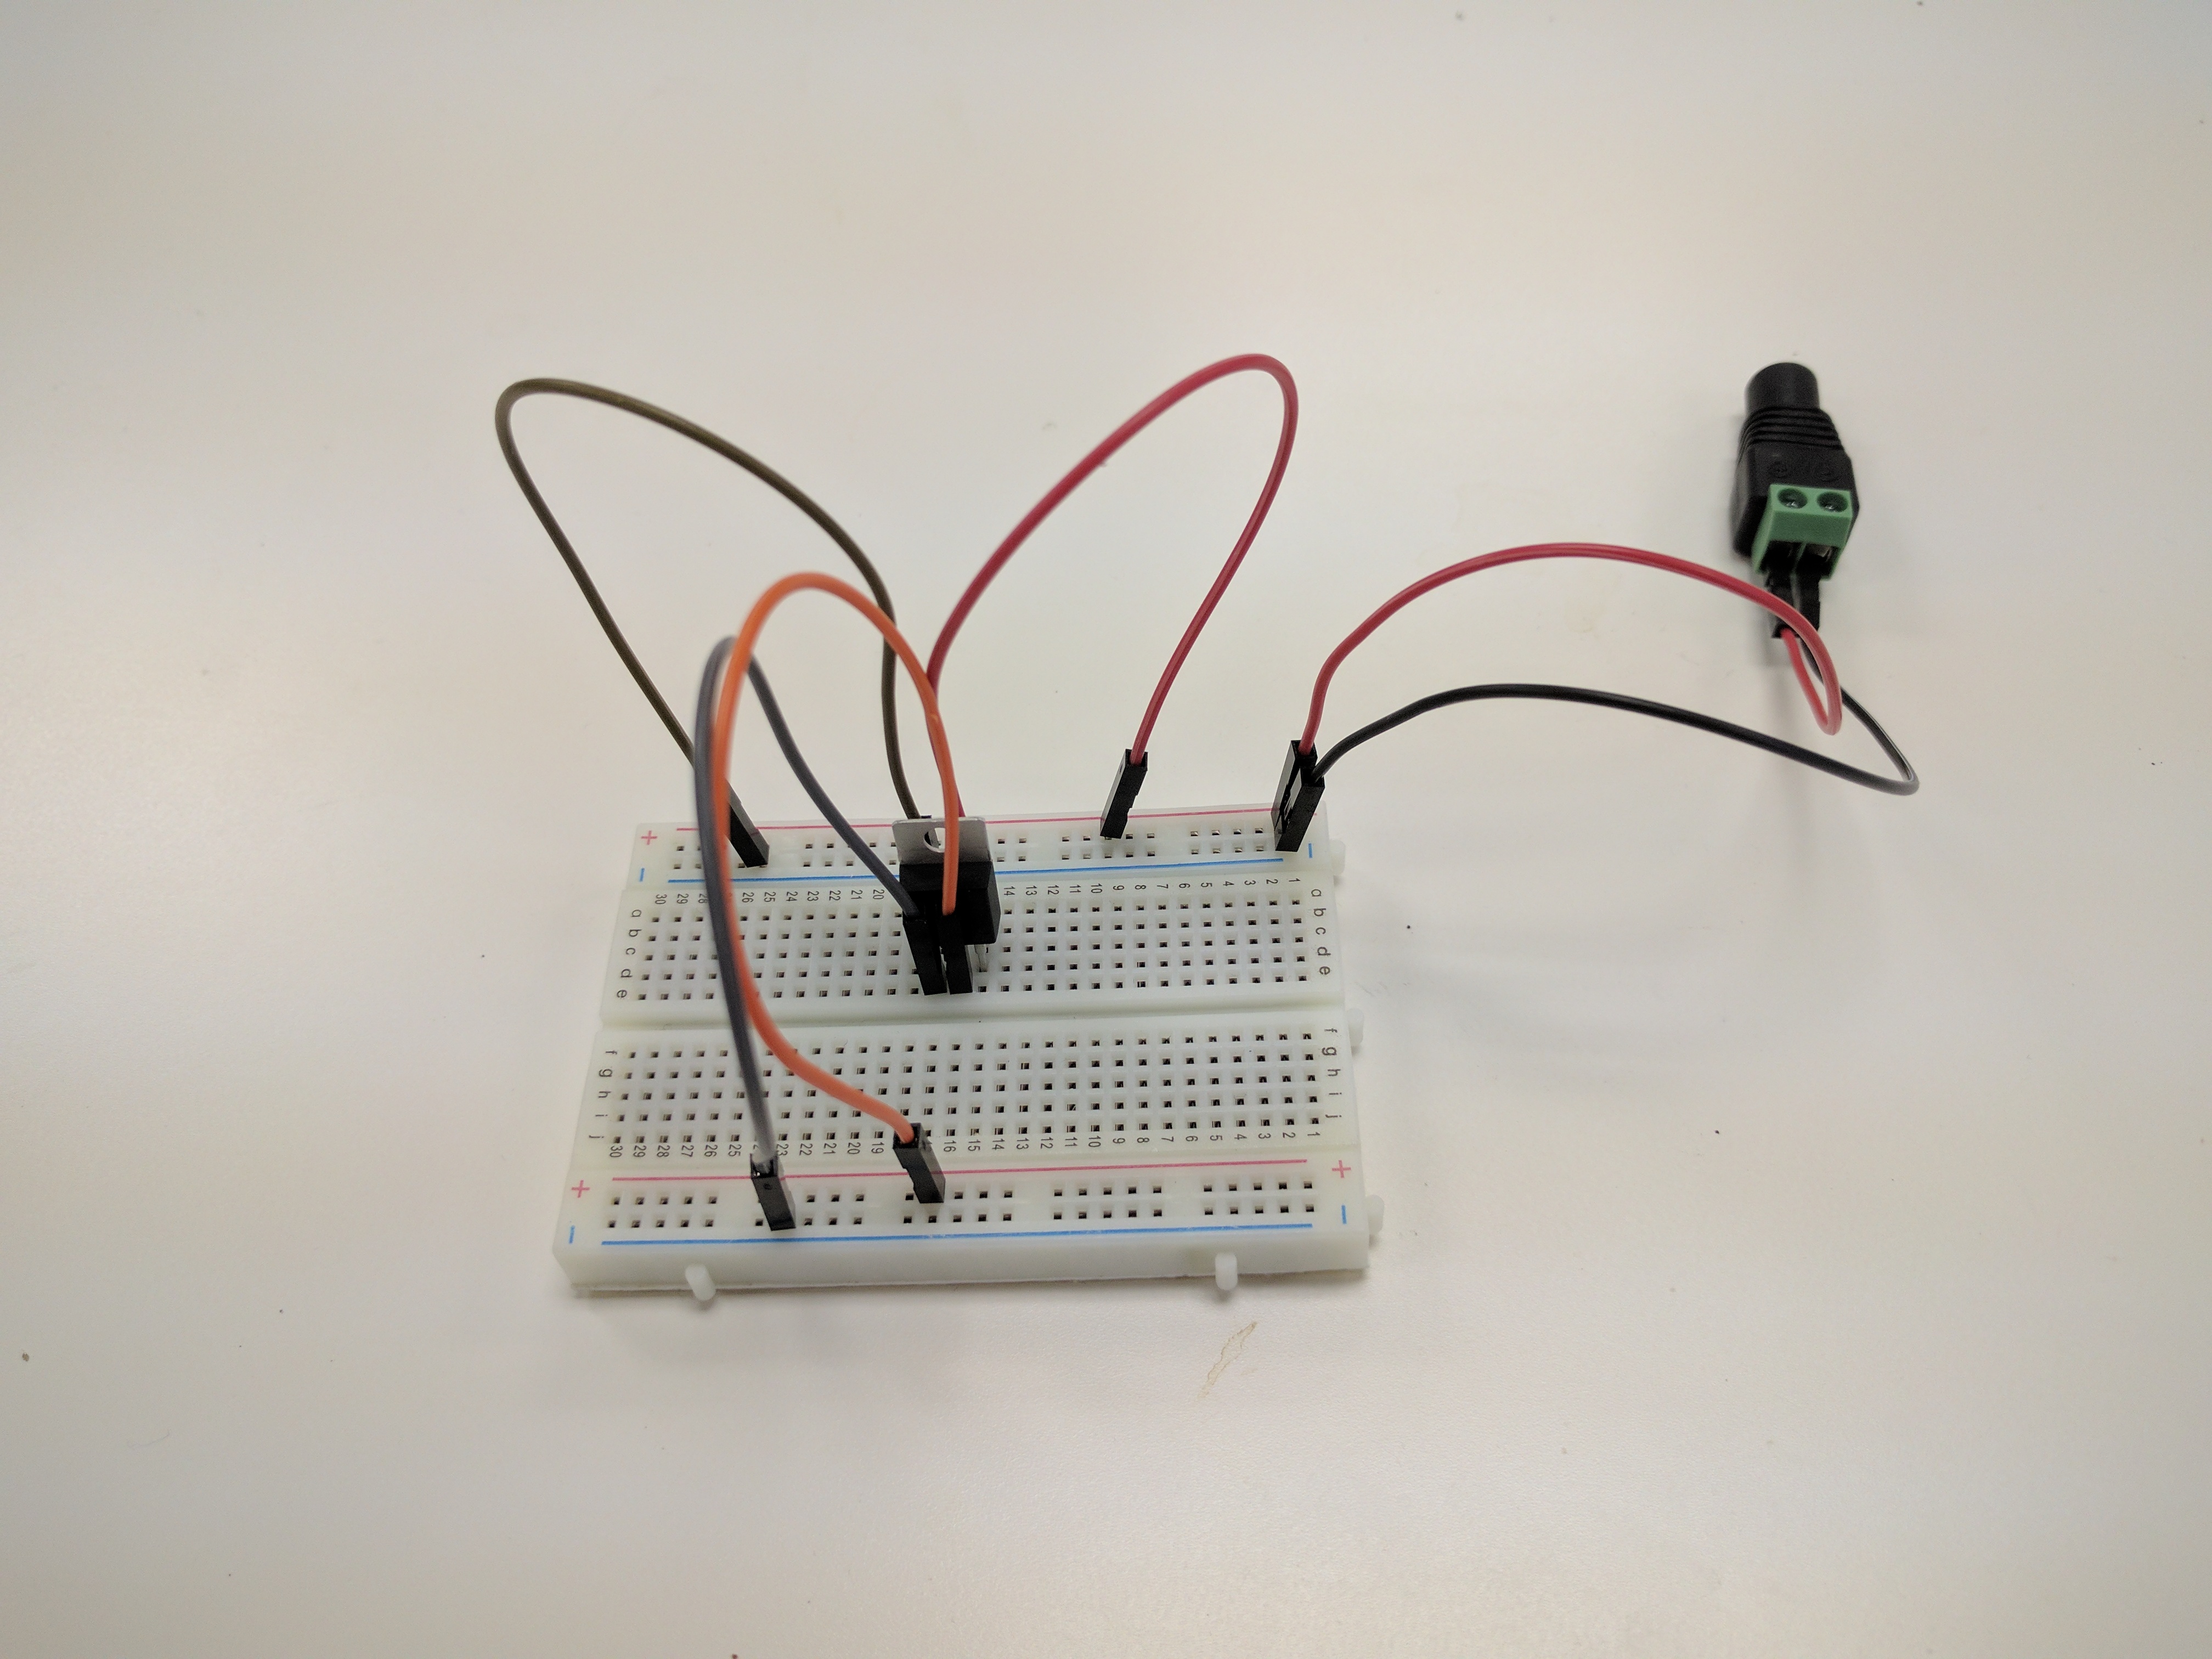
Regulator Output
- We’ll use the other pair of
+and-rails on the breadboard for our 5V rail - Connect the GND pin of the regulator (left most pin when looking from the front) to the 5V
-rail with a jumper wire - Connect the Vout pin of the regulator (middle pin) to the 5V
+rail with a jumper wire. Now this rail can be used to power the Arduino Dock and Omega
Water Pump
- Run a jumper wire from the 12V
-rail to the negative terminal of the Water Pump - Connect a jumper wire from the 12V
+rail to the IN screw terminal on Channel 0 of the Relay Expansion - Connect a jumper wire from the OUT screw terminal on Channel 0 of the Relay Expansion to the positive terminal of the Water Pump
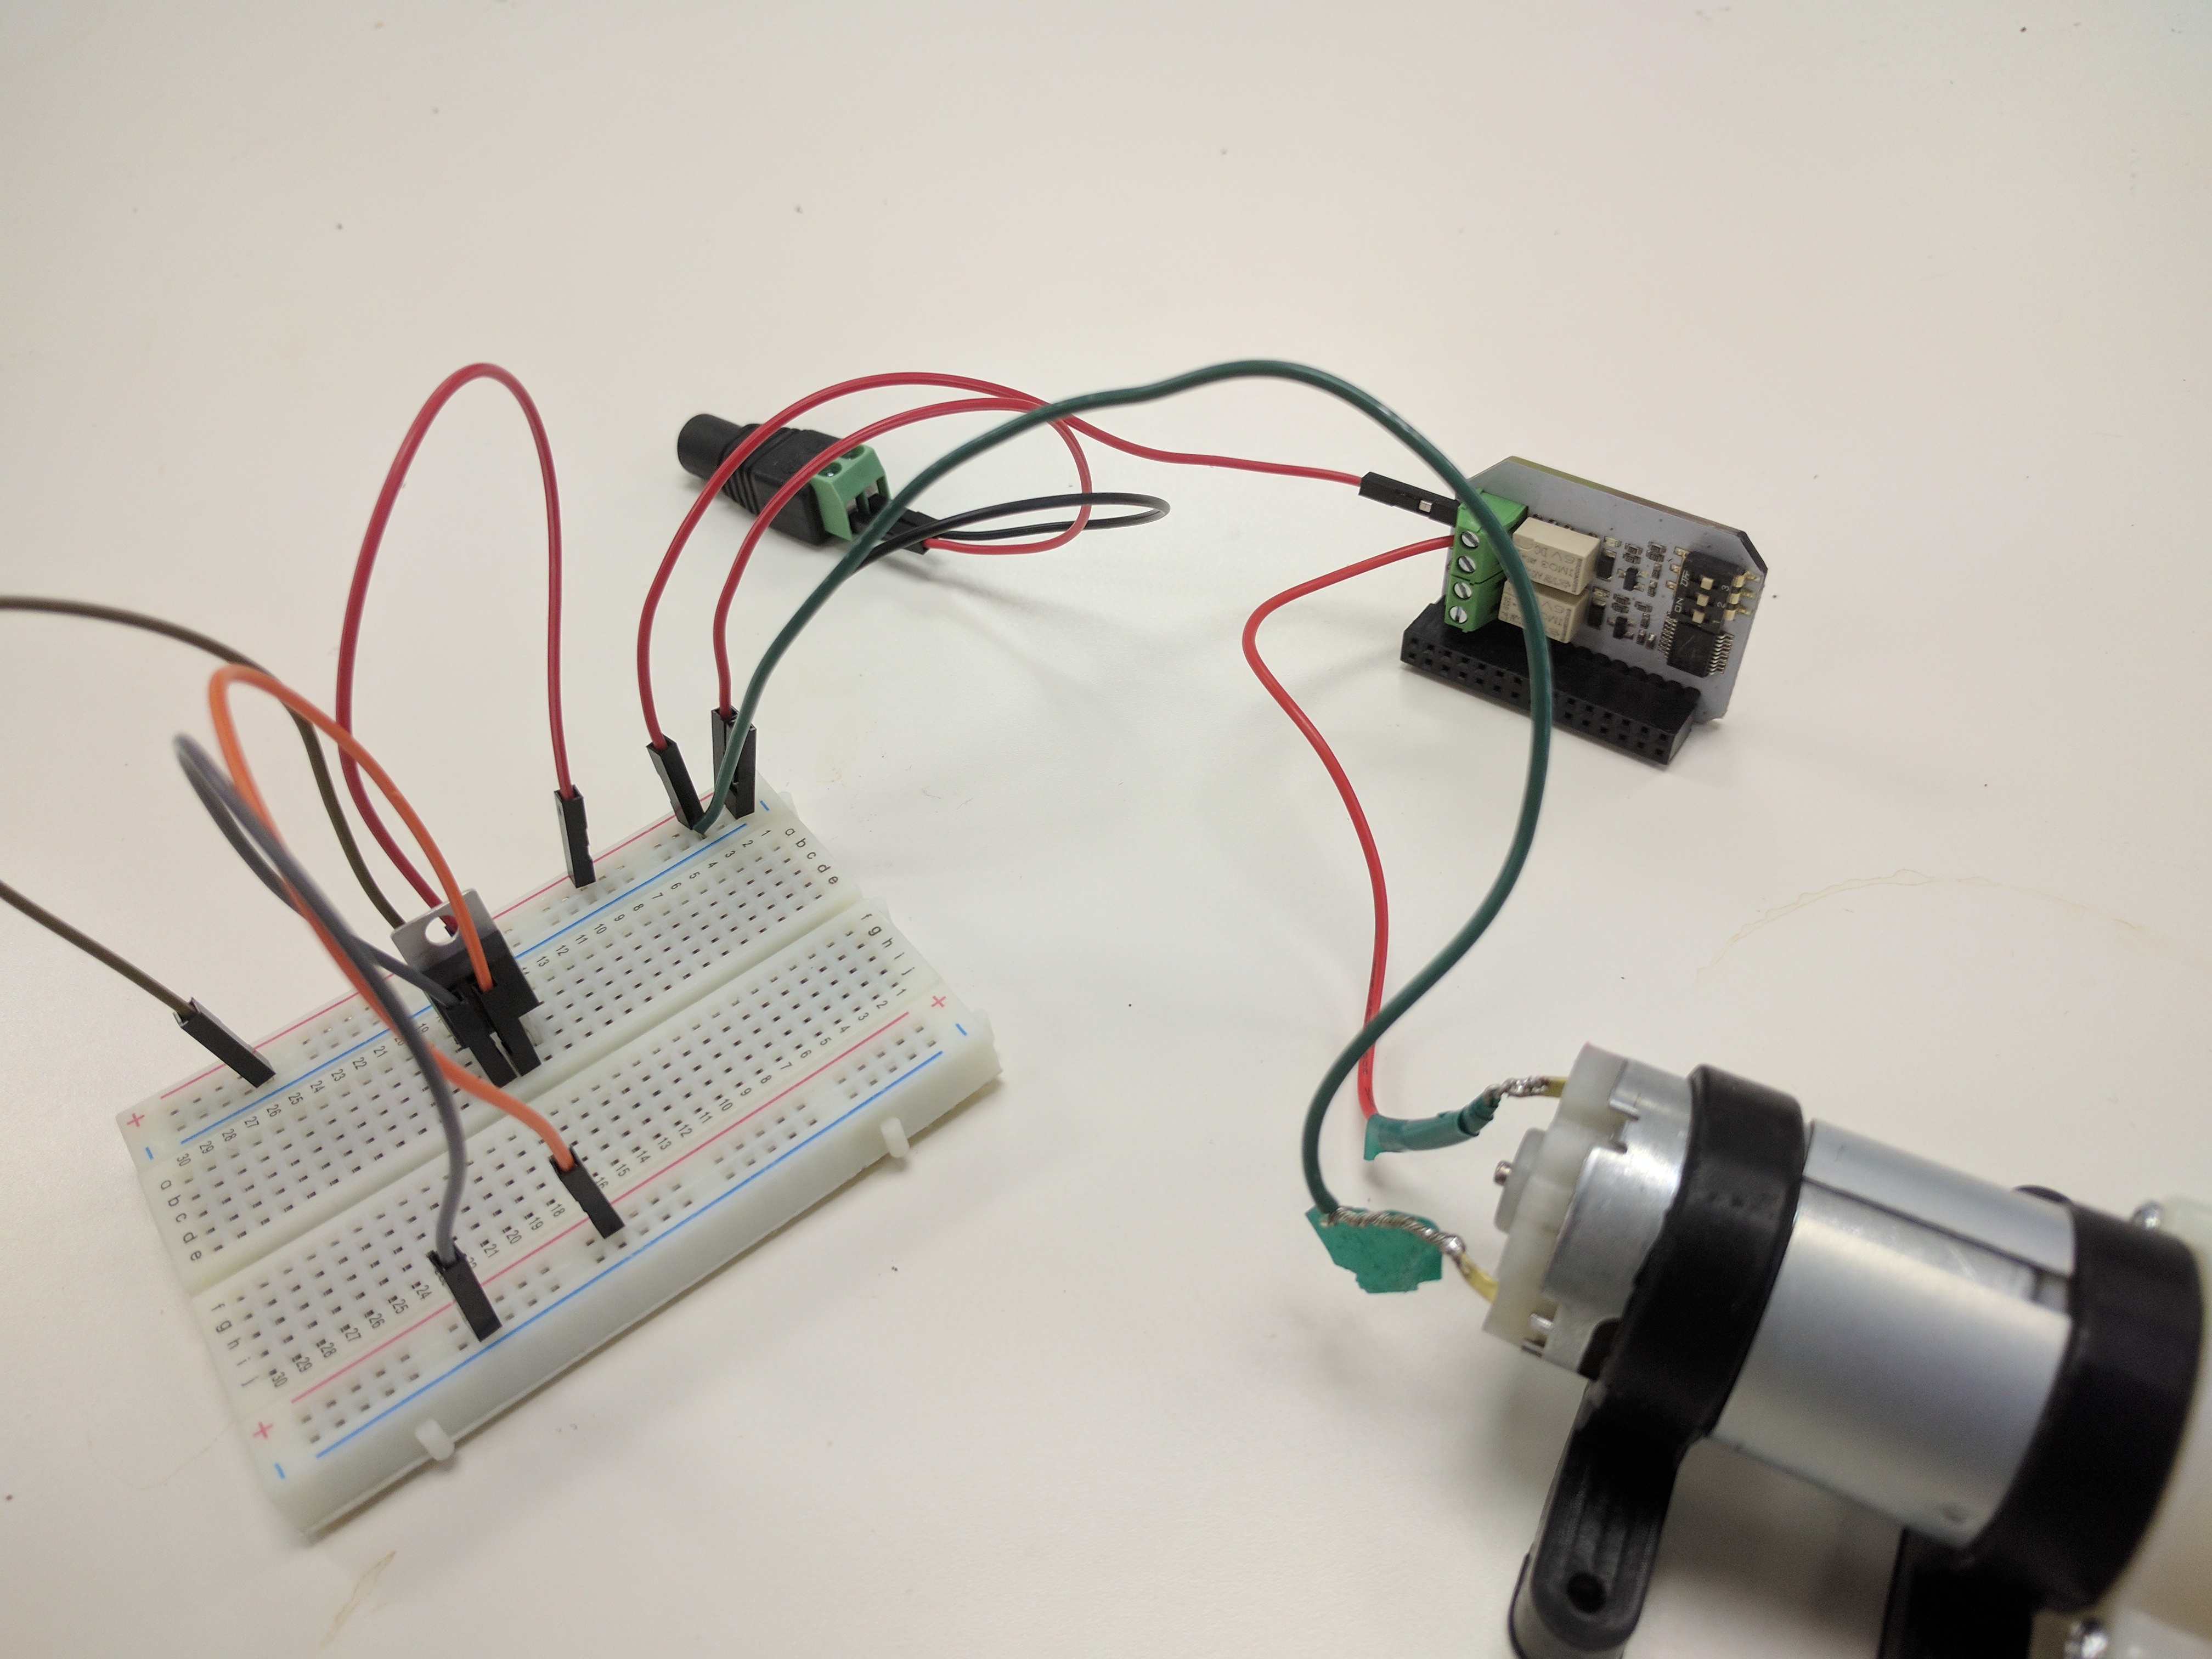
Once you’ve done that, plug the Relay Expansion back into the Arduino Dock.
Arduino Dock
WARNING: It is very important that you connect the 5V rail to your Arduino Dock. Accidentally using the 12V rail will for sure damage your Arduino Dock and Omega. Proceed at your own risk, but don’t worry, if you follow the instructions, you’ll be fine.
- Connect the 5V
-rail to one of the Arduino Dock’sGNDpins - Connect the 5V
+rail to the Arduino Dock5Vpin
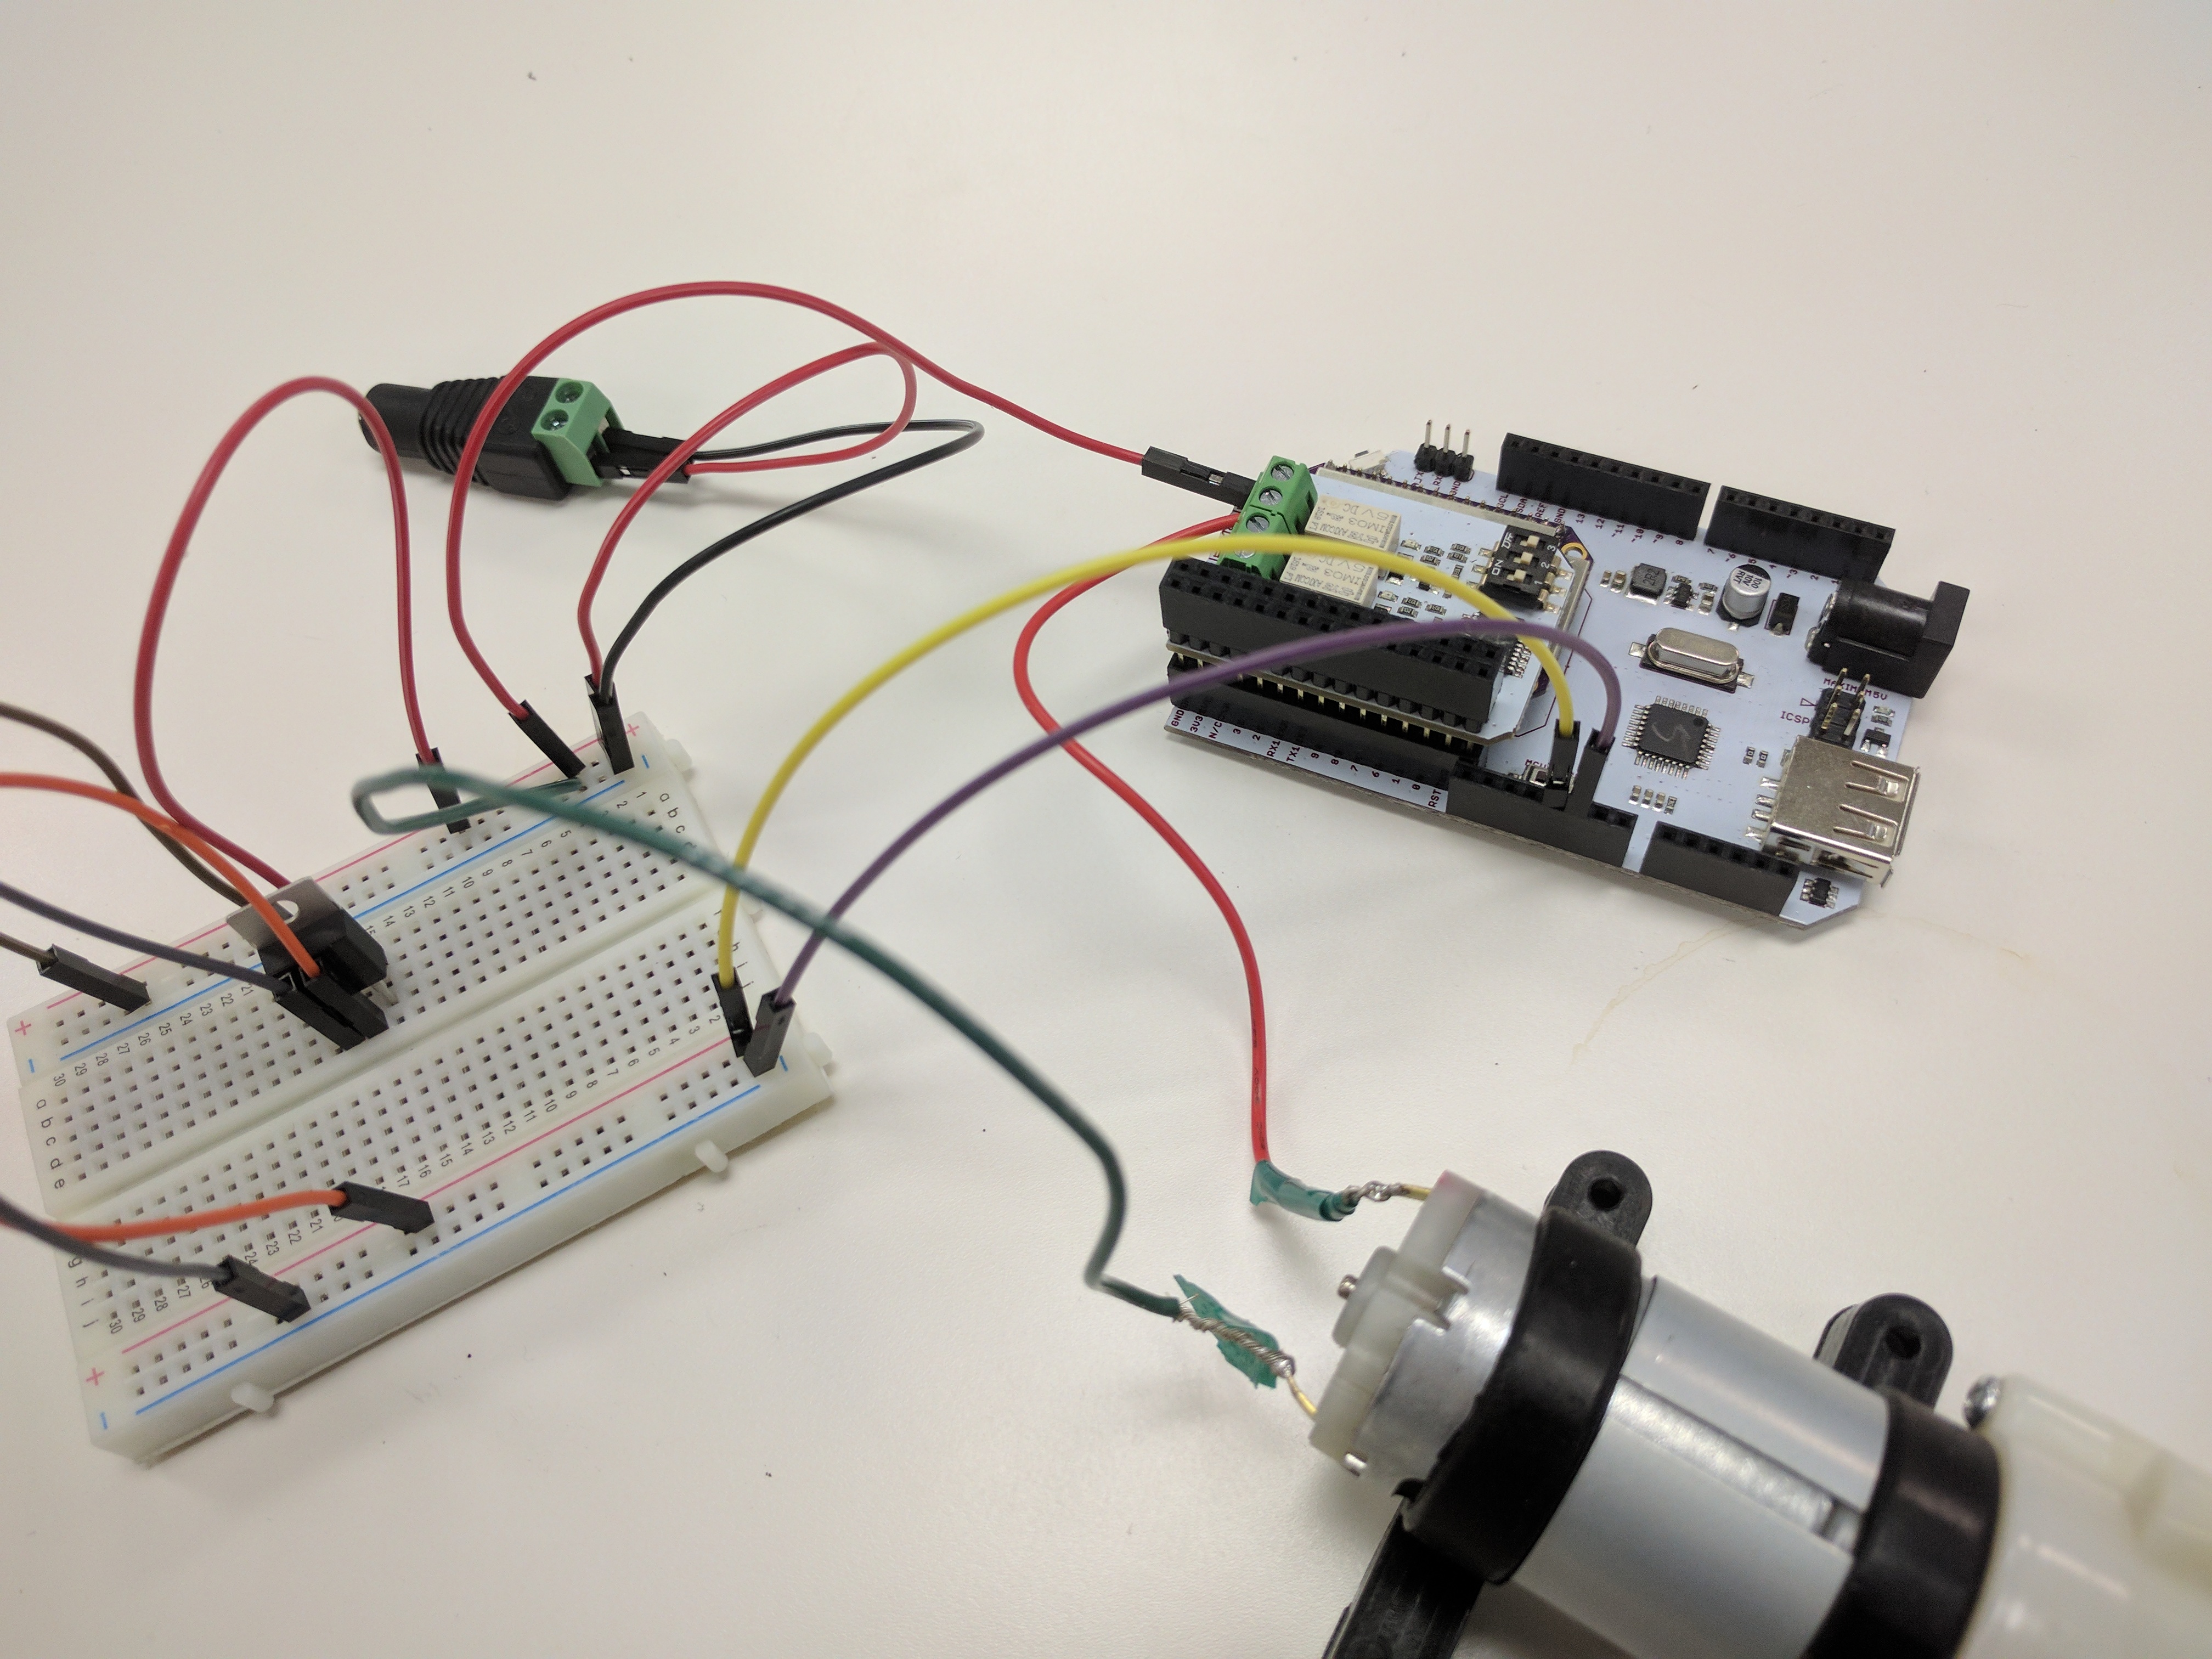
Then plug in the OLED Expansion.
Moisture Sensor
Using the wires from the moisture sensor:
- Connect the 5V
+rail to the sensor’sVccpin. - Connect the Arduino Dock’s other
GNDpin to the sensor’sGNDpin. - Connect the Arduino Dock’s
A0pin to the sensor’sSIGpin.
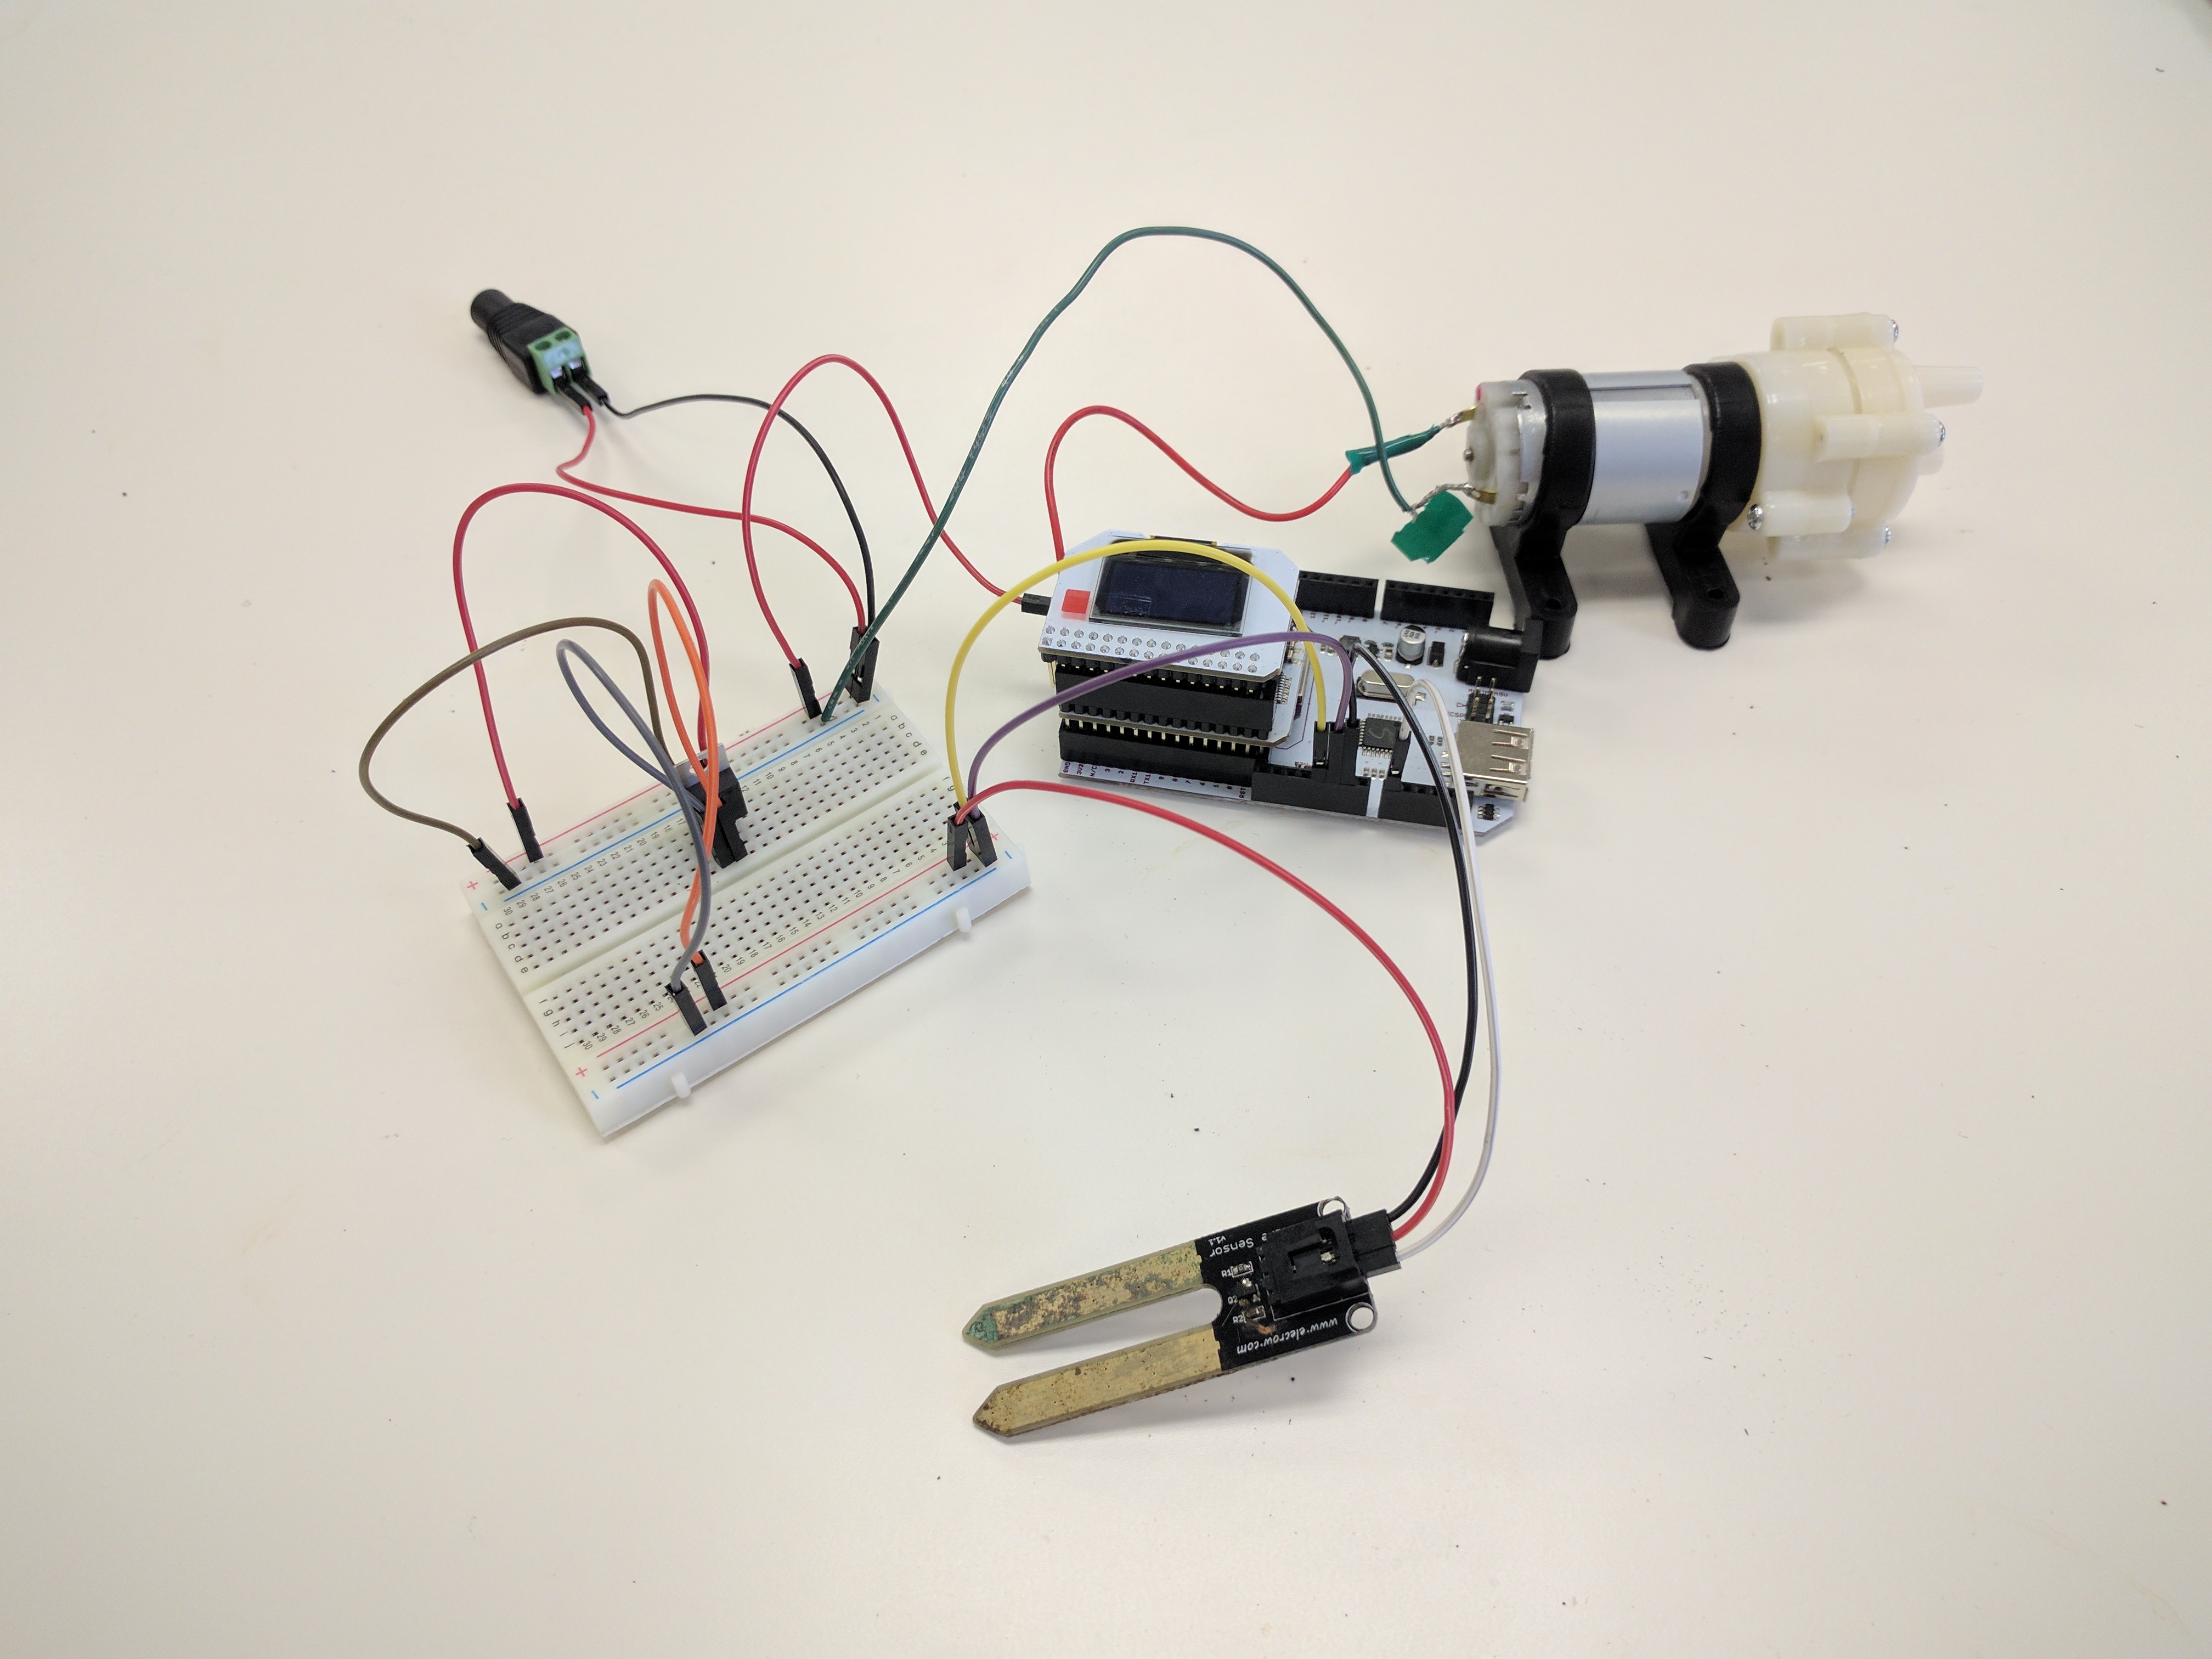
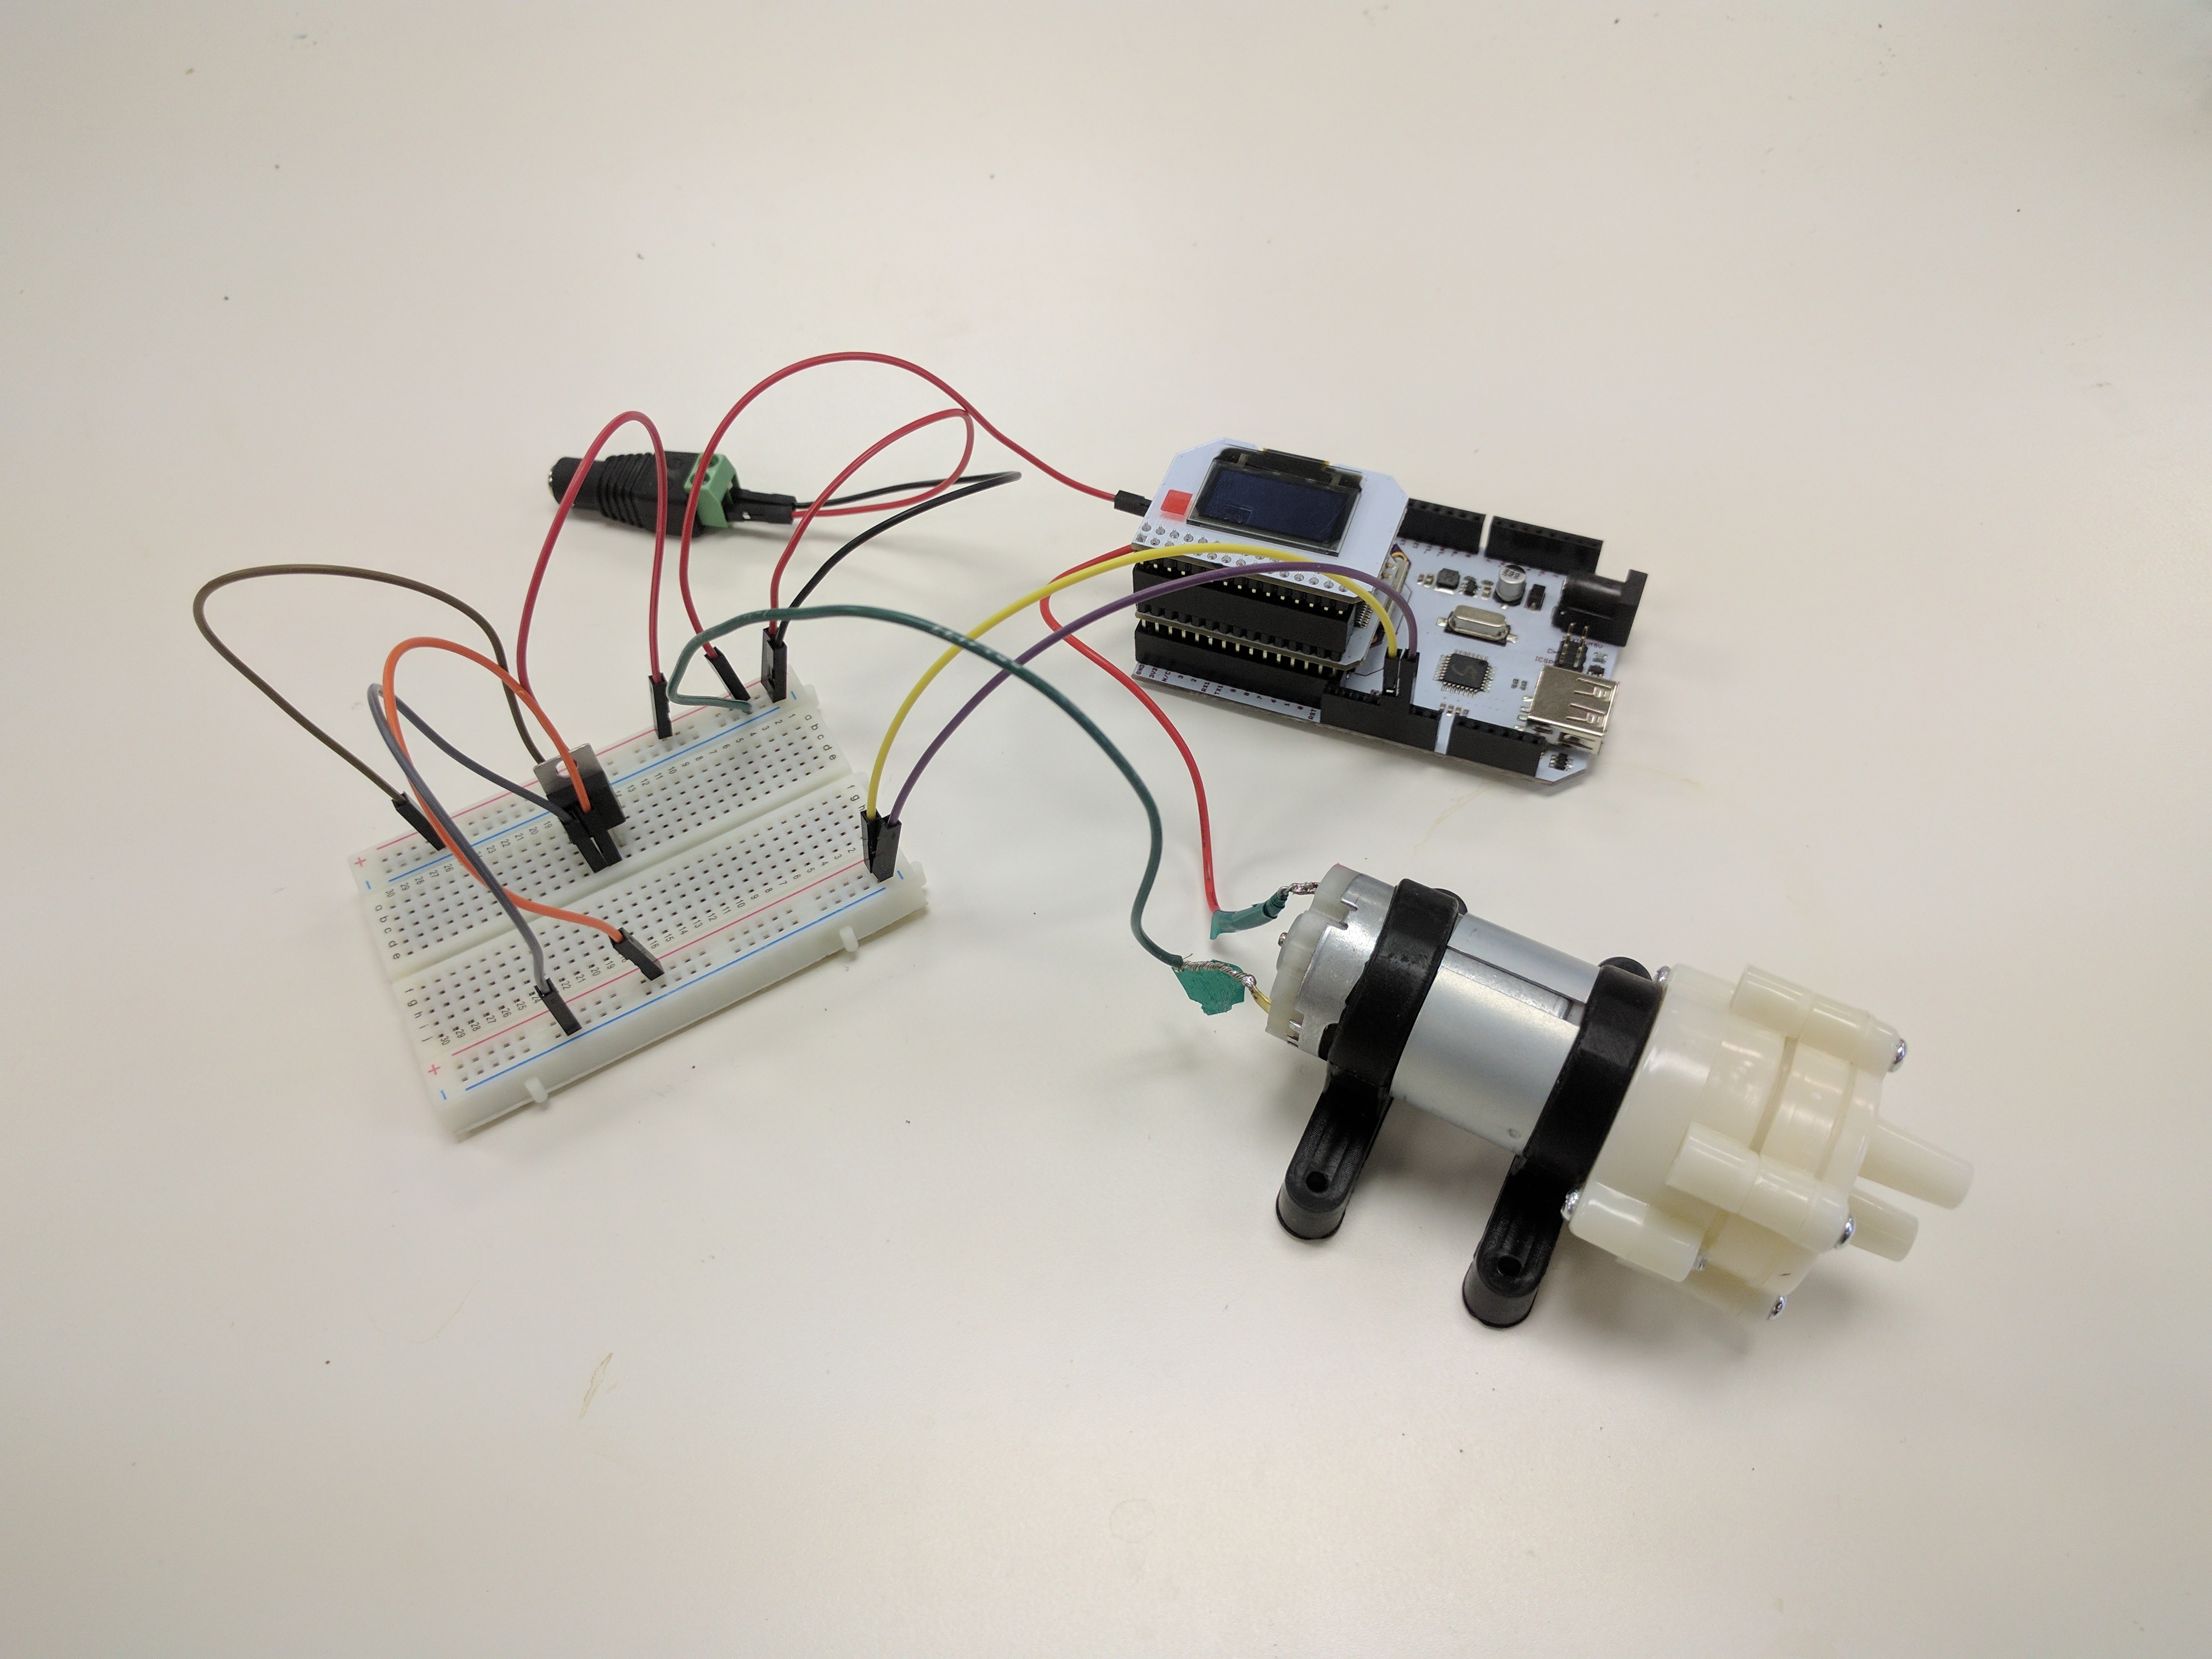
5. Provide Power
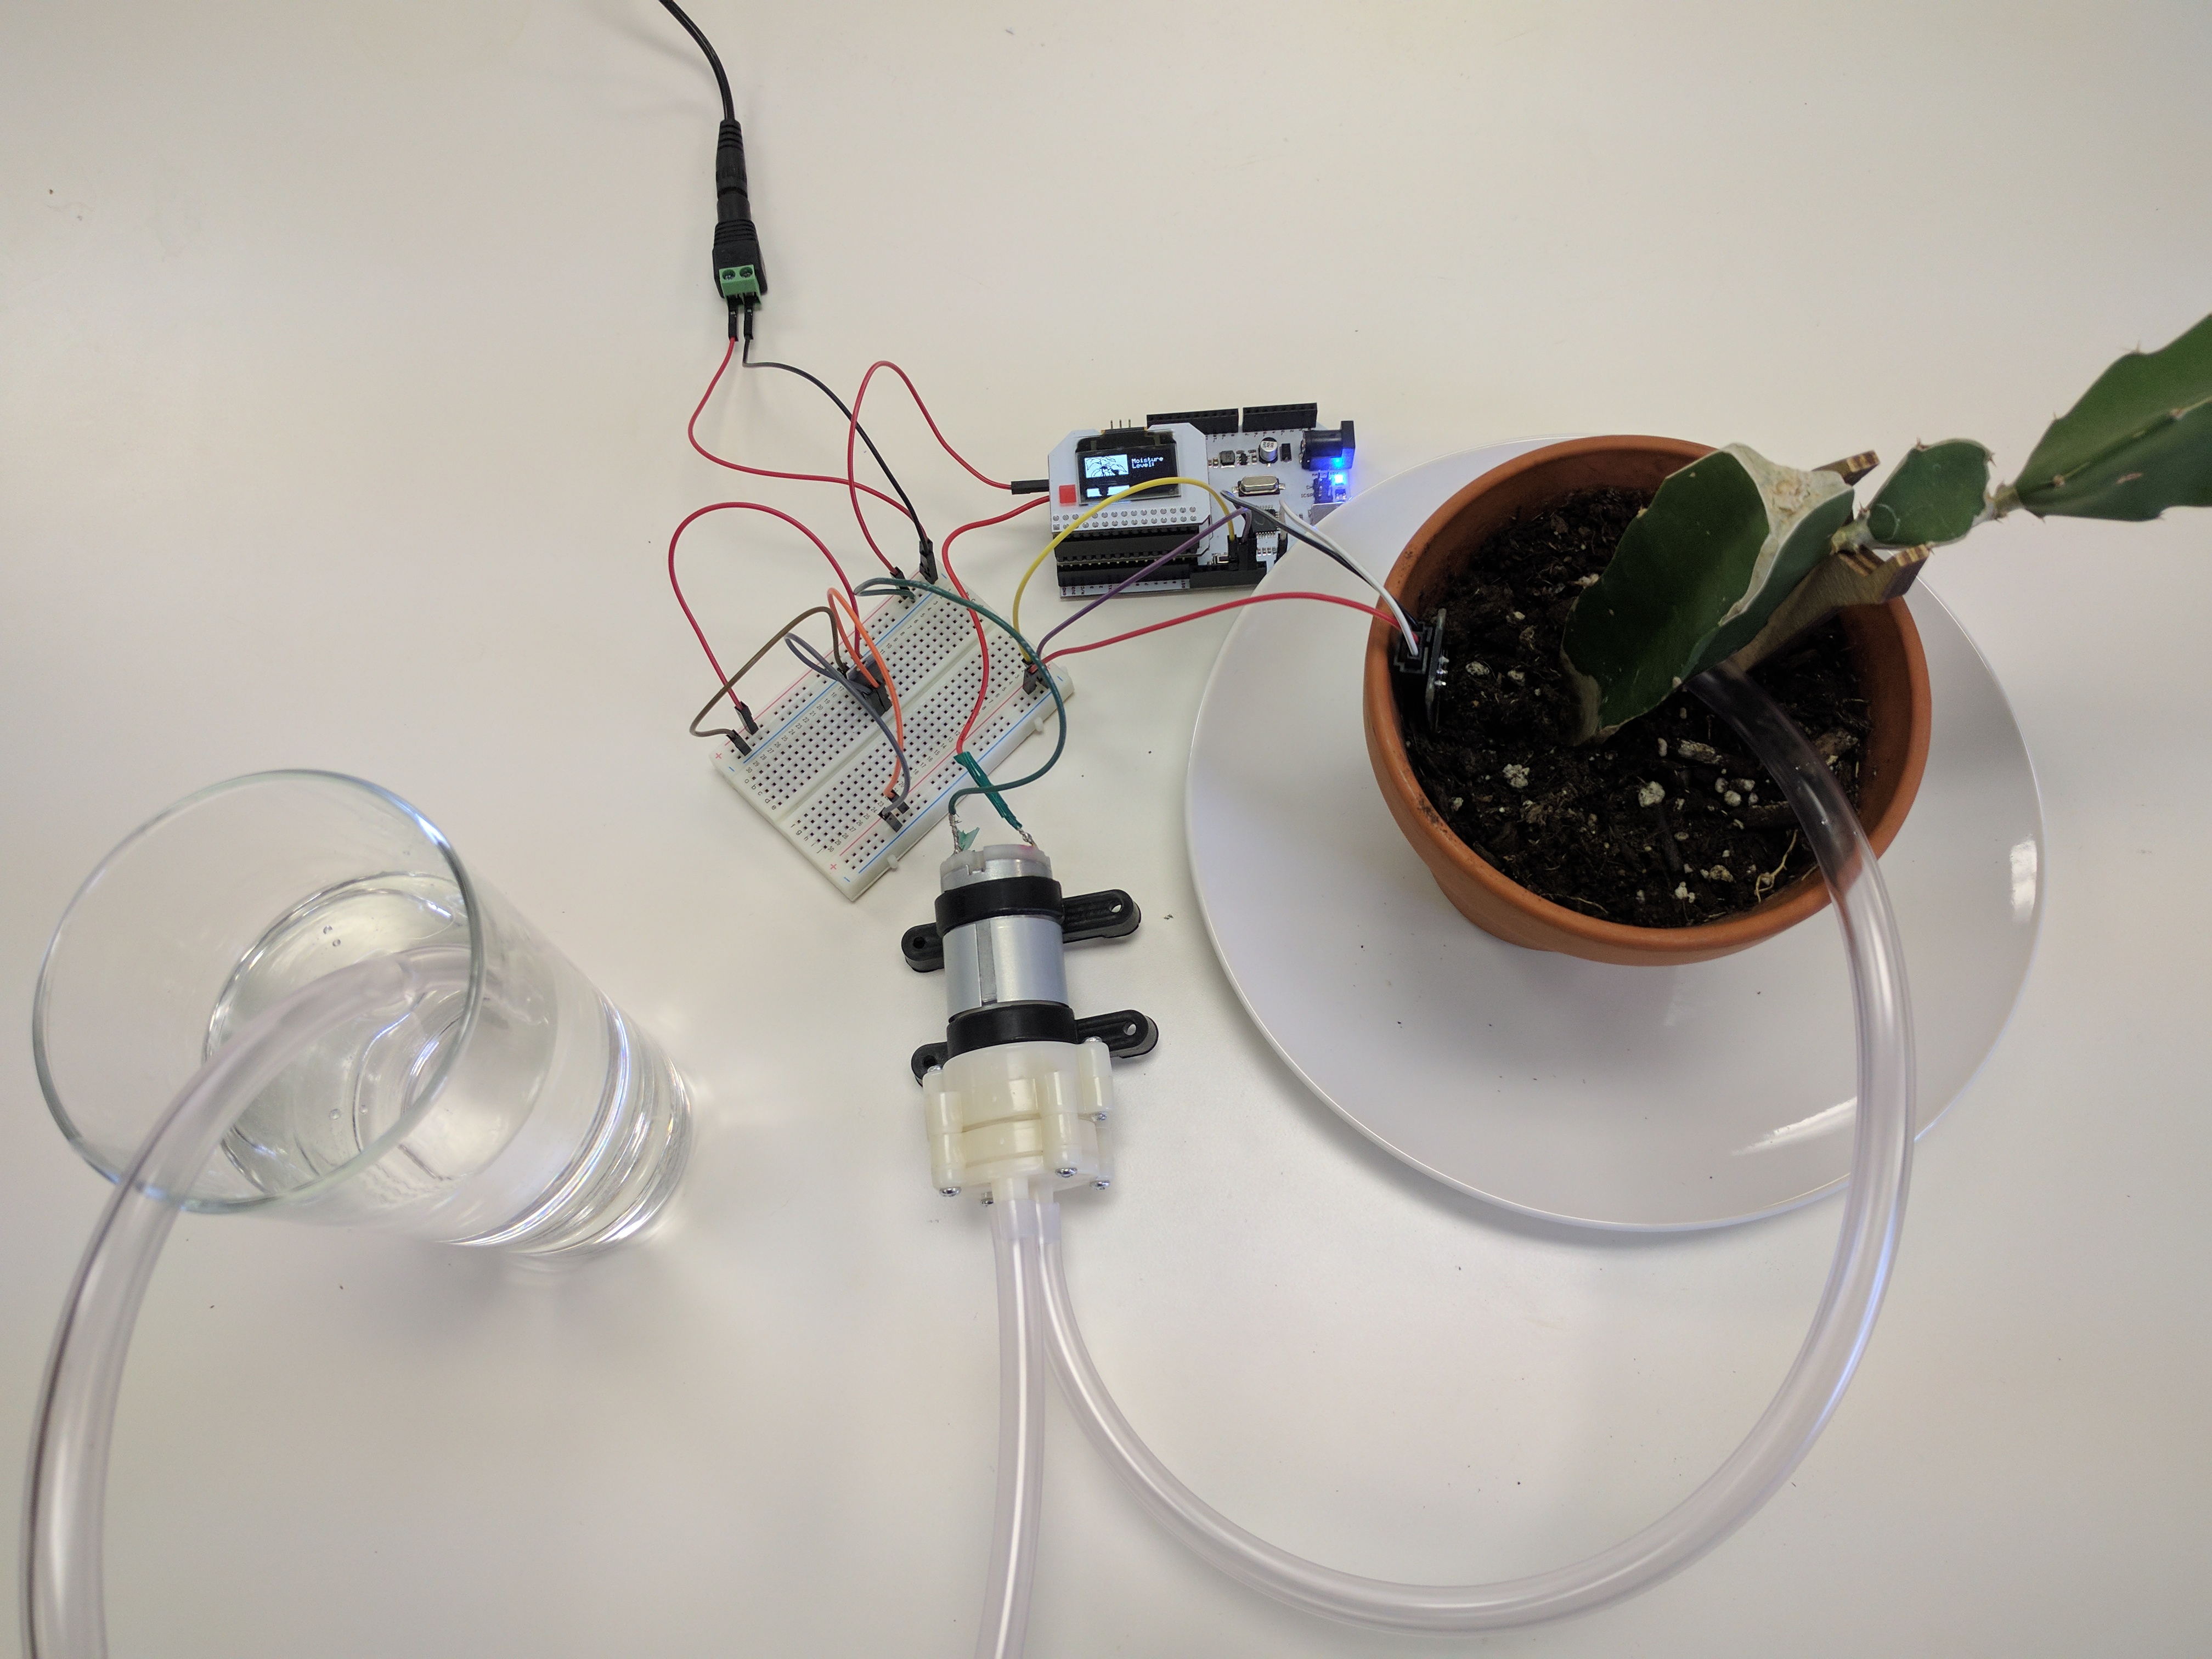
Now reassemble your pump tubing, reservoir, sensor, and plant:
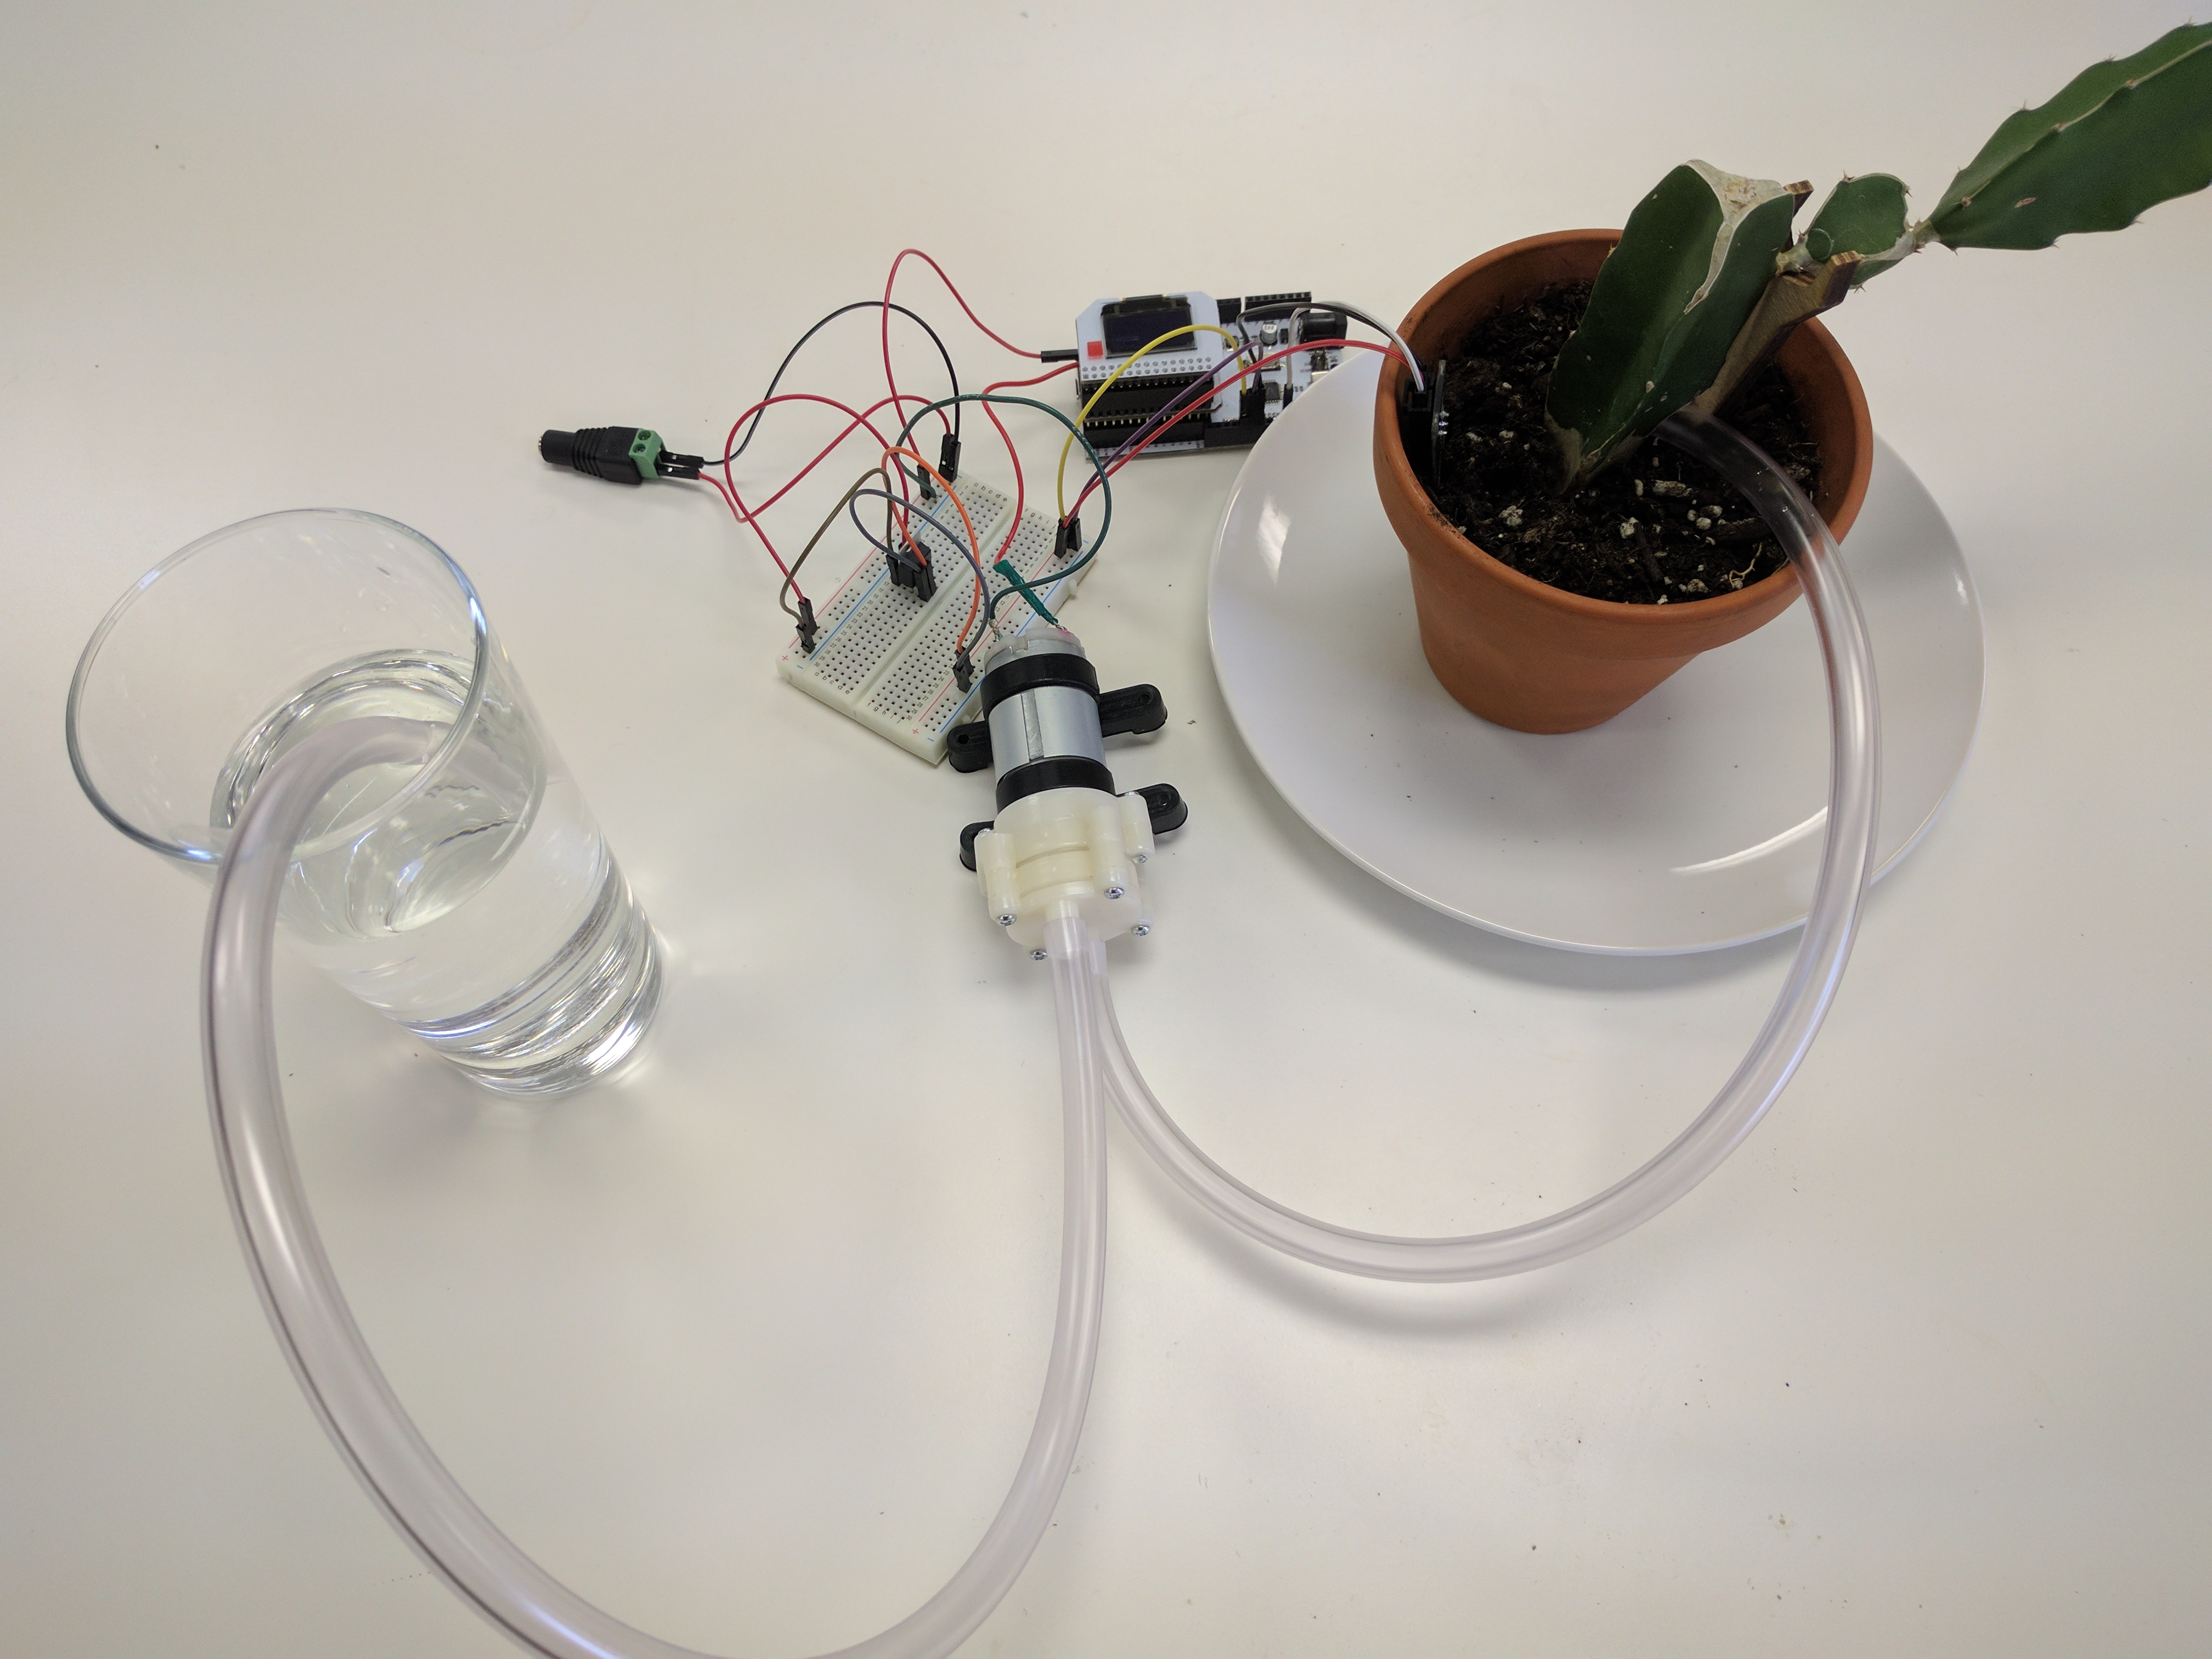
Then provide power by connecting the 12V power supply to the DC Barrel Jack Adapter. Your Omega should now be booting.
Congratulations, You Made It!
Revel in the fact that you’ve created a regulator circuit that can power your Omega as well as the 12V pump!
Show off your amazing smart-plant setup and Dashboards on our Community Forum, and let us know how you liked these tutorials!