Time-Lapse Camera
Using a webcam connected to the Omega, we can take photos over time and string them together to make a video of your scene!
Overview
Skill Level: Intermediate
Time Required: 30 minutes
In this project, we’ll use the fswebcam utility and cron to capture images from the webcam at timed intervals, then we’ll convert it all to a video using ffmpeg. To keep the amount of typing to a minimum, we will create shell scripts to do the work for us!
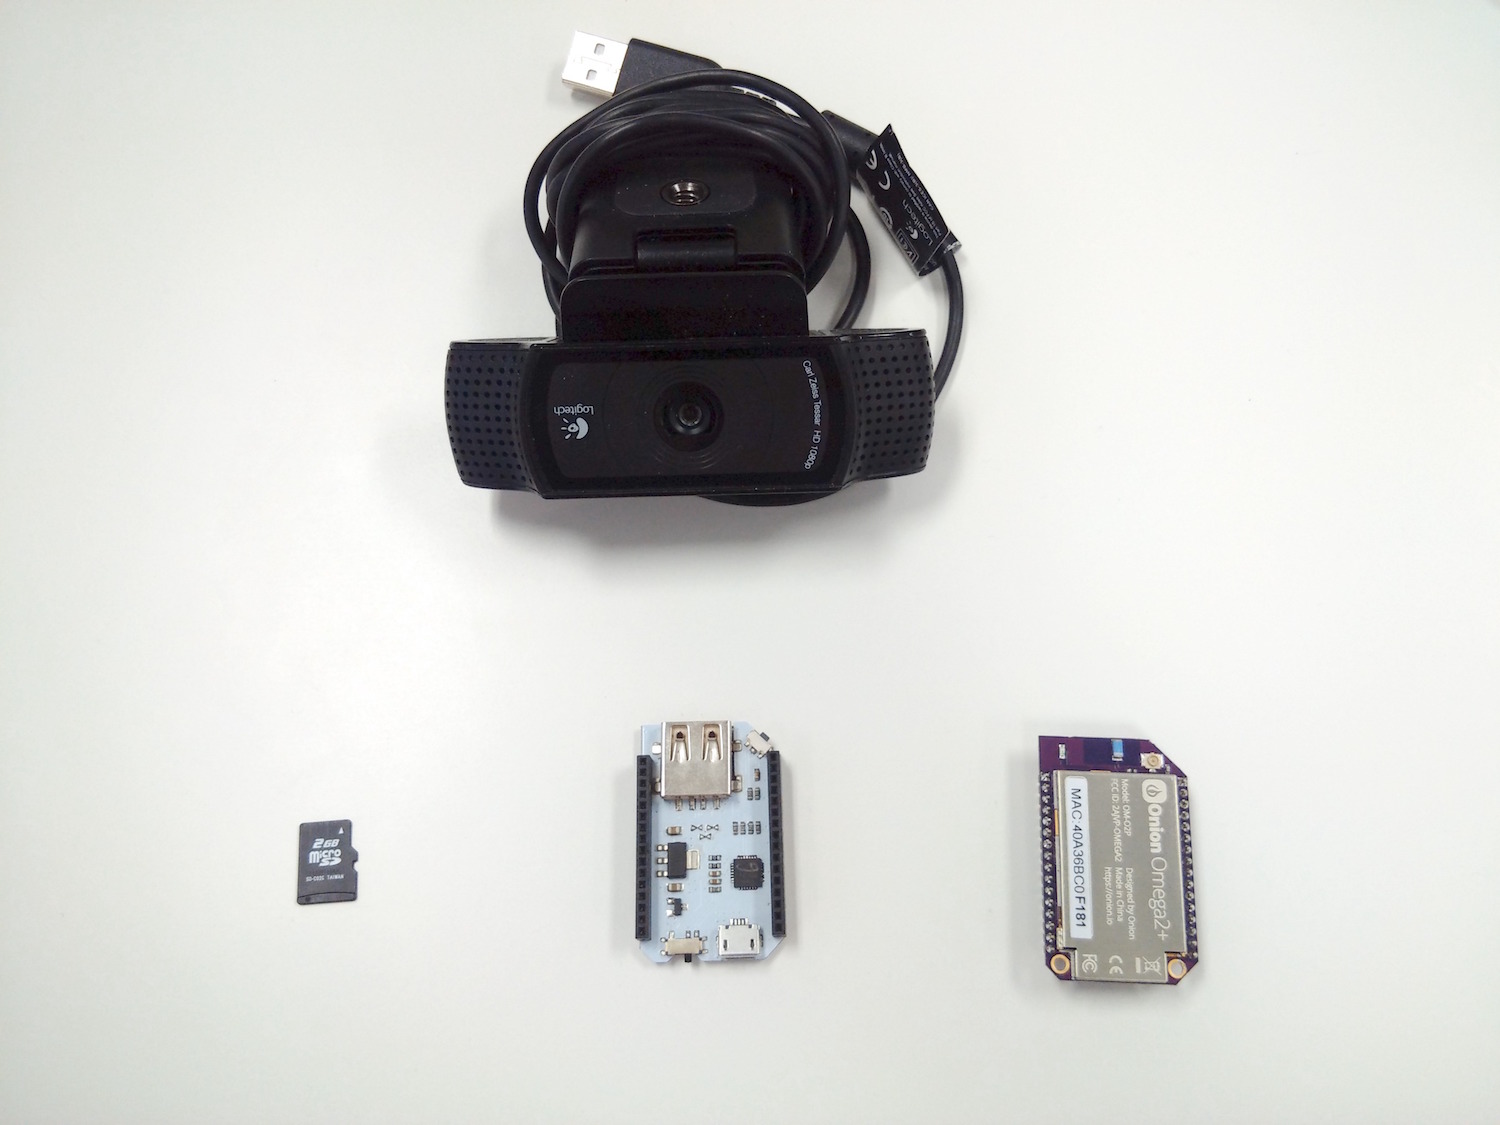
Ingredients
- Onion Omega2+
- Any Onion Dock with a USB host connector: Expansion Dock, Power Dock, Mini Dock, Arduino Dock 2
- Micro SD card
- USB Camera
Step-by-Step
Follow these instructions create sweet time-lapse videos with a webcam on your Omega2+!
All of the code can be found in Onion’s timelapse-camera repo on GitHub.
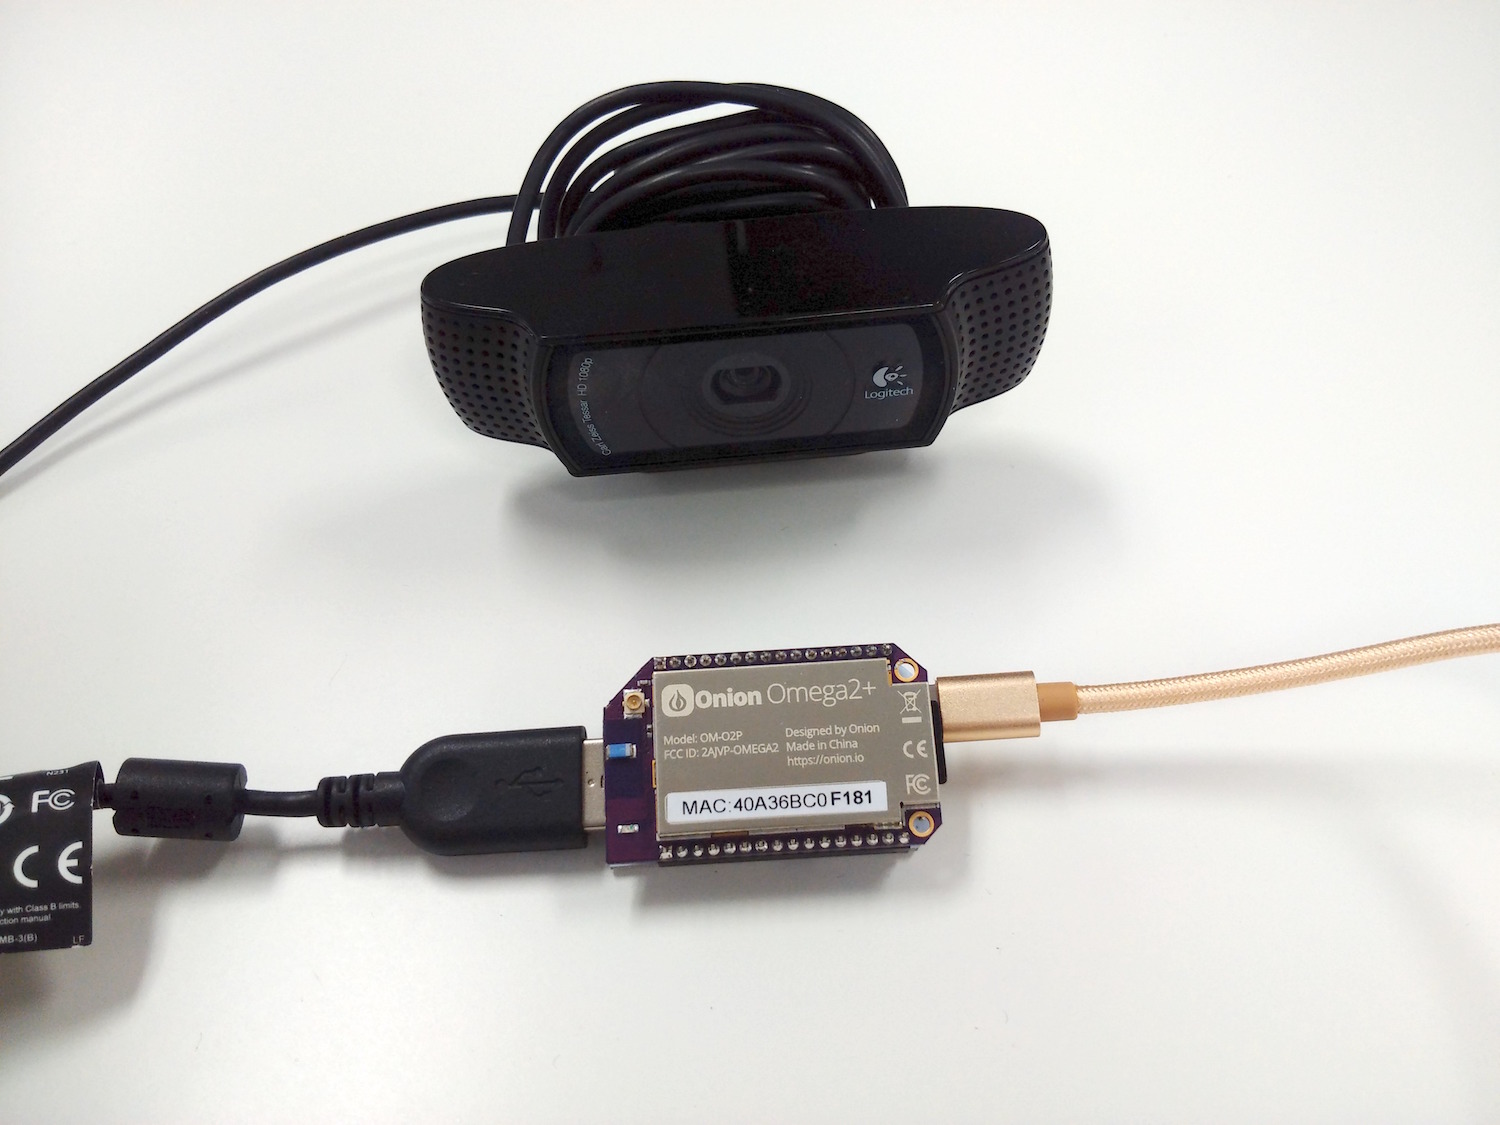
1. Get the Hardware Ready
You’ll have to have an Omega2+ ready to go, complete the First Time Setup Guide to connect your Omega to WiFi and update to the latest firmware.
Insert the MicroSD card, plug in the USB webcam, connect the Omega to power, and we’re ready to start.
2. Prepare an External Storage Device
The pictures taken with the webcam would fill up the Omega’s built-instorage quite quickly. To make sure we have enough space for our pictures, we’ll need a MicroSD card to store it all.
Connect to the Omega’s Command line and use df -h to check the storage on the Omega - and make sure we’re using the correct device.
root@Omega-F181:~# df -h
Filesystem                Size      Used Available Use% Mounted on
/dev/root                 5.5M      5.5M         0 100% /rom
tmpfs                    61.4M     84.0K     61.3M   0% /tmp
/dev/mtdblock6           25.1M    756.0K     24.3M   3% /overlay
overlayfs:/overlay       25.1M    756.0K     24.3M   3% /
tmpfs                   512.0K         0    512.0K   0% /dev
/dev/mmcblk0p4            1.8G    652.5M      1.2G  35% /tmp/run/mountd/mmcblk0p4
Here, the last line shows the MicroSD card is successfully mounted under /tmp/run/mountd/mmcblk0p4
Now that we’re sure where the MicroSD card is, let’s create a soft-link to it for easy access:
ln -s /tmp/run/mountd/mmcblk0p1 /root/sd
mkdir sd/timelapse
A soft-link is the Linux equivalent of a shortcut. It is just a file that contains a reference to another file or directory. In this case,
/root/sdcontains a reference to/tmp/run/mountd/mmcblk0p1
3. Install Webcam Software
To get the webcam to take pictures, we’ll need the software.
The package we use here isn’t included in the Onion package repo so we’ll have to use the LEDE package repo to get it.
Open up the source list like so:
vim /etc/opkg/distfeeds.confAnd comment/uncomment the lines so they look like this:
src/gz reboot_core http://downloads.lede-project.org/snapshots/targets/ramips/mt7688/packages
src/gz reboot_base http://downloads.lede-project.org/snapshots/packages/mipsel_24kc/base
# src/gz reboot_onion http://repo.onioniot.com/omega2/packages
## src/gz reboot_luci http://downloads.lede-project.org/snapshots/packages/mipsel_24kc/luci
src/gz reboot_packages http://downloads.lede-project.org/snapshots/packages/mipsel_24kc/packages
## src/gz reboot_routing http://downloads.lede-project.org/snapshots/packages/mipsel_24kc/routing
## src/gz reboot_telephony http://downloads.lede-project.org/snapshots/packages/mipsel_24kc/telephony
# src/gz omega2_core http://repo.onioniot.com/omega2/packages/core
# src/gz omega2_base http://repo.onioniot.com/omega2/packages/base
# src/gz omega2_packages http://repo.onioniot.com/omega2/packages/packages
src/gz omega2_onion http://repo.onioniot.com/omega2/packages/onion
A complete guide on how to do so can be found in our guide on Using Opkg.
Next, we’ll run opkg update so the changes take effect and then we can go ahead and install the fswebcam package:
opkg update
opkg install fswebcam
4. Take a Photo
The fswebcam utility lets us take a photo with a webcam with the following command:
fswebcam --no-banner -r 1280x720 `date +"%Y-%m-%d_%H%M%S"`.jpgIf you’re wondering how we have
date +"%Y-%m-%d_%H%M%S"/as the output name of the file but it ends up being the date and time, it’s through the wonders of command substitution! The command inside the backticks, `, will be executed and replaced with the output of the command, and then the rest of thefswebcamcommand will be executed. Try runningdate +"%Y-%m-%d_%H%M%S"on the command line, you’ll see that it outputs the time and date in the same format as the images get named.
5. Script it to save our fingers
To save us from typing that out every time, we’ll write a short script.
Save the code below to /root/snapshot.sh:
#!/bin/sh

fswebcam --no-banner -r 1280x720 /root/sd/timelapse/`date +"%Y-%m-%d_%H%M"`.jpg
Make the file executable with chmod:
cd /root
chmod +x snapshot.sh
6. Automate it
We’ll use cron to automate the capture image script. cron is a utility that will repeatedly execute some command at set times. Here’s a quick overview of how cron’s syntax works:
# * * * * *  command to execute
# ┬ ┬ ┬ ┬ ┬
# │ │ │ │ │
# │ │ │ │ │
# │ │ │ │ └───── day of week (0 - 7) (0 to 6 are Sunday to Saturday, or use names; 7 is Sunday, the same as 0)
# │ │ │ └────────── month (1 - 12)
# │ │ └─────────────── day of month (1 - 31)
# │ └──────────────────── hour (0 - 23)
# └───────────────────────── min (0 - 59)
To set up a new task - called a cronjob - we’ll need to edit cron’s configuration file with:
crontab -eThis opens an editor (by default, vim) to edit the file.
To create a cronjob, append the following to the crontab:
#take snapshot once a minute
* * * * * /root/snapshot.sh
#
For our new cronjob to take effect, restart the cron daemon with:
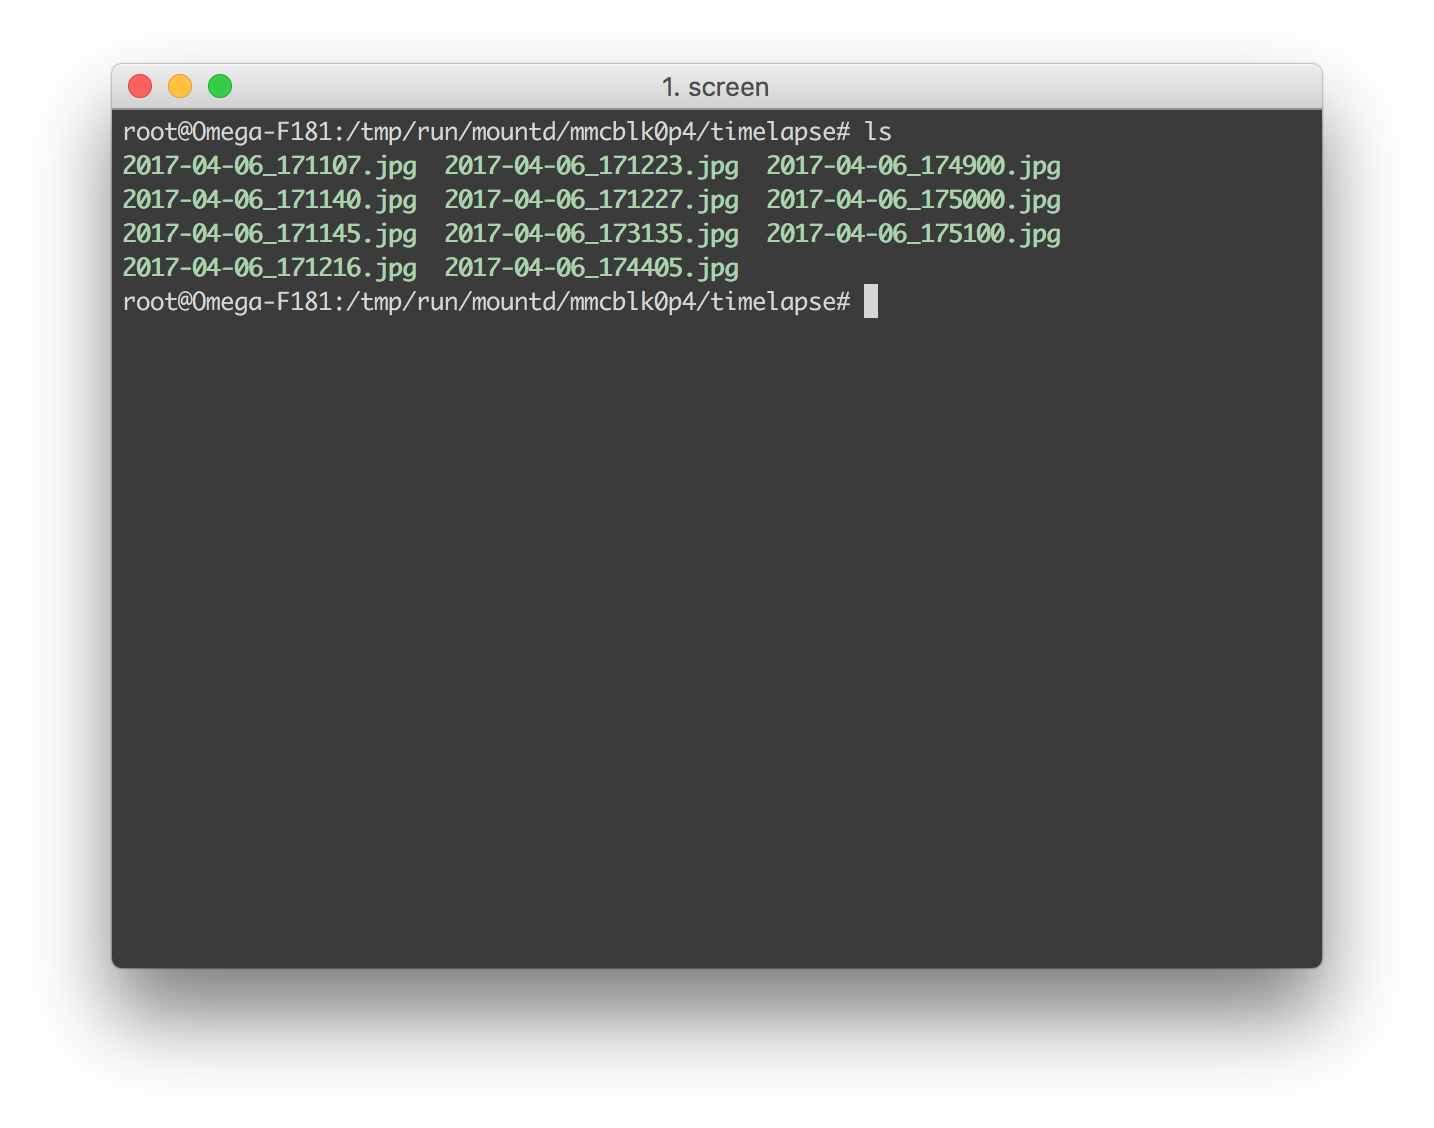
/etc/init.d/cron restartNow wait a bit, if new files are created each minute, then we’re good to move on!
Check out the Omega documentation for more info on using
cron
7. Set up FFmpeg
Once cron starts working and we have some images from the webcam, we’ll want to create our very first timelapse video. To do that we’ll be using the FFmpeg program.
First, grab the package:
opkg update
opkg install ffmpeg
Next, we’ll use a script to rename the photos and create the video. Renaming first makes sending the files to FFmpeg a lot easier.
Copy the code below and save it to /root/makevideo.sh.
#!/bin/sh

cd /root/sd/timelapse

# rename images to be sequential (according to time)
a=1
for i in `ls -tv *.jpg`; do
  new=$(printf "%d.jpg" "$a") #04 pad to length of 4
  mv -- "$i" "$new"
  let a=a+1
done

# call ffmpeg to create our video
ffmpeg -r 6 -start_number 1 -i %d.jpg -s 1280x720 -q:v 1 `date +"%Y-%m-%d_%H%M%S"`.mp4
Here’s the options we used for ffmpeg and what they do:
| Option | Effect | Accepted format | Our input |
|---|---|---|---|
| -r | Frame rate of the output | integer | 6 |
| -start_number | Number the sequence of files start with | integer | 1 |
| -i | Input files | List of file names | %d.jpg |
| -s | Resolution of the output | Width x Length | 1280x720 |
| -q:v | Quality of video | integer between 1~31 (1 is highest quality) | 1 |
8. Making the Timelapse Video
Almost there!
Let’s make the script executable so we don’t have to call sh every time we want to make the video:
chmod +x /root/makevideo.shTo make the video, we directly call the script:
/root/makevideo.shVoila! A time-lapsed video of the photos your webcam was taking!
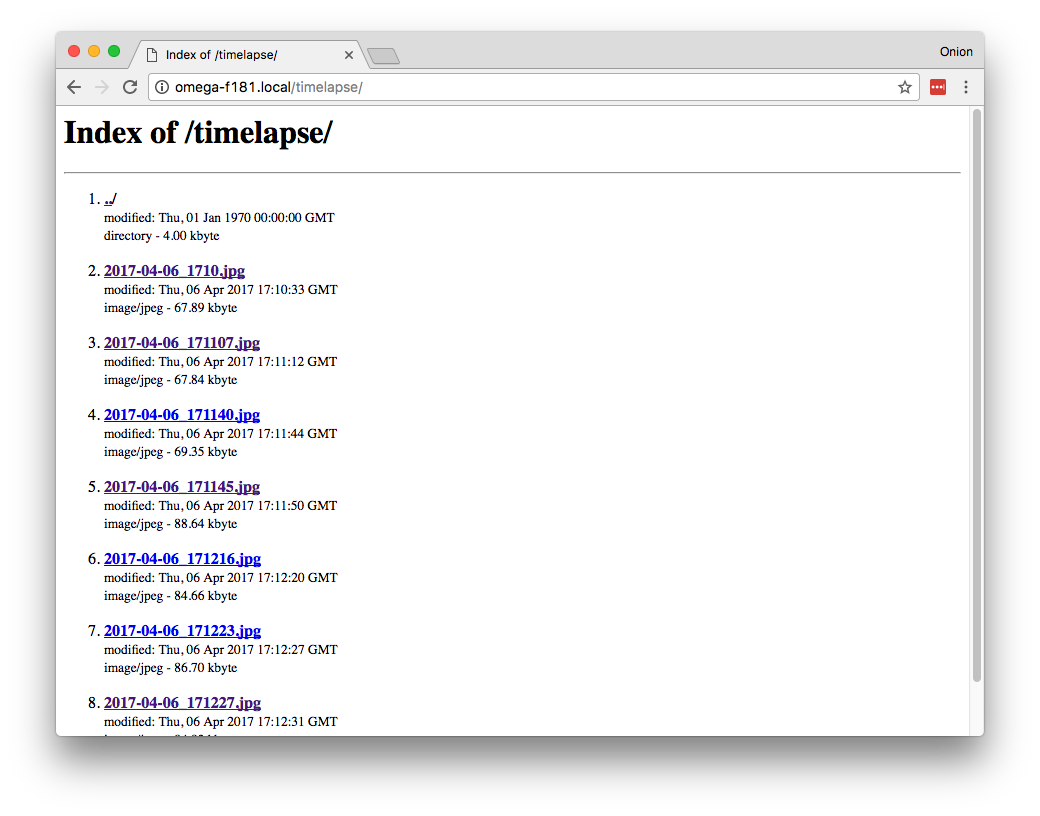
Bonus points: Accessing the Images through a Browser
Link the images to the web directory of the Omega, and uhttpd will automatically serve them up.
ln -s /tmp/run/mountd/mmcblk0p4/timelapse /www/timelapseTo get to our images, go to http://omega-abcd/timelapse in your browser. Remeber to replace omega-abcd with your Omega’s unique name!