Using the ADC Expansion
The ADC (Analog-to-Digital Converter) Expansion allows the user to read and interpret analog voltage, effectively giving the Omega analog inputs. The Expansion has 4 input channels, each with a resolution of 16 bits and a maximum of 860 samples per second.
With the ADC Expansion, a whole world of analog sensors is now open to you and your Omega projects.
You can learn more about the technical specifications of the ADC Expansion in our ADC Expansion hardware overview
The Channels
The ADC Expansion has 4 input channels, they’re available on the header as well as the grove connectors. It’s important to note that each channel should be connected to an input source through either the header or the Grove connector.
Input Header
Input channels are available on the female header on the board, along with 5V power and ground headers, to power the sensors.
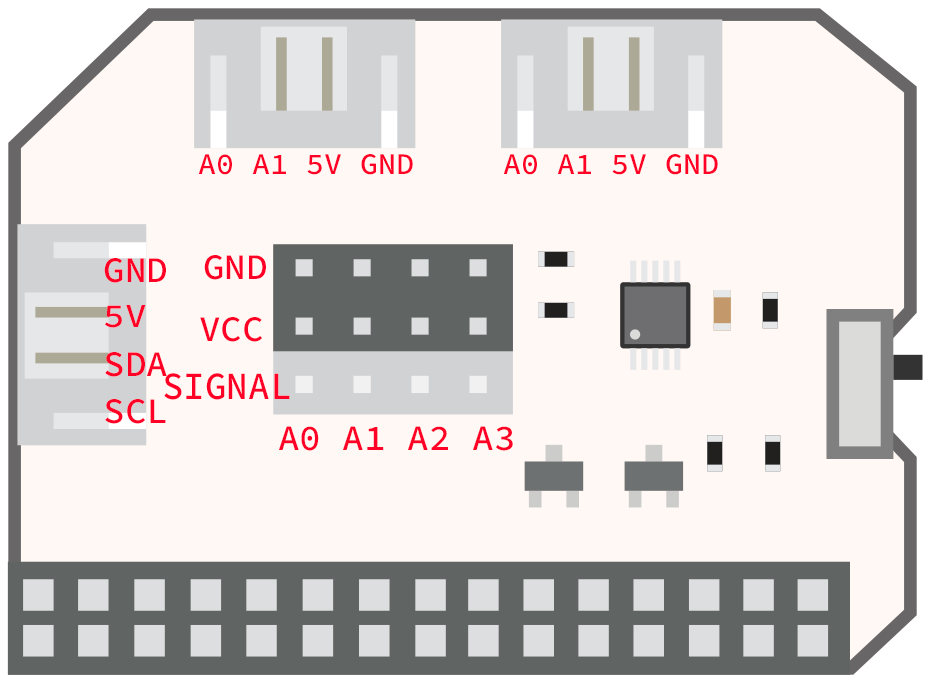
Make sure to connect the sensors correctly - connect 5V from the sensor to the VCC on the female input and same with GND and Signal connectors.
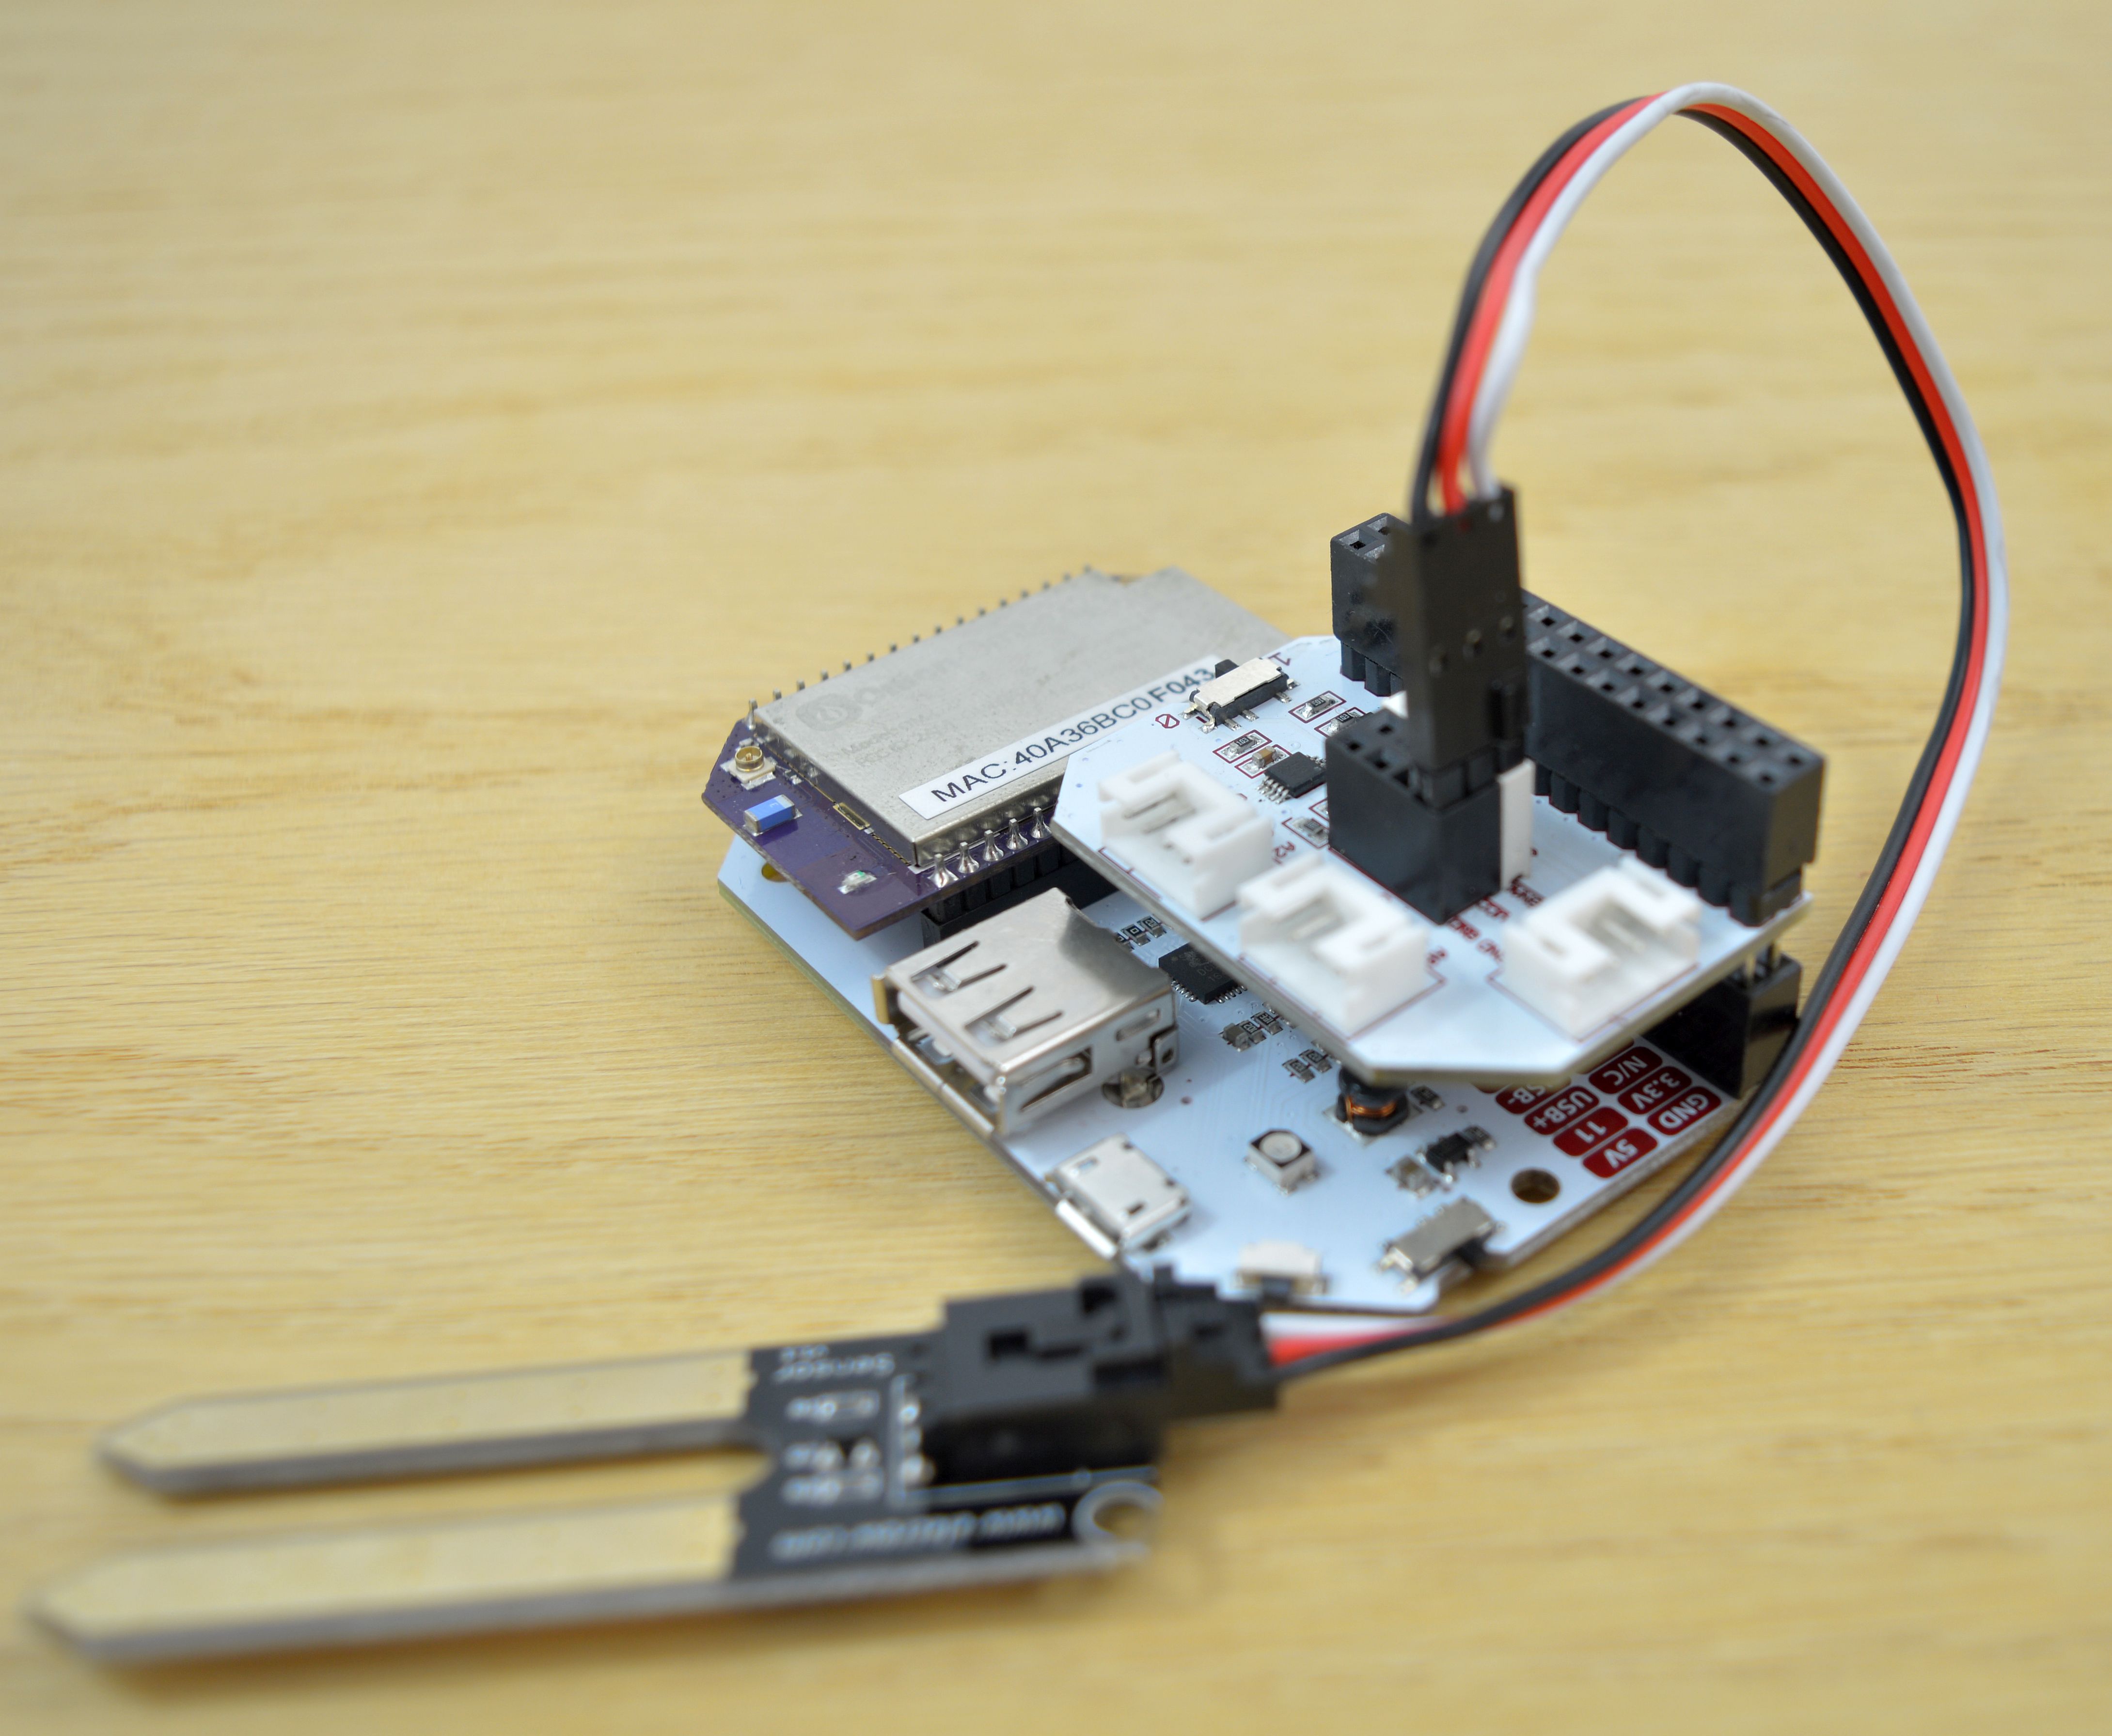
Grove Connectors
The ADC Expansion has two analog grove connectors:
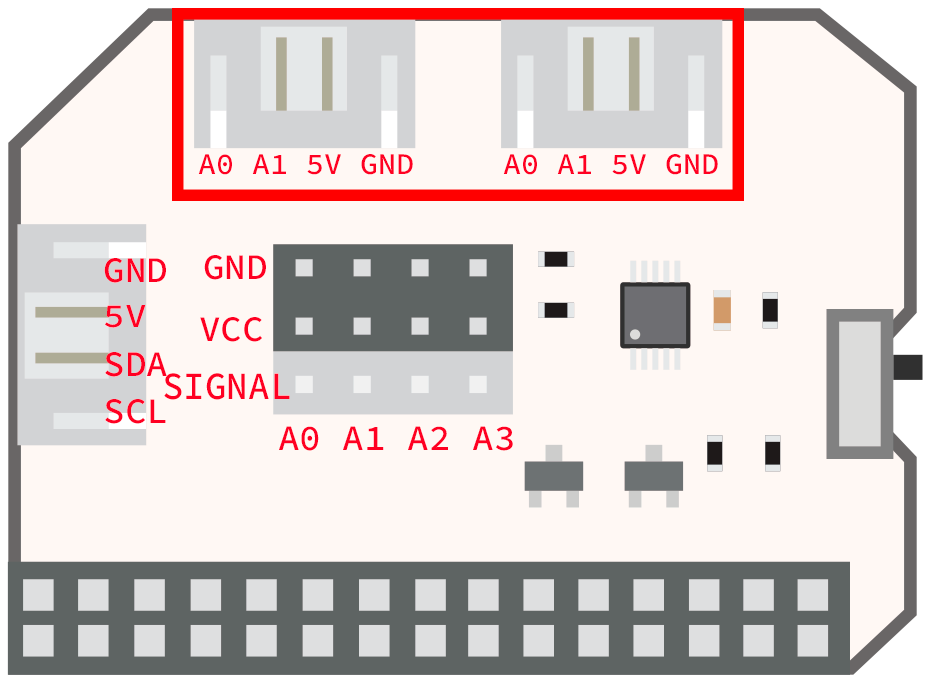
Remember, it’s important that a channel should be connected to an input source either through the header or the grove connector. Using both for a single input channel can cause damage to the ADC Expansion.
Digital Grove Connector
The ADC Expansion also includes a digital I2C grove connector, allowing for additional Grove sensors to be connected.

The Address Switch
The address switch changes the I2C device address of the ADC Expansion, allowing users to use two ADC Expansions with a single Omega, providing EIGHT analog input channels

The switch changes the I2C address of the ADC chip on the ADC Expansion. That way, two ADC Expansions can be included on the Omega’s I2C bus
| Switch Position | I2C Device Address |
|---|---|
| 0x48 (Farther from Expansion Header) | 0x48 |
| 0x49 (Closer to Expansion Header) | 0x49 |
Using the Command Line
There is a command line utility that is available to read analog inputs from the Omega’s Linux command line.
Installing the Utility
Before you use your ADC Expansion, you need to install the adc-exp utility:
opkg update
opkg install adc-exp
Command Usage
For a print out of the command’s usage, run it with just a -h argument:
adc-exp -hIn general, the usage is as follows:
adc-exp [options] <channel>Reading an Input Voltage
To sample and read the voltage on an input channel, run the following:
adc-exp <channel>Note that this assumes the switch is set to
0x48
For example, if we want to read channel 0:
adc-exp 0Will return something like
A0 Voltage: 2.12 VThe Switch Option
By default, the adc-exp command assumes the switch is set to 0x48. It’s possible to explicitly specify the switch value:
adc-exp -s <switch value> <channel>So for example, reading channel 3 when the switch is set to 0x49:
adc-exp -s 0x49 3Will return something like
A3 Voltage: 3.33 VReading All channels
In order to read all channels at once use the following:
adc-exp [-s <switch value>] allLet’s say the switch is set to 0x49, the command will look like this:
adc-exp -s 0x49 allAnd will return something like:
A0 Voltage: 3.30 V
A1 Voltage: 4.99 V
A2 Voltage: 2.53 V
A3 Voltage: 0 V
JSON Output
Sometimes it’s useful to have the output in JSON, so we’ve built in an option:
adc-exp -j [-s <switch value>] <channel>Let’s say we want to read channel 1 and the switch is set to 0x48, we can run:
adc-exp -j -s 0x48 1It will return something like:
{"channel":1,"voltage":2.51, "switch":0}Or, if the switch is set to 0x49 and we want to read channel 3:
adc-exp -j -s 0x49 3It will return:
{"channel":3,"voltage":4.99, "switch":0x49}