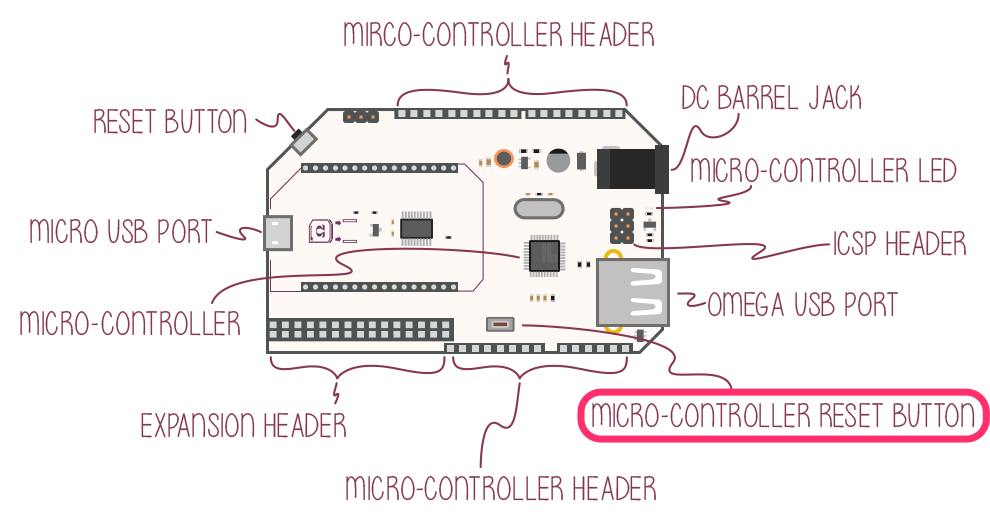
Resetting the Microcontroller
The Arduino Dock gives us an easy method of resetting the ATmega microcontroller; we can use the MCU_RESET push button on the Dock itself.
Pressing the reset button is similar to turning the MCU off and on again. This only stops the program currently running on the microcontroller and starts it again from the beginning. It will not erase the program. In the context of an Arduino sketch, it will reset any global variables, run the setup function again, and then start executing the loop function.
There are several cases where resetting the MCU is useful. For example, if the program isn’t looped or stopped and we want to run the program again. Instead of reflashing the program we can simply press the reset button. Resetting the microcontroller is very useful when testing code and restarting the program for debugging purposes.
Physically with a Button
The microcontroller can be reset physically by pressing the MCU_RESET momentary push button on the Arduino Dock.
When the MCU_RESET button is pressed and released, microcontroller will reset, it should only take a few seconds. Depending on the program loaded on the microcontroller, the blue microcontroller LED might quickly blink a few times, this indicates that the reset has taken place. It’s also possible, again depending on the program, that it will not blink or react at all, you can still safely assume that the reset has taken place.