Reading a Photoresistor
In this tutorial, we will use a photoresistor to detect the ambient light intensity. In order to be able to actually detect the light intensity, we’ll need a voltage divider in our circuit. We’ll also be sending data from the ATmega to the Omega through the serial port. Let’s dive in!
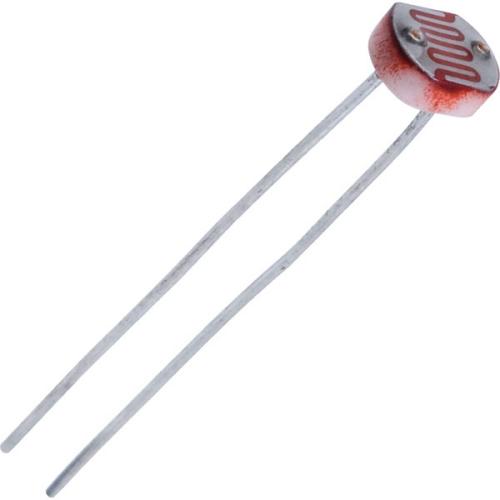
Photoresistor
A photoresistor has a variable resistance based on the intensity of the light hitting it. However, its light intensity is inversely proportional to its resistance: the resistance will decrease when the environment has more light, and increase when there is less light. The photoresistor is made out of a semiconductor with high resistance and can go up to megohms when the environment is dark.
Building the Circuit
For this circuit we will need use a photoresistor and a 1k resistor to make a voltage divider on a breadboard. We will be using jumper wires for the connections.
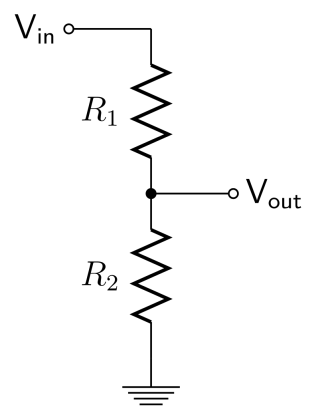
\[ V_{out} = \frac{R_2}{R_1+R_2} \cdot V_{in} \]
Using the equation for the voltage divider, we will be able to determine the resistance of the photoresistor and then calculate the light intensity.
What You’ll Need
Prepare the following components from your kit:
- Omega plugged into Arduino Dock
- USB Micro-B cable for power
- Breadboard
- 3x Jumper wires (M-M)
- 1x Photoresistor
- 1x 1kΩ Resistor
Hooking up the Components
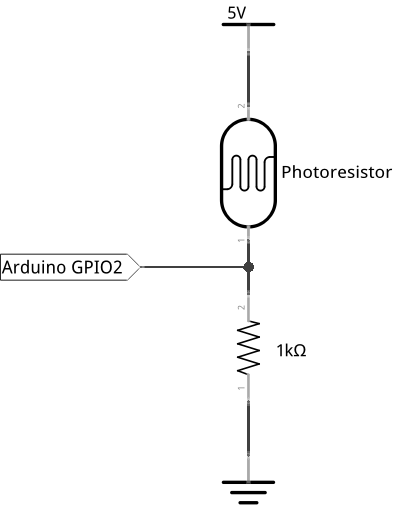
Once you have the components ready, follow these steps:
- Connect one end of the photoresistor to
5Vand the other end to the 1k resistor (the polarity does not matter). - Connect the other end of the 1k resistor to
GND. - Connect the middle point between the photoresistor and resistor to the A0 analog pin on the Arduino Dock.
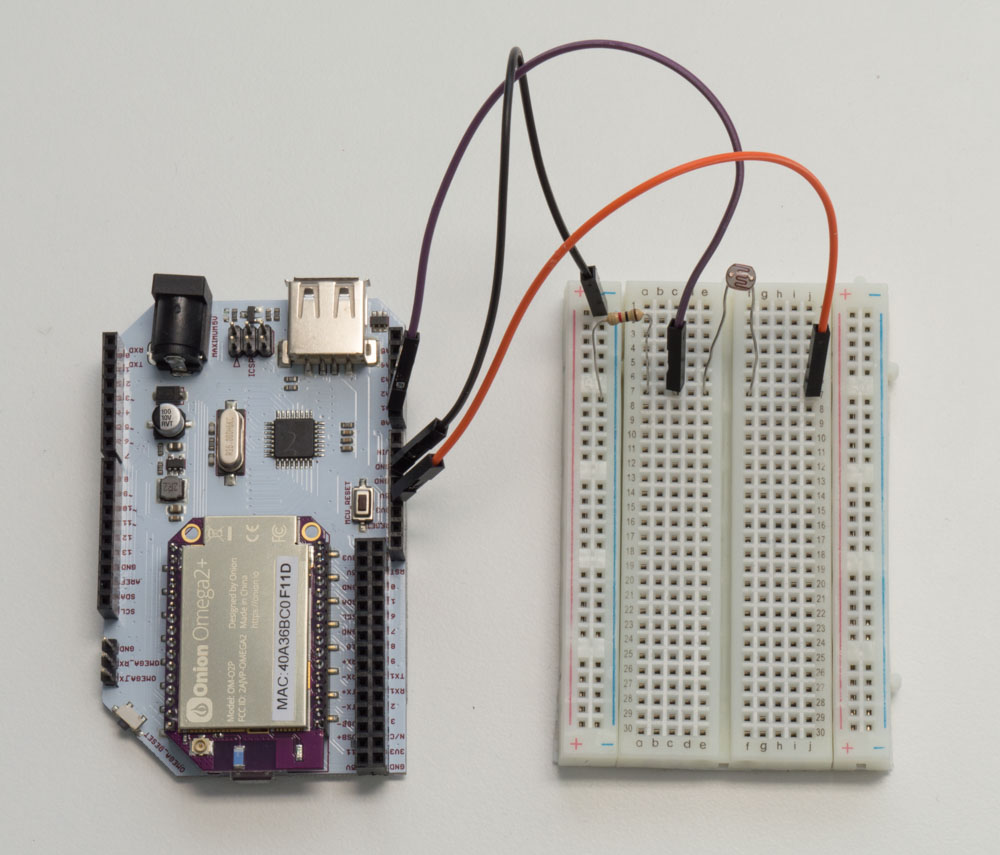
All done! Here’s what our finished circuit looks like:
Writing the Code
For this experiment, the code doesn’t activate anything, it will simply calculate and print out the resistance and the light intensity level to the console.
If you’re ready, copy the code below to SKA06-photoresistor.ino and flash it to start reading the light levels!
// the analog pin connected to the photoresistor
int lightPin = A0;
// resistor value between photoresistor and GND
int R1 = 10000;
// delay between sensor reads
int readDelay = 10000;

void setup()
{
    //initializing serial communication with the Omega2 for sending sensor data
    Serial.begin(9600);
}

void loop()
{
    // read a value (0 to 1023) from the analog pin and print to the Omega through serial
    int reading = analogRead(lightPin);
    Serial.println(reading);

    // convert the reading to voltage level (0 to 5V)
    float voltage = reading * 5.0 / 1024.0;
    Serial.print(voltage); Serial.println(" volts");

    // calculate the resistance of the photoresistor based on voltage level and the voltage divider formula:
    // V(A0) = R1/(R1 + Rphoto) * 5V
    float Rphoto = 5.0 / voltage * R1 - R1;
    Serial.print(Rphoto/1000); Serial.println(" kohms");

    // convert photoresistance resistance to light intensity in lux
    float lightIntensity = 500/(Rphoto/1000);
    Serial.print(lightIntensity); Serial.println(" lux");

    // delay between the readings
    delay(readDelay);
}
Once again, you can read the serial communication from the ATmega by calling:
cat /dev/ttyS1What to Expect
The ATmega will print the output voltage of the voltage divider, the resistance of the photoresitor and the light intensity in lux through the serial port. We can then read the data on the serial port on the Omega with the following command:
cat /dev/ttyS1If you cover the photoresistor with your hand, you’ll see on your Omega’s command line that the light intensity (lux) value will decrease significantly. You’ll also see how the resistance of the photoresistor is inverse proportional to the light intensity.
A Closer Look at the Code
The code we use is fairly straight forward: we use analogRead to obtain a digital value (0 to 1023), then we convert that data to both voltage and light intensity.
During the calculations, we use Serial.print() to send the values at all the stages to the Omega for better understanding the calculation process.
We’ll briefly touch on communicating with serial in case you missed the last experiment, and we’ll go over output formatting in C.
Output on serial
Last time, we covered how serial communication works in general, and specifically how it works between the ATmega and the Omega. In case you missed it, serial communication is simply communication where only a single channel is used. Because of that limitation, one party must be set up to listen while the other talks. With the Arduino Dock, we’ve hooked up the serial output of the ATmega chip directly to a UART pin on the Omega, which means that everything is set up for the Omega to listen to the ATmega!
Output Formatting
Arduino’s core is actually C code so many functions from the library borrow C conventions and habits, and print() is no exception. If you’ve worked with Python or Javascript, you’ll notice that you can print and join strings on the fly.
For example:
The above is completely valid in Python, and will print out Number is 12 complete with a new line. To get the same kind of results with Arduino code, we resort to some fiddling to place new line characters and other parts of the string in the appropriate order.
To copy our C example from above in Arduino, we can do:
int number = 12;

Serial.print("Number is ");
Serial.println(number);
Which is a bit more convoluted, but works just as well with the functions we have access to.