Developing using the Command Line
Developing programs for the Omega using the command-line is a very practical option because of the powerful tools included on the Omega, but at first it can be a little intimidating to use the command line. This tutorial will help you get started developing code on the Omega’s command line and will show you that it’s not so scary after all!
In this tutorial we’re going to write a script that will blink the Omega’s LED in morse code based on the user’s input using the Omega’s command-line interface.
Overview
| Tutorial Difficulty | Intermediate |
|---|---|
| Time Required | 15 mins |
| Required Materials: | Omega2 or Omega2+ Expansion Dock, Mini Dock, Arduino Dock or Power Dock |
Prerequisites
In order to develop programs on the command-line, you’ll need access to a terminal so either SSH into the Omega’s command-line, or connect serially.
To learn more on how to connect to the Omega’s command-line you can read our comprehensive guide to connecting to the Omega.
Controlling the LED from the Terminal
Open the Terminal and log in using your username and password. The defaults are:
username: root
password: onioneer
The Omega comes ready with a kernel module that can translate text to Morse code and blink the LEDs, but you’ll need to tell the kernel which LED you want to blink. The kernel exposes a lot of hardware status and configuration options through a virtual filesystem under /sys.
> The files under /sys aren’t actually files, but they look and act like files to make it very easy to access them from the command line and in scripts or programs.
To tell the kernel that we are going to use the Morse code module, set the LED trigger condition for the Onion system LED to morse by using the echo command to write the setting into the virtual file:
echo morse > /sys/class/leds/omega2\:amber\:system/triggerIf you’re using an Omega2+, the LED will be named
omega2p:amber:systemas opposed toomega2:amber:systemso you will have to pipe the above command to/sys/class/leds/omega2p\:amber\:system/trigger
Depending on which Terminal app you’re using, the keyboard shortcut to paste might not be the straight-forward Ctrl+v or Cmd+v on a Mac. Some Windows terminal programs use Ctrl+Shift+v as the paste shortcut!
You can verify that it worked by using cat to look at the virtual file:
root@Omega-2757:~# cat /sys/class/leds/omega2\:amber\:system/trigger
none mmc0 timer default-on netdev transient gpio heartbeat [morse] oneshot
The square brackets indicate that the morse trigger is currently selected. The text in that file shows the other available options that this particular bit of the kernel can be set to.
Anyway, now we have everything set up! We just need to tell the kernel what message to blink on the LED. Conveniently, once the morse option is selected, the kernel creates a new virtual file for that called (unsurprisingly enough) message. We can use echo again to put text there:
echo Hello, Onion > /sys/class/leds/omega2\:amber\:system/messageNow watch your LED! If it’s too fast or too slow, you can change the speed with the delay file that also gets created:
root@Omega-12D9:~# cat /sys/class/leds/omega2\:amber\:system/delay
50
That’s pretty fast! Let’s slow it down a bit so that people like me who aren’t experts can read it:
root@Omega-12D9:~# echo 100 > /sys/class/leds/omega2\:amber\:system/delayThe message will keep looping forever or until you change it. To stop it, you can either clear the message entirely:
echo > /sys/class/leds/omega2\:amber\:system/messageor change the LED trigger to something else:
echo default-on > /sys/class/leds/omega2\:amber\:system/triggerWriting a Shell Script in the Terminal using vi
A Unix Shell is an interpreter that reads commands from the command-line and executes them. A Shell Script is a way of coding using those basic commands to create a more complex program. Essentially, we are going to use the same basic commands from the last section to create a program that will read a message and then blink that message in morse code.
Create a file called morse.sh in the root directory using the following command:
vi /root/morse.shYou’ll open an empty file. To start typing you can enter a.
Copy the code below into the terminal.
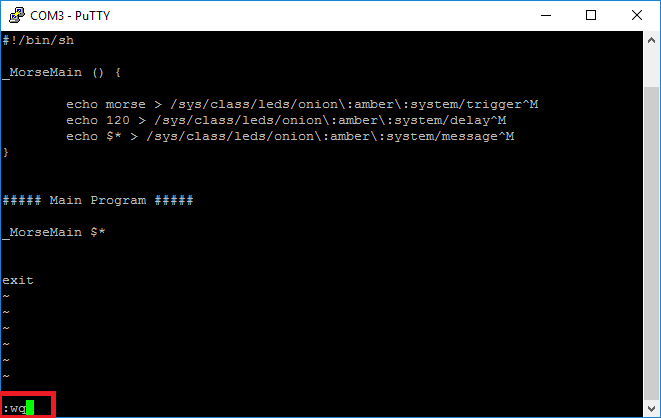
#!/bin/sh

# find the name of the board, to be used in the name of the LED
. /lib/ramips.sh
board=$(ramips_board_name)

# define the function that will set the LED to blink the arguments in morse code
_MorseMain () {

    echo morse > /sys/class/leds/$board\:amber\:system/trigger
    echo 120 > /sys/class/leds/$board\:amber\:system/delay
    echo $* > /sys/class/leds/$board\:amber\:system/message
}


##### Main Program #####

# run the function and pass in all of the arguments
_MorseMain $*

exit
This block diagram shows the steps the _MorseMain function will perform:

The main part of the program will just call the function and pass in all of the command line arguments.
Now to save the file you’ll have to enter the Command Mode by hitting the ESC button on your keyboard.
The Command Mode of
viallows you to enter keys to perform commands such as saving and exiting, exiting without saving, or deleting lines.
Type :wq and hit enter to save and exit your file.
You are now ready to convert text to morse code!
Running your Script in the Terminal
To run your Script enter the following command to run your script:
sh /root/morse.sh <YOUR MESSAGE HERE>Enter a message that you would like to blink in morse code:
root@Omega-2757:~# sh /root/morse.sh Hello OnionOnce you’re done, you can set the blinking back to default-on with the following command:
echo default-on > /sys/class/leds/omega2\:amber\:system/triggerRemember, on an Omega2+, the LED will be named
omega2p:amber:systemas opposed toomega2:amber:systemso you will have to pipe the above command to/sys/class/leds/omega2p\:amber\:system/trigger