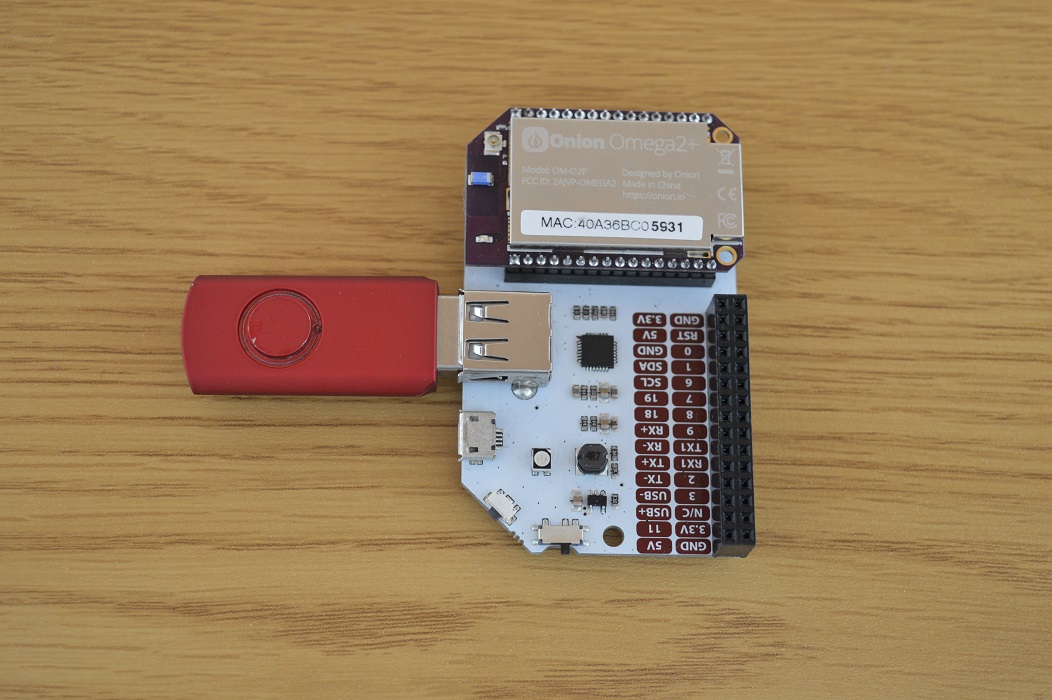
Using USB Storage
The Omega2 can read and write to USB storage devices, such as USB keys, and USB external hard-drives. This tutorial will show you how to expand the storage on your Omega2 using an external USB storage device, and how to change some of the default configurations.
USB Storage and Linux
On a Linux device, a USB storage device needs to be mounted in order to be used. Mounting a device maps it’s storage space to a directory on your device so that you may access it.
The Omega2 comes ready with an auto-mounting tool that will take care of that process for you! The default mount location is /mnt/.
On firmware older than
v0.3.0, the default mount location was/tmp/mounts/and themountdpackage controlled automatic mounting. Firmwaresv0.3.0and up use theblock-mountpackage.
Using USB storage
Steps to access USB storage:
- Plug in the USB Storage
- Navigate to the directory where your USB device is located.
- The default is
/mnt/cd /mnt/
- The default is
- Check the directory for your USB storage device
ls- Your device will usually be named
sda1cd <device name>to enter the storage space on your USB- In this example, this would be
cd sda1
- Congratulations, you can now use your USB storage device for additional space on your Omega!
Now that your device is mounted, you can treat this directory just like you would any other one on your Omega. This means you can copy files to the Omega from the USB device, and vice versa. Not only that, you can even run code from your USB device on your Omega!
You can copy files from your Omega to the USB device using the cp command.
cp <FILE YOU WANT TO COPY> <DESTINATION>Based on the example above, the command would look like the following if I was moving a file from my root directory to the USB device:
cp /root/example.txt /mnt/sda1/example.txtUnmounting
Once you are done with your USB storage device, make sure you unmount your device before removing it to avoid corrupting your data.
The umount command is used to unmount the storage
umount <mount point>From the above example:
umount /mnt/sda1The USB device can now be safely unplugged.
Changing Mounting Options
The configuration for block-mount can be found in /etc/config/fstab. By default, the configuration is as follows:
config global
    option anon_swap '0'
    option auto_swap '1'
    option auto_mount '1'
    option delay_root '5'
    option check_fs '0'
    option anon_mount '1'
The auto_mount option controls automatic mounting of external storage. And the anon_mount option controls whether anonymous storage devices - meaning haven’t been previously used with the Omega - should be mounted.
The configuration can be changed by directly editing the /etc/config/fstab config file, or using UCI.
Changing the default mount point
This is only valid for firmwares older than
v0.3.0that usedmountdinstead ofblock-mount.
In order to change the default mount point of your USB storage devices you’ll need to change a configuration file.
- Change directories to
/etc/config/
cd /etc/config- Edit the
mountdfile withvi
vi mountdYou’ll see the following:
config mountd mountd
        option  timeout         60
option path /tmp/mounts/- Change
/tmp/mounts/to the desired destination
config mountd mountd
        option  timeout         60
        option  path            <DESIRED MOUNT DIRECTORY>
Save the file by hitting
ESCand typing:wq- Restart the auto-mount service to apply the new settings
/etc/init.d/mountd restartYour device should now automatically mount to your newly specified directory upon plugging in.