Developing using the Console
Important Note: As of firmware v0.2.1, the Console was deprecated and replaced by OnionOS, a new web-based, graphical user interface for the Omega2 family. Learn more about OnionOS on the Onion blog. This article will remain in the documentation to serve as reference for the deprecated Console.
The Console is a powerful tool that is easily accessible through your browser. The Console gives you access to a terminal connected to your Omega, and an editor that allows you to directly access the Omega’s filesystem!
In this tutorial we’re going to write a script that will blink the Omega’s LED in morse code based on the user’s input using the Editor App, and the Terminal App.
Overview
| Tutorial Difficulty | Intermediate |
|---|---|
| Time Required | 15 mins |
| Required Materials: | Omega2 or Omega2+ Expansion Dock, Mini Dock, Arduino Dock or Power Dock |
Prerequisites
In order to develop programs on the console you’ll need the Terminal and Editor apps installed.
To learn more on how to install apps you can read our brief guide to installing apps
At this point you are now ready to develop code for your Omega from your browser!
Controlling the LED from the Terminal App
If you haven’t already, install the Terminal app by opening it on the Console and clicking the Install button.
See our article on Installing Console Apps for a walkthrough.
Open the Terminal App and log in using your username and password. The defaults are:
username: root
password: onioneer
The Omega comes ready with a kernel module that can translate text to Morse code and blink the LEDs, but you’ll need to tell the kernel which LED you want to blink. The kernel exposes a lot of hardware status and configuration options through a virtual filesystem under /sys.
> The files under /sys aren’t actually files, but they look and act like files to make it very easy to access them from the command line and in scripts or programs.
To tell the kernel that we are going to use the Morse code module, set the LED trigger condition for the Onion system LED to morse by using the echo command to write the setting into the virtual file:
echo morse > /sys/class/leds/omega2\:amber\:system/triggerIf you’re using an Omega2+, the LED will be named
omega2p:amber:systemas opposed toomega2:amber:systemso you will have to pipe the above command to/sys/class/leds/omega2p\:amber\:system/trigger
To paste into the Terminal app, use ctrl+shift+v or cmd+shift+v on a MAC
You can verify that it worked by using cat to look at the virtual file:
root@Omega-2757:~# cat /sys/class/leds/omega2\:amber\:system/trigger
none mmc0 timer default-on netdev transient gpio heartbeat [morse] oneshot
The square brackets indicate that the morse trigger is currently selected. The text in that file shows the other available options that this particular bit of the kernel can be set to.
Anyway, now we have everything set up! We just need to tell the kernel what message to blink on the LED. Conveniently, once the morse option is selected, the kernel creates a new virtual file for that called (unsurprisingly enough) message. We can use echo again to put text there:
echo Hello, Onion > /sys/class/leds/omega2\:amber\:system/messageNow watch your LED! If it’s too fast or too slow, you can change the speed with the delay file that also gets created:
root@Omega-12D9:~# cat /sys/class/leds/omega2\:amber\:system/delay
50
That’s pretty fast! Let’s slow it down a bit so that people like me who aren’t experts can read it:
root@Omega-12D9:~# echo 100 > /sys/class/leds/omega2\:amber\:system/delayThe message will keep looping forever or until you change it. To stop it, you can either clear the message entirely:
echo > /sys/class/leds/omega2\:amber\:system/messageor change the LED trigger to something else:
echo default-on > /sys/class/leds/omega2\:amber\:system/triggerWriting a Shell Script in the Editor App
A Unix Shell is an interpreter that reads commands from the command-line and executes them. A Shell Script is a way of coding using those basic commands to create a more complex program. Essentially, we are going to use the same basic commands from the last section to create a program that will read a message and then blink that message in morse code.
If you haven’t done so already, install the Editor app by opening it on the Console and clicking the Install button.
See our article on Installing Console Apps for a walkthrough.
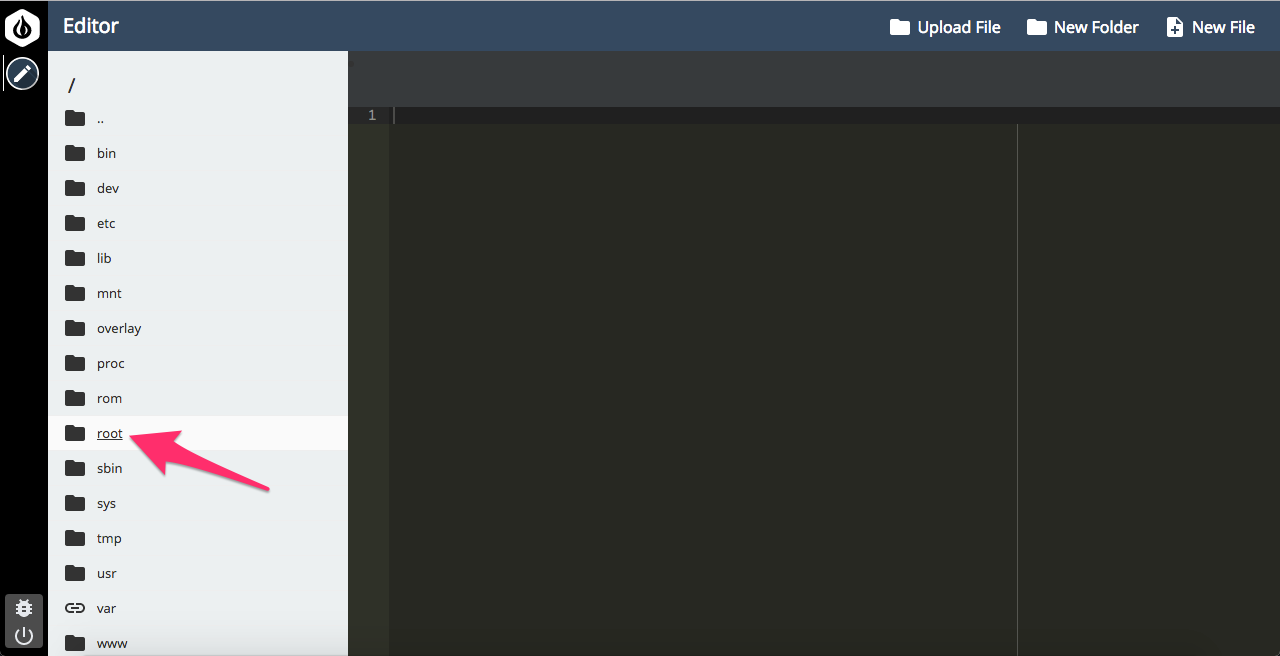
Open the Editor app, navigate to the /root directory:
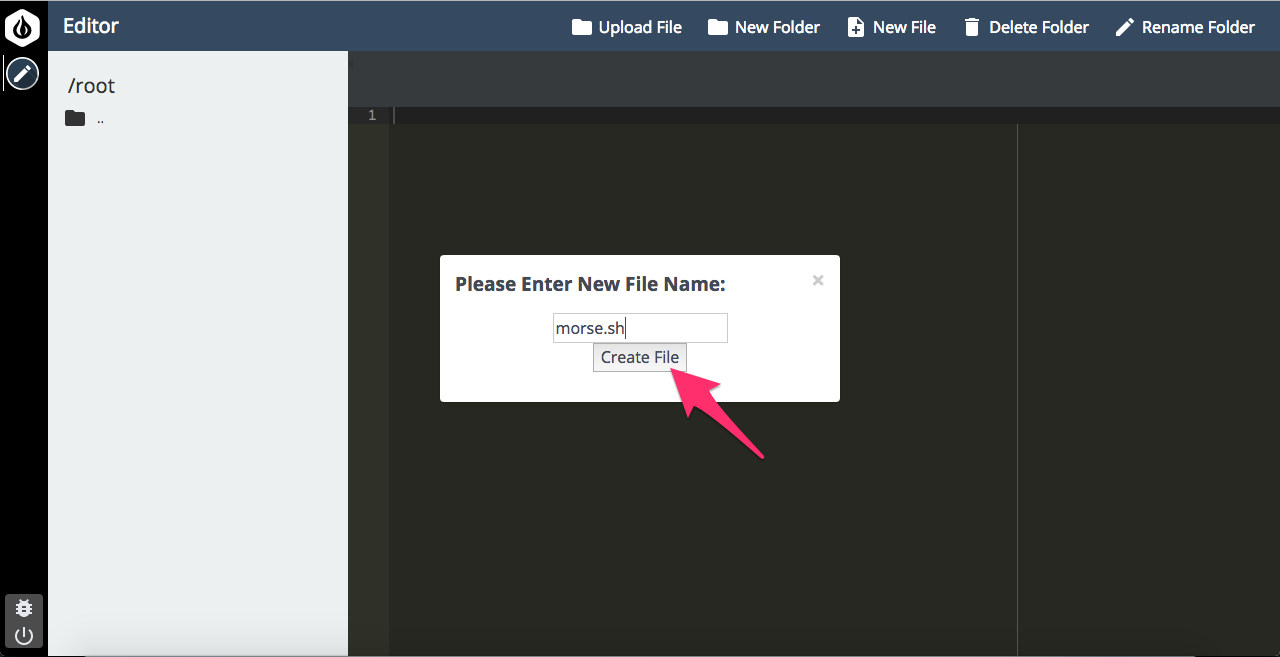
Create a new file:

Let’s name it morse.sh:
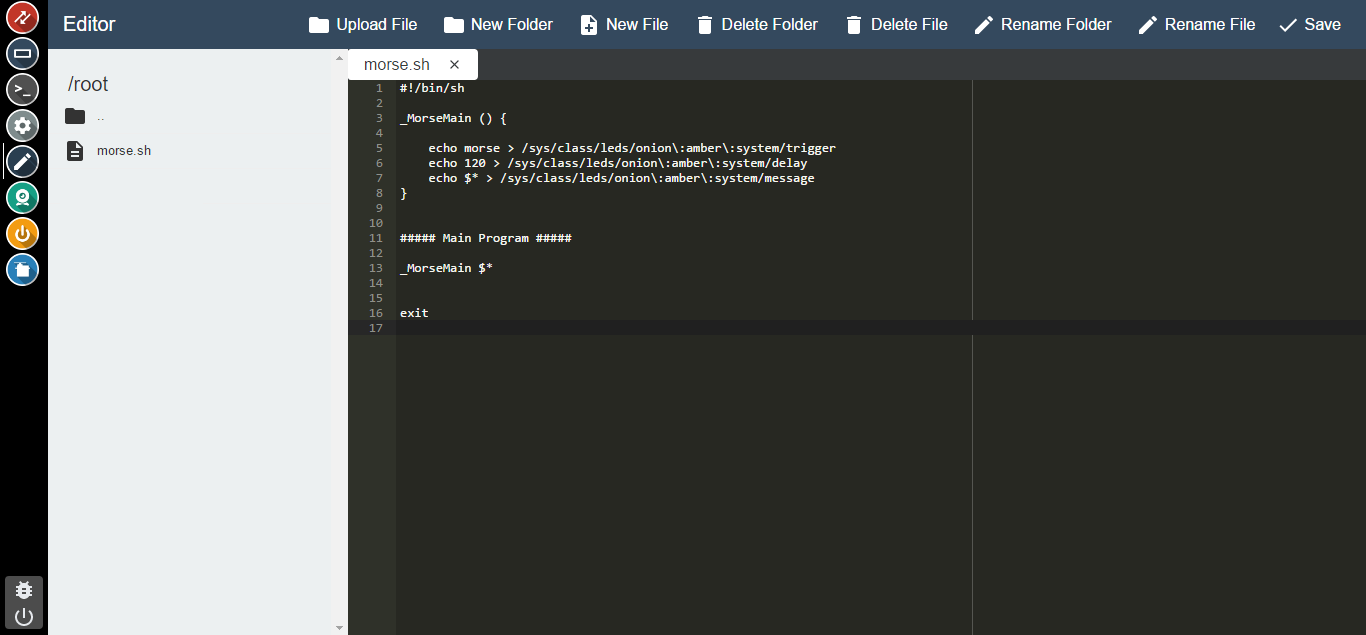
Copy the code below, and save the file:
#!/bin/sh

# find the name of the board, to be used in the name of the LED
. /lib/ramips.sh
board=$(ramips_board_name)

# define the function that will set the LED to blink the arguments in morse code
_MorseMain () {

    echo morse > /sys/class/leds/$board\:amber\:system/trigger
    echo 120 > /sys/class/leds/$board\:amber\:system/delay
    echo $* > /sys/class/leds/$board\:amber\:system/message
}


##### Main Program #####

# run the function and pass in all of the arguments
_MorseMain $*

exit
This block diagram shows the steps the _MorseMain function will perform:

The main part of the program will just call the function and pass in all of the command line arguments.
Your Console should look something like this now:
The Editor can also be used to upload files from your computer directly to the Omega, see the article on transferring files to the Omega for details.
You are now ready to convert text to morse code!
Running your Script in the Terminal App
To run your Script, open the Terminal App once again, and log in if your session was disconnected.
Then, enter the following command to run your script:
sh /root/morse.sh <YOUR MESSAGE HERE>Enter a message that you would like to blink in morse code:
root@Omega-2757:~# sh /root/morse.sh Hello OnionOnce you’re done, you can set the blinking back to default-on with the following command:
echo default-on > /sys/class/leds/omega2\:amber\:system/triggerRemember, on an Omega2+, the LED will be named
omega2p:amber:systemas opposed toomega2:amber:systemso you will have to pipe the above command to/sys/class/leds/omega2p\:amber\:system/trigger