Transferring Files to the Omega
The Omega is incredibly powerful in that it is a full Linux computer. This means that it has its own filesystem, allowing you to store files directly on the Omega. It also means that you can take your files from an external device and copy them to your Omega. This tutorial will show you how you to transfer files using the Onion Console and your browser, as well as directly from Windows, Mac OS X, and Linux.
Using the Editor App in the Onion Console
The Editor App in the Onion Console can be used to upload files directly to the Omega’s filesystem.
The console is installed by default after completing the Setup Wizard, but you can read our brief guide on installing the Onion Console for more information.
If you haven’t installed the Editor app yet, check out our guide on Installing Console Apps
This works on all operating systems and is a great way to wirelessly upload code to your Omega.
NOTE: It is not recommended to upload files larger than 2MB using this method.
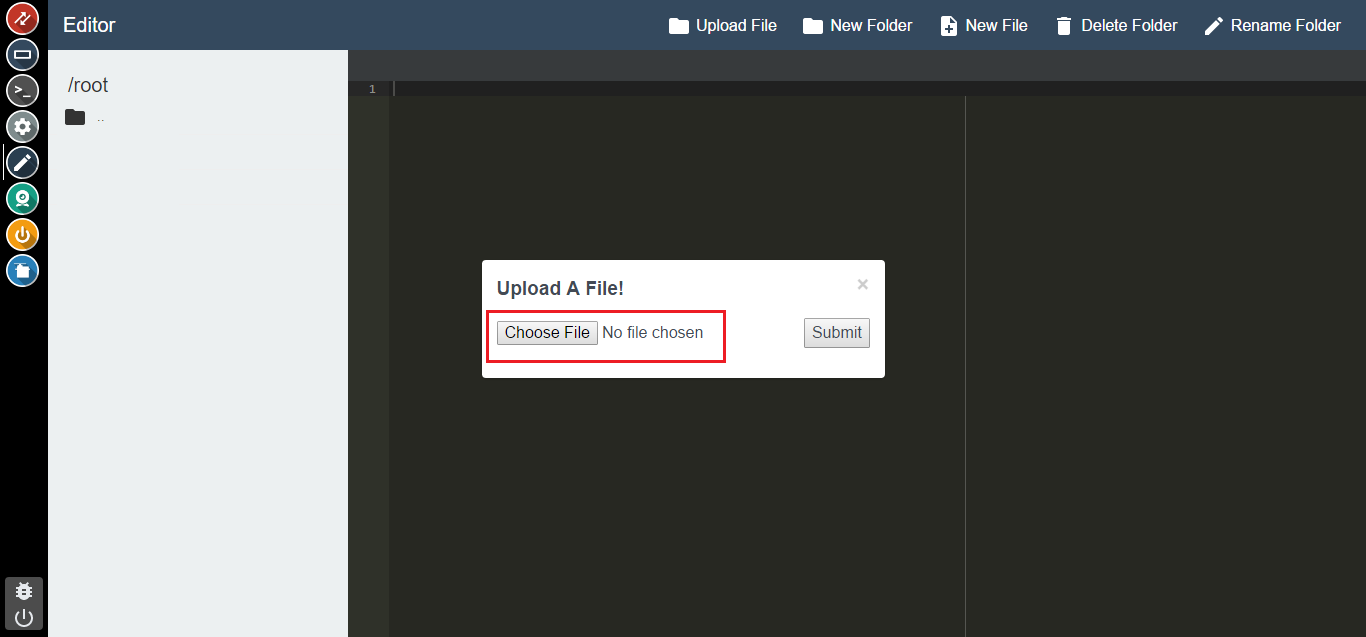
First, open the Editor app in the Console. Any files you upload will be placed into the current working directory of the Editor, so you’ll need to navigate to your intended directory in the side bar:

The green circle shows that my current directory is
/root
Now click the Upload File button in the top bar and a prompt will open asking you to choose which file to upload from your computer:
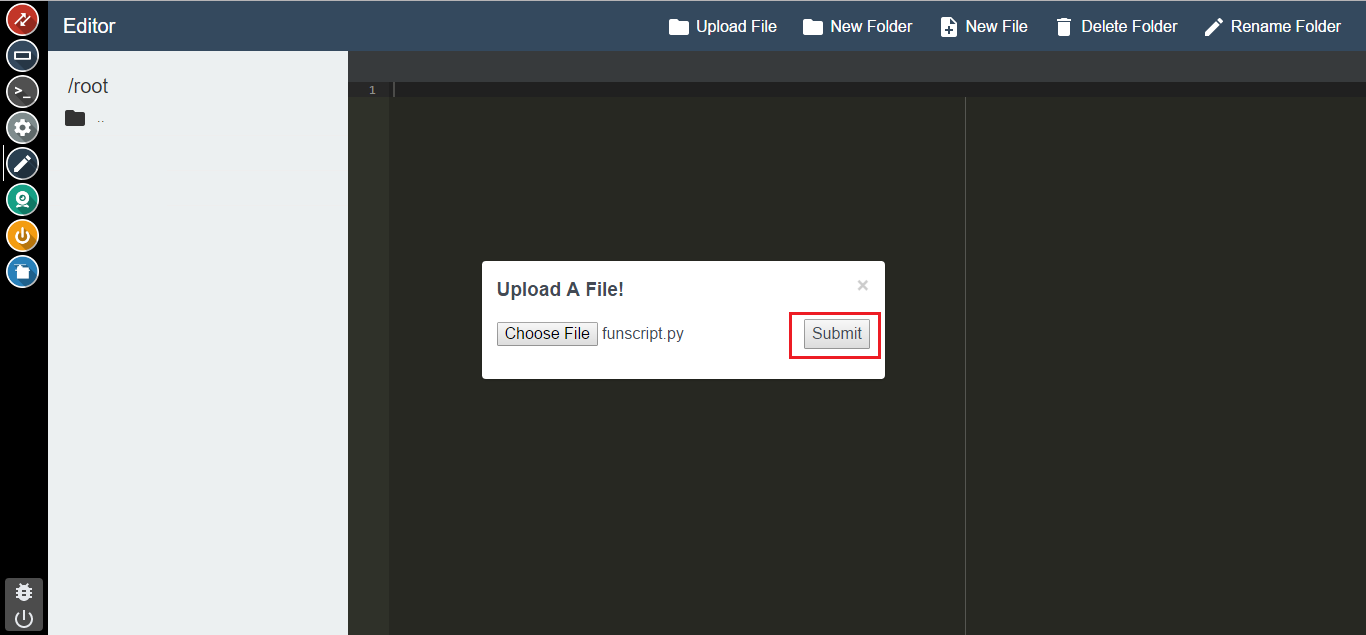
Click that and select the file you would like to upload. Then hit the Submit button:
And your file will be uploaded to the current directory:
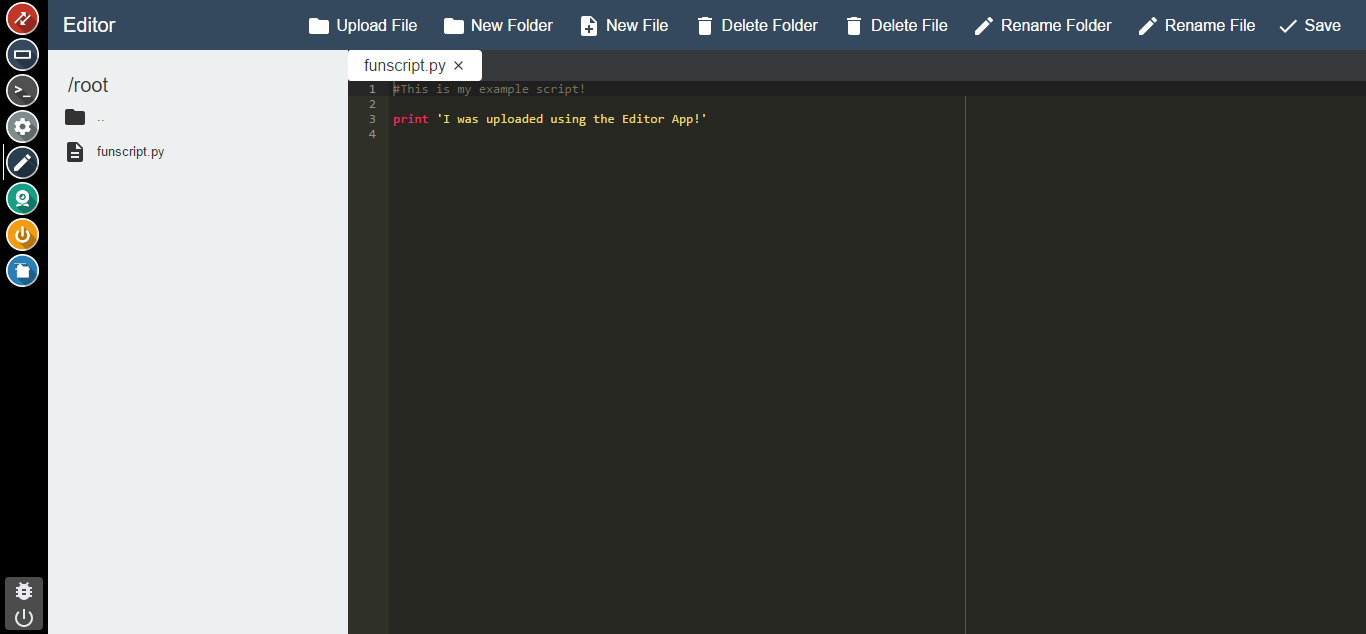
And that’s all there is to it! A simple and effective way to upload files from your computer to your Omega.
Using Windows
The Omega can use the SCP file protocol to transfer files wirelessly. SCP stands for Secure Copy, and is based SSH (Secure Shell).
In this tutorial we’re going to use WinSCP to transfer our files.
You’ll need to have Apple’s Bonjour Service in order to connect to the Omega’s hostname. You can download Apple’s Bonjour on their website
What is WinSCP?
WinSCP is an open source free SFTP client, FTP client, WebDAV client and SCP client for Windows. Its main function is file transfer between a local and a remote computer. Beyond this, WinSCP offers scripting and basic file manager functionality.
In short, it makes creating & updating files on your Omega a lot easier!
Getting Started
First, download WinSCP from their site.
Once downloaded, install the application and then run it.
Configure the Connection
Connecting to the Omega is super simple. First, make sure your Omega has internet connection. If this is not the case, follow the Getting Started guide.
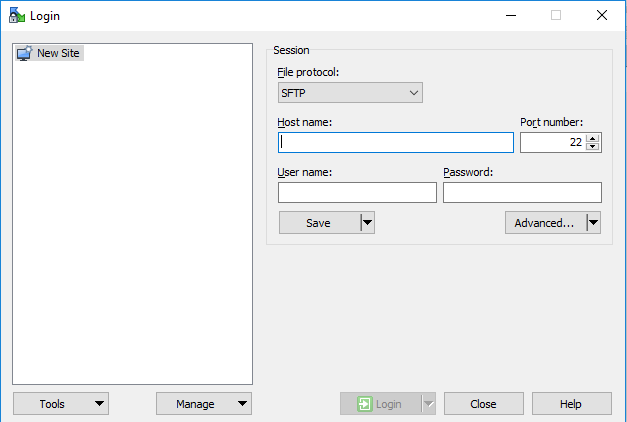
In the right hand pane, you’ll need to set the details for your Onion Omega. Typically these are:
| Setting | Value |
|---|---|
| File Protocol | SCP |
| Hostname | omega-ABCD.local |
| Port Number | 22 |
| Username | root |
| Password | onioneer |
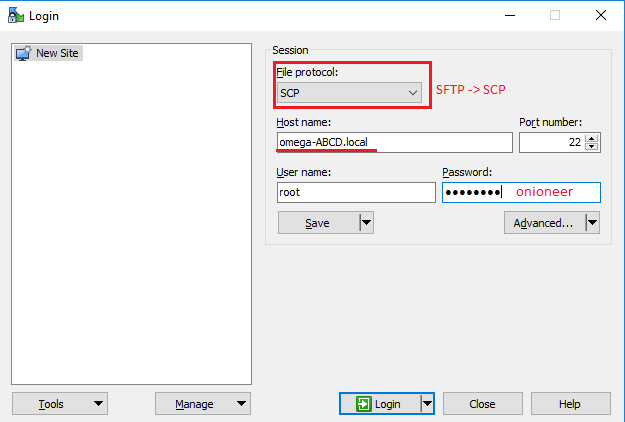
Once finished, press the “Save” button.
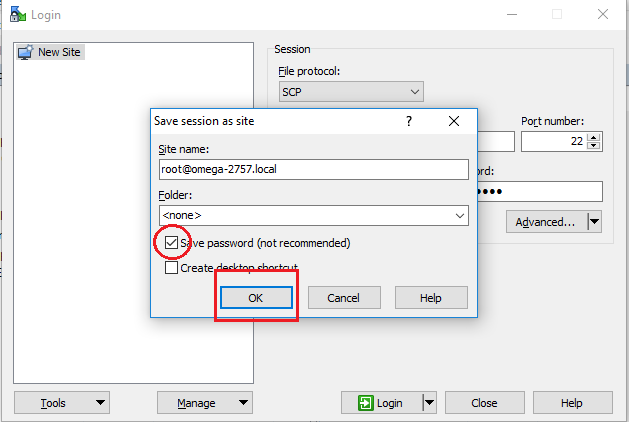
On the next window there is a tickbox option to save the password, that’s up to you. Saving the password is less secure, but faster to access your Omega.
You can name the connection and you can also you can save a desktop shortcut if desired.
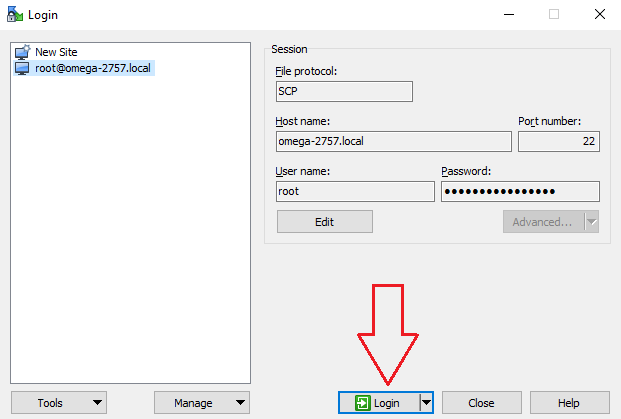
Now from the left menu you’ll see the name you saved the new site as a few moments ago, eg “root@omega-2757.local”, click on this, then “Login”.
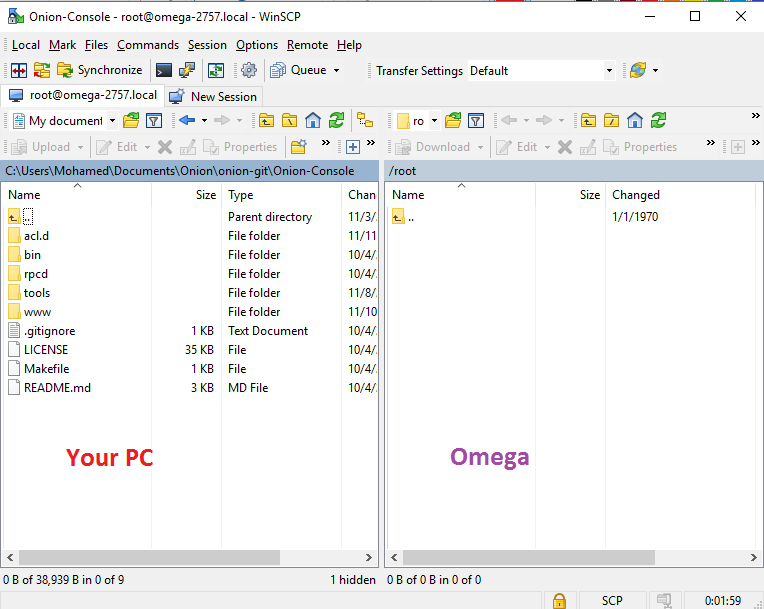
You will now try to connect to your Omega. On success you’ll see this in the window:
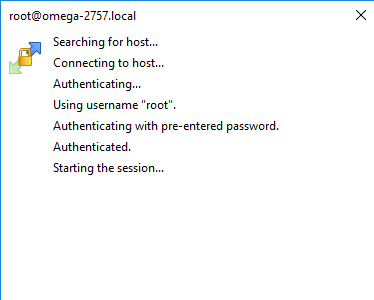
If you connection fails, WinSCP will let you know that the host was not found. If this is the case, make sure that both you and your Omega have an internet connection, and that you have Apple’s Bonjour Service installed. If you don’t have Apple’s Bonjour Service, you can connect to your Omega’s access point, and connect to its IP 192.168.3.1 .
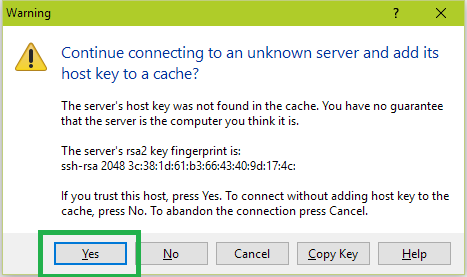
As this is your first time connecting via WinSCP you’ll receive a warning similar to the one below. That’s to be expected, click on “Yes”
You can now drag and drop between folders on your computer and folders on your Omega. Congratulations, you now have easy remote access to the files on your Omega!
Using Linux or Mac OS X
On Mac OS X or Linux, we can use the command-line utility rsync (remote sync) to transfer files to and from the Omega. It’s included with Mac OS X and most Linux distributions by default (including the Omega’s).
In case you don’t have it, simply run the below commands to install it on your local machine:
sudo apt-get update
sudo apt-get install rsync
rsync uses the ssh protocol when connecting to remote servers. When working with an Omega, specify the username as root and provide the password when prompted (onioneer by default).
rsync can simply send files as-is over to the remote server, but if the files already exist then it takes a smarter approach to sending new data. It will look at the differences between the two sets of files, then applies the differences to the files to bring them up-to-date.
Push Directories and Files to the Omega
Copying Whole Directories
First make sure you’re connected to the same WiFi network/LAN as your Omega. Then to quickly copy an entire directory to your Omega, fill in this template with the paths of your folders, where ABCD is your Omega’s factory name:
rsync -a <LOCAL DIRECTORY> root@Omega-<ABCD>.local:~/<DIRECTORY TO PUSH TO>Example and result:
rsync -a ~/my-cool-project root@Omega-ABCD.local:~/remote-directory

On Omega:
ls ~/remote-directory
my-cool-project
Copying the Contents of a directory
To copy only the files inside a directory, add a / to the end of <LOCAL DIRECTORY> like so:
rsync -a -v <LOCAL DIRECTORY>/ root@Omega-<ABCD>.local:~/<DIRECTORY TO PUSH TO>Example and result:
## my-cool-project contains files called file1, file2, and file3
rsync -a ~/my-cool-project/ root@Omega-ABCD.local:~/remote-directory

On Omega:
ls ~/remote-directory
file1 file2 file3
Copying a Single File
To push a single file to the Omega:
rsync -a <LOCAL FILE> root@Omega-<ABCD>.local:~/<DIRECTORY TO PUSH TO>Example and result:
rsync -a ~/my-awesome-file root@Omega-ABCD.local:~/remote-directory

On Omega:
ls ~/remote-directory
my-awesome-file
If you get a warning about connecting to an unknown host, type ‘yes’ (as this is your Omega).
Pull from Omega
Entire directory:
rsync -a root@Omega-<ABCD>.local:~/<DIRECTORY TO PULL FROM> <LOCAL DIRECTORY>Files only:
rsync -a root@Omega-<ABCD>.local:~/<DIRECTORY TO PULL FROM>/ <LOCAL DIRECTORY>Adding Your SSH Key
To skip the password prompt, you can add your SSH key to the Omega.
Going Further
This part will show you all of the in and outs of rsync.
Using a push command, the syntax for the command is explained below:
rsync -a [<OPTIONS>] <LOCAL DIRECTORY> <USERNAME>@<REMOTE HOST>:<DESTINATION DIRECTORY>We’ll go over each part of the command below.
-a- archive mode. Equivalent to a combination of several operations, including but not limited to:-r- recursively sync into directories-l- preserve symlinks-t- preserve modification times- and a few more useful flags (
-pgoD). See the full reference for details:rsyncReference - The
-aflag is a very convenient flag that you’ll want to include in most of your typical calls.
<OPTIONS>- some optional flags you can include are:--progress- show progress during transfer-v- verbose output: the terminal will report events and status-n- dry run: see how exactly the files will be synced without actually transferring or overwriting anything.
<LOCAL DIRECTORY>- The directory containing the files you want to push. There are two ways this can be done, shown below:~/my_directory- copies the folder itself over to the destination, eg.destination_directory/my_directory~/my_directory/- by adding a/at the end, this means the contents ofmy_directory. Ifmy_directoryhad filesfile1,file2,file3, then the remote server would receive the files like sodestination_directory/file1destination_directory/file2destination_directory/file3
<USERNAME>- the user on the remote system. For the Omega, this will always beroot.<REMOTE HOST>- the URL or IP of the remote server.- This can be typically
Omega-ABCD.local(ABCDbeing your Omega’s factory name) - Or it can be the Omega’s IP address, eg.
192.168.12.34
- This can be typically
<DESTINATION DIRECTORY>- the directory on the remote server where your local files will be sent to, eg.~/source/my_cool_project
To see the full list of options and behaviours, see the rsync Reference.