Power Dock 2
Bring your next project on the go with the Power Dock! Equipped with on-board battery management, the Power Dock allows you to recharge and monitor battery levels, while providing a header to connect Onion Expansions.
The Hardware
Your Power Dock has a 30 pin Expansion Header, allowing you to use all of your Onion Expansions. It provides the Omega with the 3.3V it needs to run, while also providing 5V for the Expansions and USB Host port.
The Power Dock is flexible: it can run off just a battery or just by drawing power from the Micro USB port. Charging the battery requires having both the battery and the Micro USB plugged in. Don’t worry, the Omega will still work with no interruptions while charging.
The Micro-USB port supplies 5V to the Dock. This voltage is stepped down to the required 3.3V required to power the Omega, and also provides 5V to the Expansions and USB Host port.
What makes our Power Dock 2 more useful and unique is a additional battery level ADC. A simple chip that allows you to monitor your battery charge.
Connecting an Omega
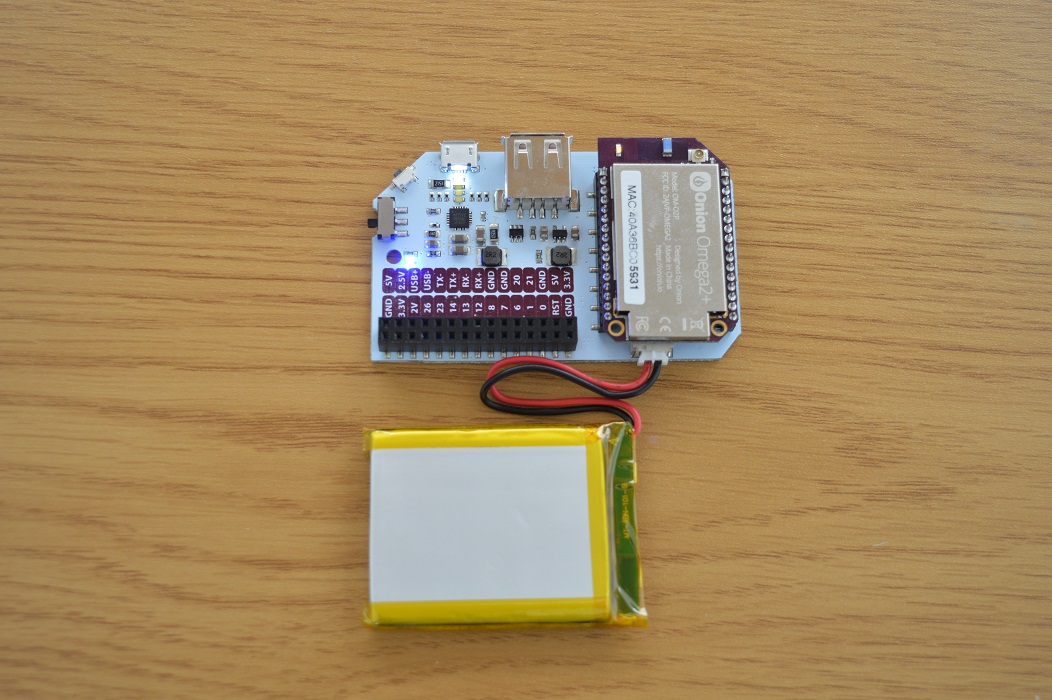
To connect an Omega to the Power Dock, line up the Omega’s edges with that of the Power Dock’s as demonstrated below:
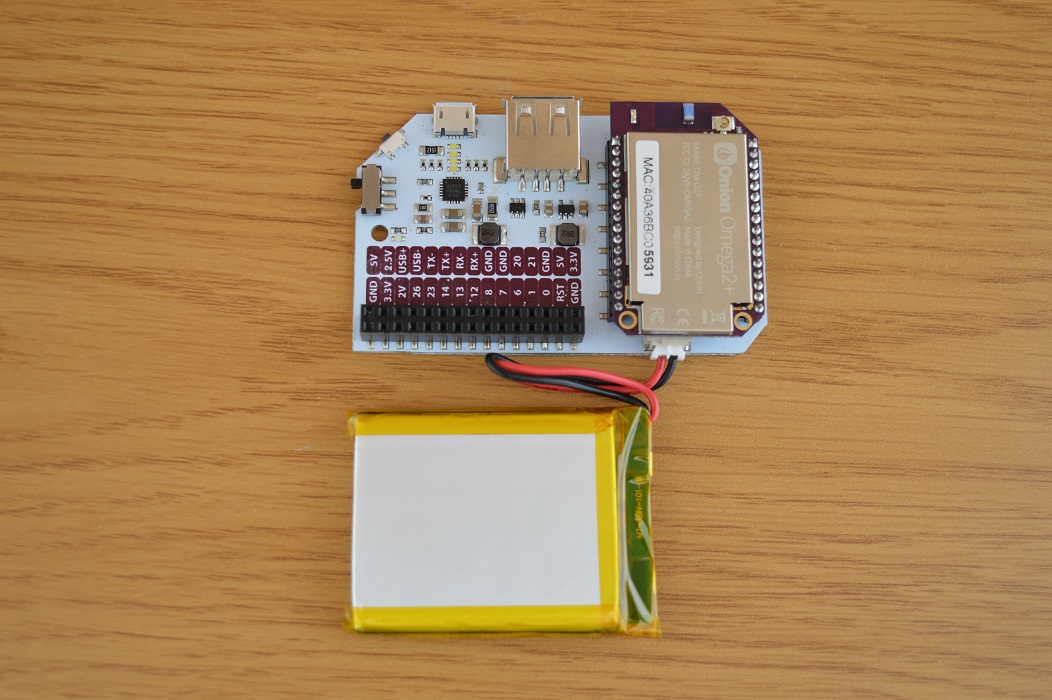
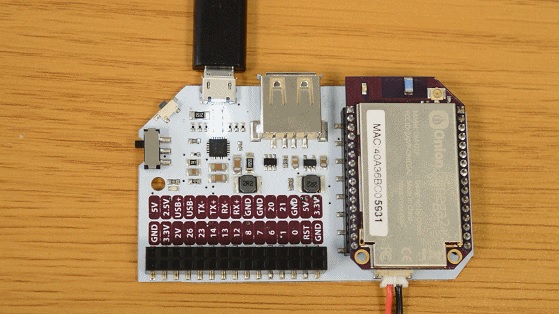
Make sure your Omega is pushed all the way down as demonstrated in the picture below:
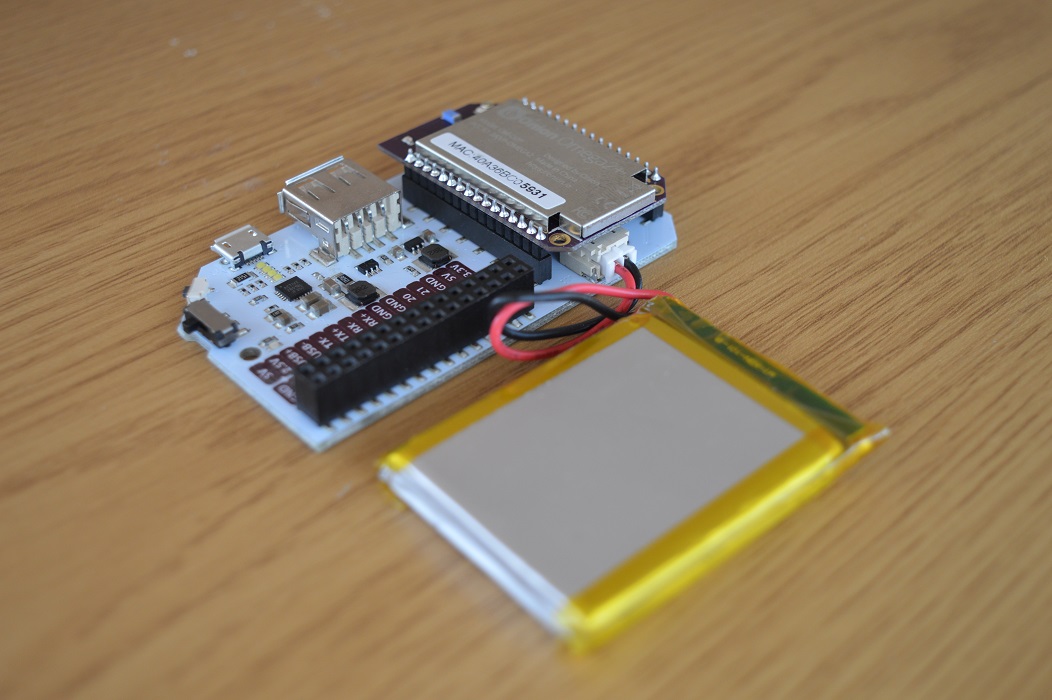
You may need to line up the pins with the holes before pressing the Omega into the Dock.
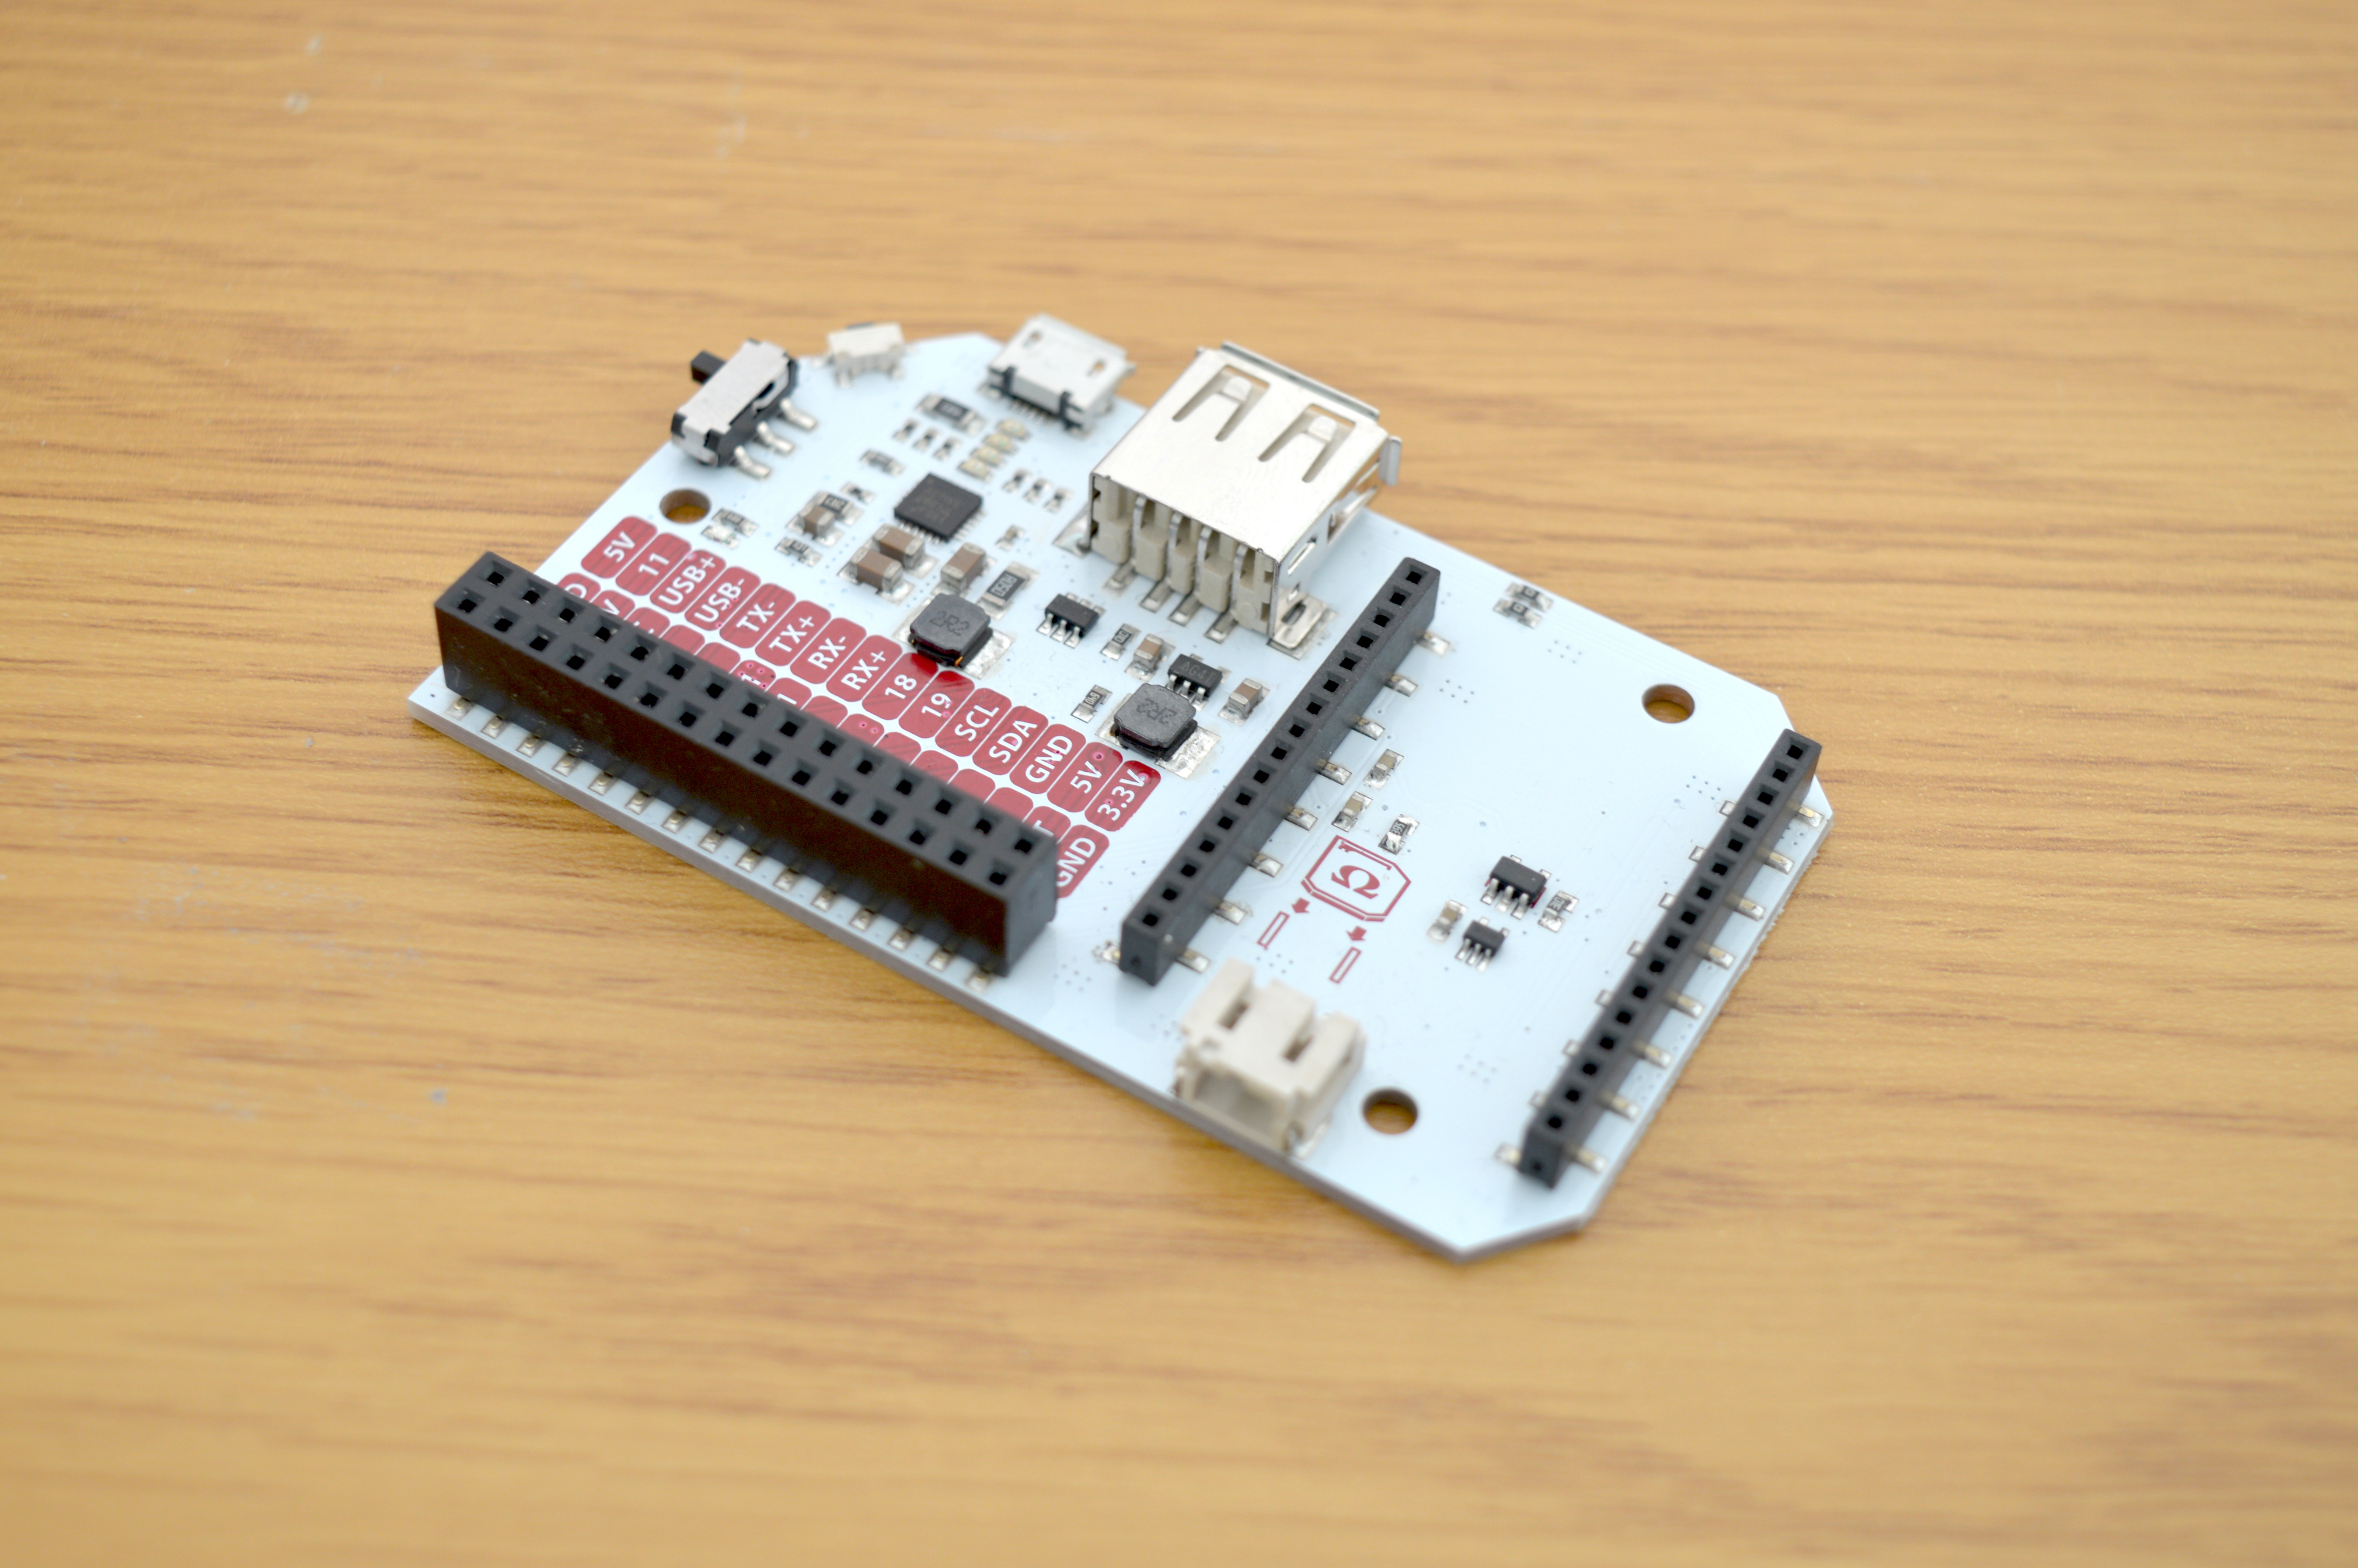
The Expansion Header
The Expansion Header is a convenient tool that gives you easy access to the Omega’s GPIOs, and allows you to connect Onion Expansions directly. The Expansion Header is labelled to show you what GPIO is connected to each section.
The pinout diagram below shows the Expansion Header’s connections and the possible multiplexing options:
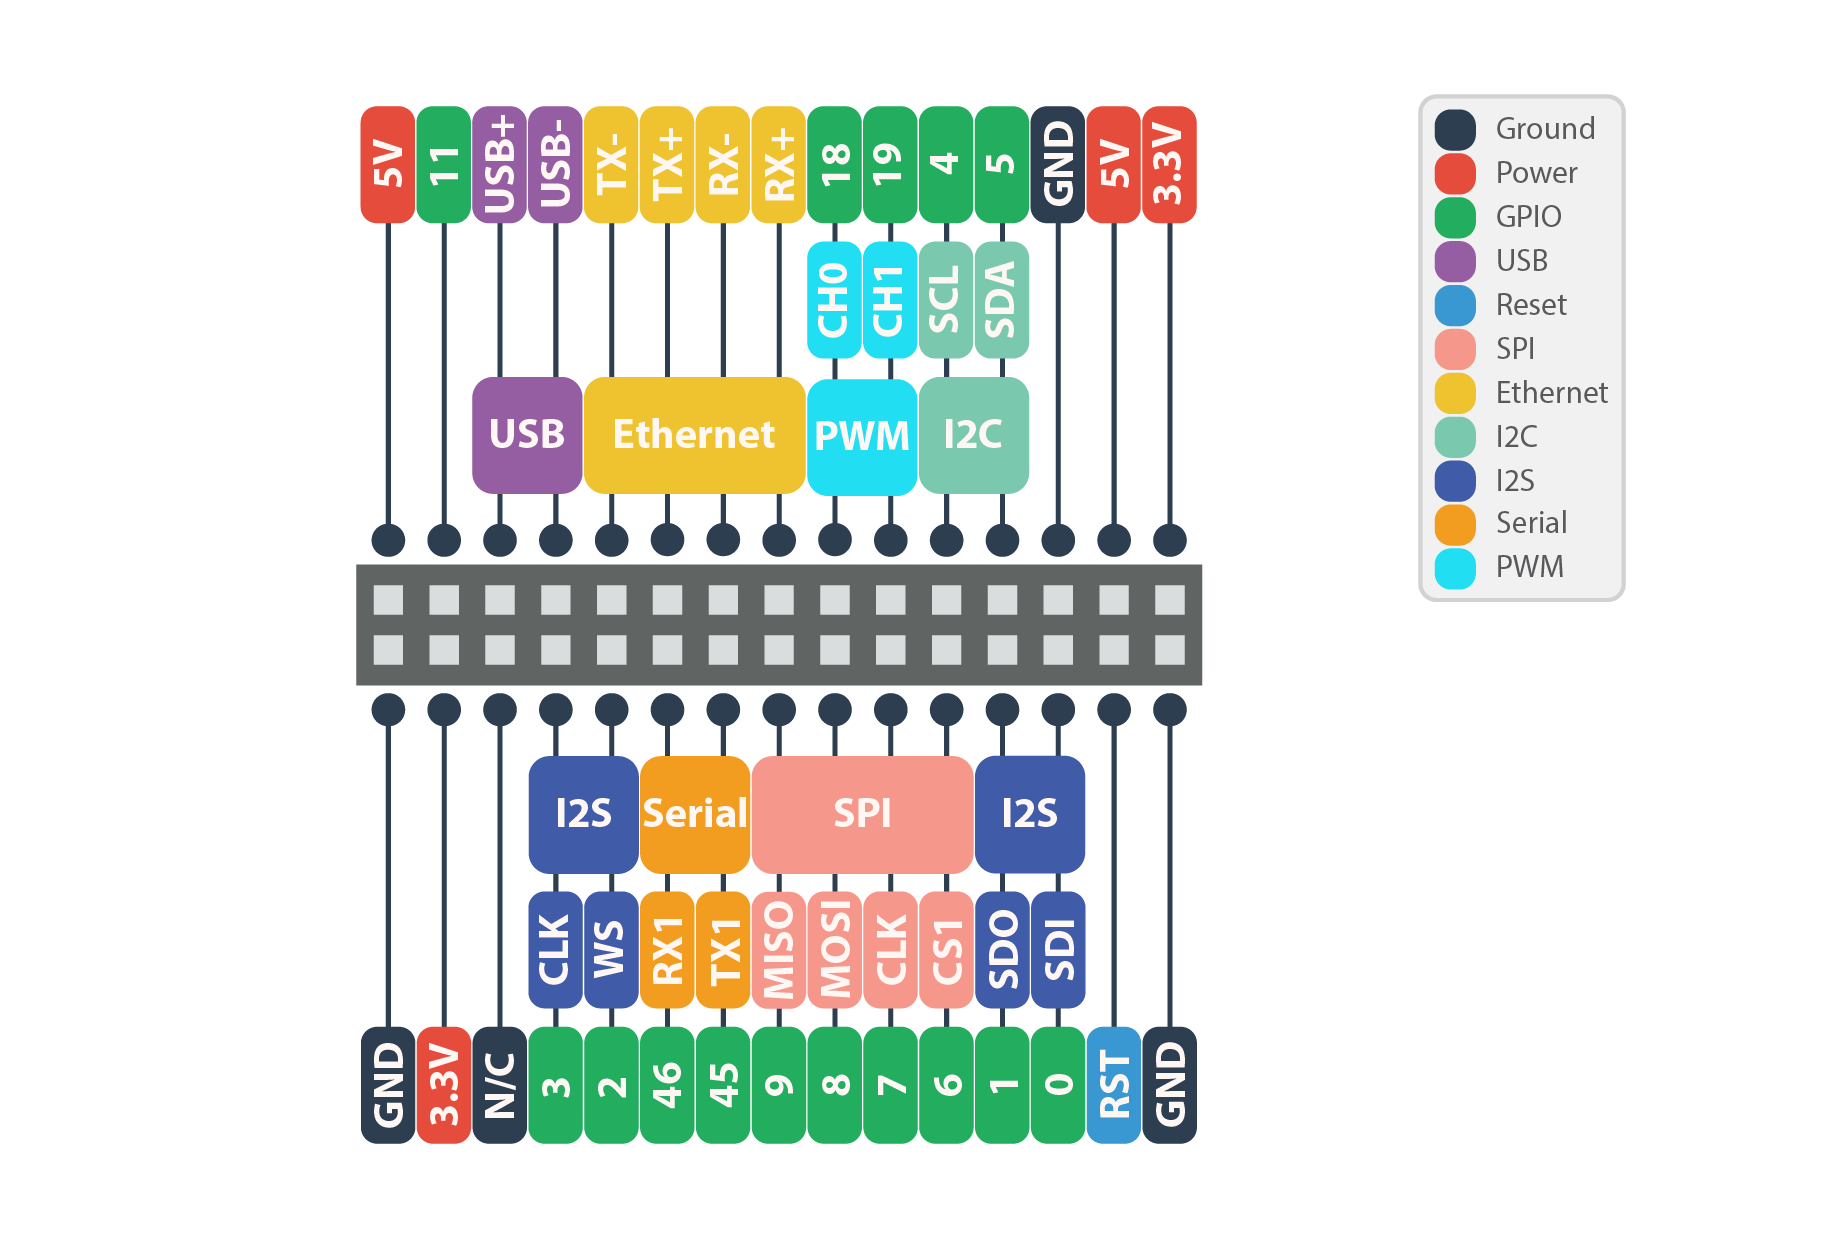
By default, the Serial, SPI, and I2C pins implement these communication protocols and cannot be used as GPIOs. Similarly, the I2S pins are set to GPIO mode by default.
To learn more on changing the functionality of the Omega’s pins, see the Multiplexing GPIOs section of our article on the Omega’s GPIOs.
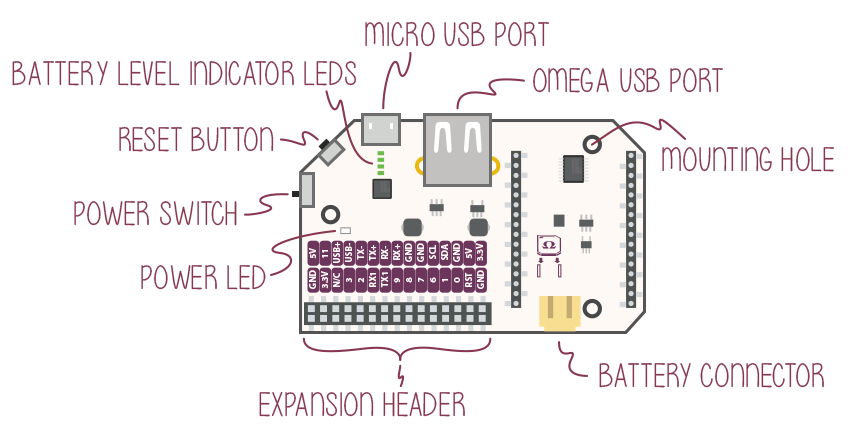
Micro-USB Port
The Micro-USB Port is used to supply power to the Power Dock. Connect the Dock to a power source such as a computer or a USB wall adapter to recharge your battery, or to use your board without a battery.
No USB-to-Serial
There is no USB-to-Serial Chip on the Dock. This means that you will not be able to connect to the Omega serially over the Micro-USB port.
You can still connect to your Omega’s terminal with SSH, you can learn how to do that in this guide to connecting to the Omega.
The Power Switch
The power switch controls power to the Omega, regardless of whether it is powered from the battery or Micro-USB cable. The power switch has no effect on the battery charging, so the battery will charge regardless of the switch position.
The blue Power LED indicates if there is power flowing to the Omega.
Battery Level Indicator LEDs
The power dock contains 4 LEDs that indicate the current battery level and charging status. The LED closest to the Micro-USB port indicates the lowest battery level and the LED furthest away from the Micro-USB port indicates the highest battery level.
Lowest Battery Level:
Highest Battery Level:
Battery Level ADC
We have added an ADC chip to the Power Dock 2 in order to measure the voltage level of an attached LiPo battery. From now on, you can get a precise voltage of a battery just by issuing a single command. It will give you a better idea of how much charge is left in order to satisfy your needs.
The Battery Connector
The Power Dock is designed for use with a 3.7V LiPo Battery with a standard 2-pin JST-PH connector (2mm spacing between pins).
Expect a 1500mAh battery to last about 10 hours, in some cases, up to 12 hours.
Warning: Do not attempt to charge your battery with anything other than the Power Dock or a charger designed specifically for LiPo Batteries!
Omega USB Port
The Omega’s USB Port can be used to connect to all sorts of devices, namely a USB storage device to extend the storage space of your Omega. The USB port supports USB 2.0, and is a type A connector.
Differences from the Expansion Dock
Note some of the differences between the Expansion Dock and the Power Dock:
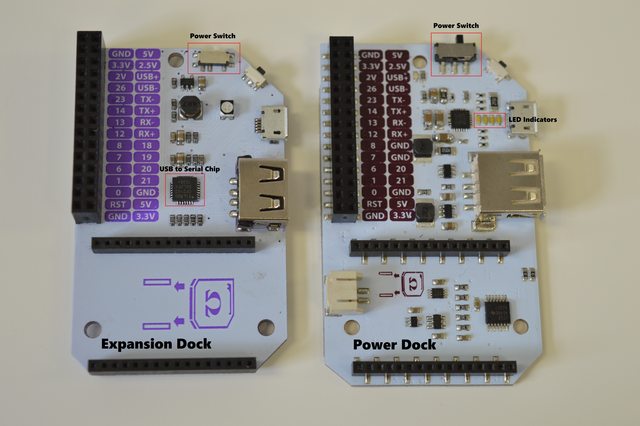
The main differences are:
- Addition of battery management circuits and battery level indicator LEDs
- Addition of 2-pin JST-PH connector for batteries
- All circuit components are surface-mount
- No USB-to-Serial Chip
- No RGB LED
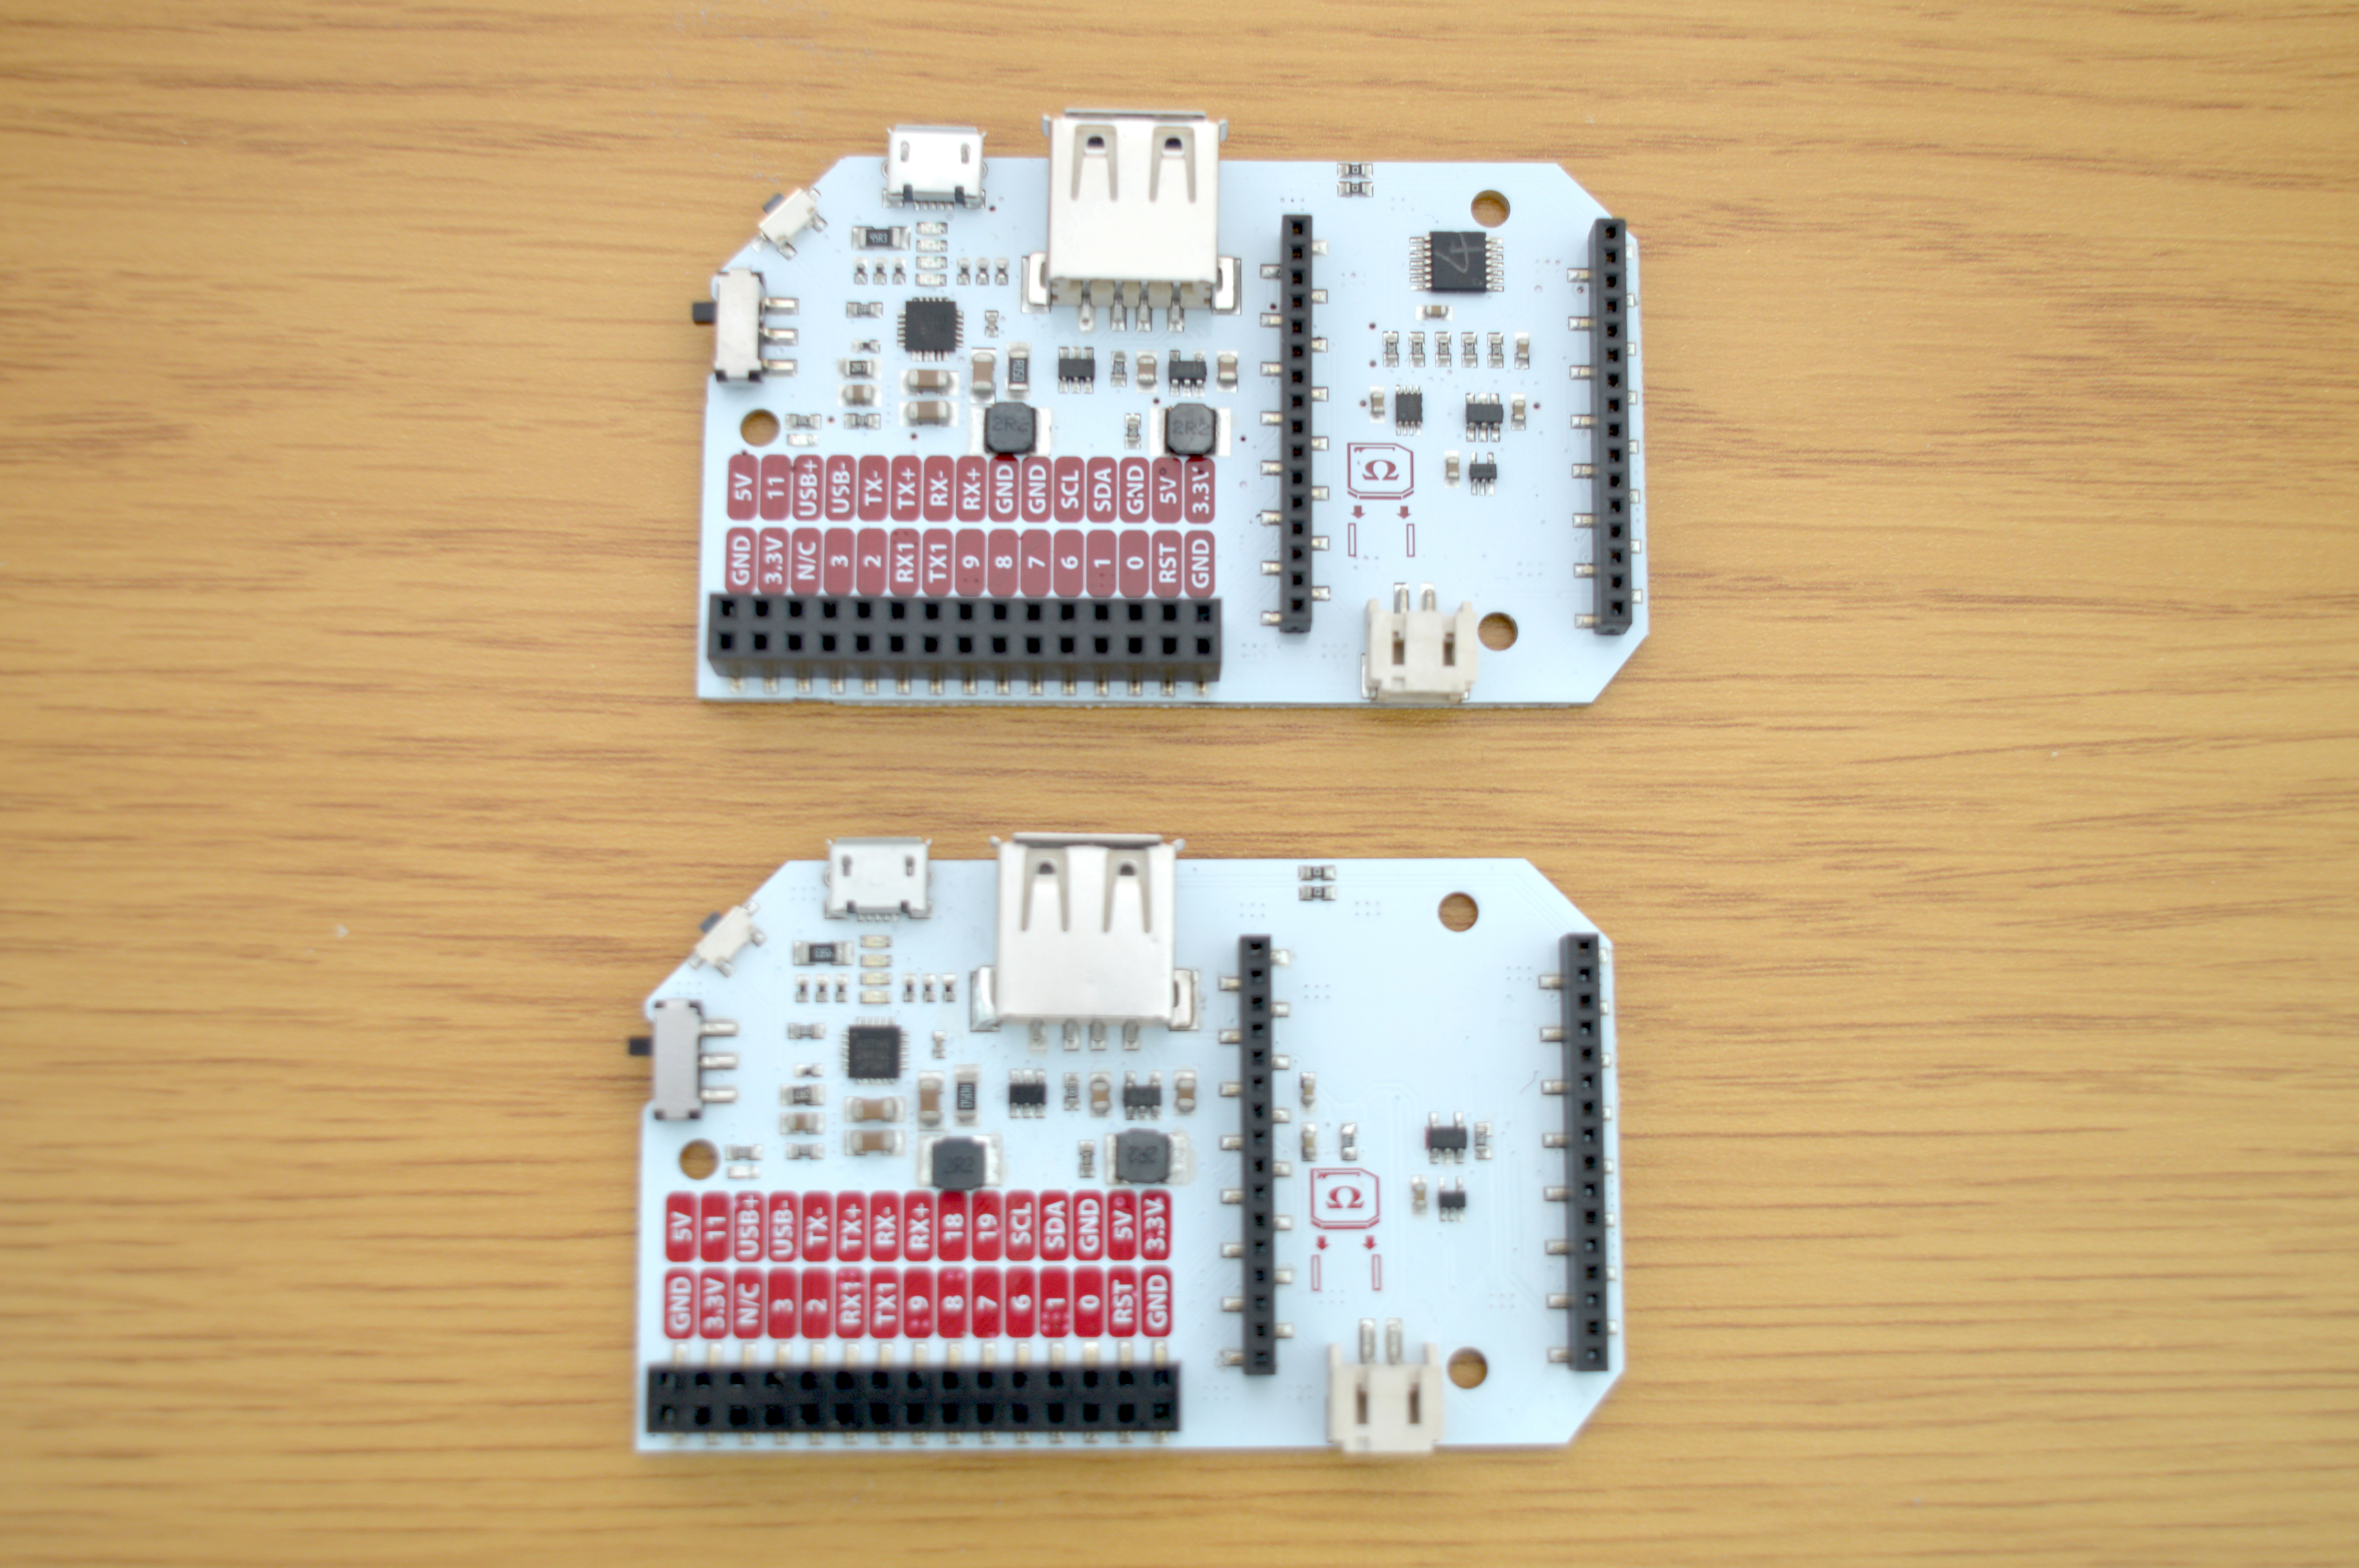
Differences from the original Power Dock
What differs Power Dock 2 from the original Power Dock is that it has the Battery Level ADC that allows you to accurately monitor the voltage of your battery. Another update is that GPIOs 18 & 19 are now available on the Expansion Header!
Using the Power Dock
The Power Dock operates in three different modes.
Battery Mode
This is the most important mode; when the Omega and Power Dock are running completely off the battery. The LED Indicators will be turned off by default to conserve battery life, however they can be turned on for five seconds via a command from the Omega.
When the battery is approaching depletion the Indicator LEDs will begin flashing the low battery warning:
Charging Mode
When both the battery and Micro-USB cable are connected to the Power Dock, the battery will be charging. The Omega can still be powered on while the battery is charging, but it doesn’t have to be; the battery will charge in this mode regardless of what the Omega is doing. You can even disconnect your Omega and the battery will still charge!
The Indicator LEDs will show the current charge level of the battery:
- A solid LED means the battery has charged up to that level
- A flashing LED means the battery is currently charging this level
For best results, use a short Micro-USB cable when charging.
Take a look at the animations below for more details on the battery level indicators:
Battery is 25% charged, charging up to 50%:
Battery is 50% charged, charging up to 75%:
Battery is 75% charged, charging up to 100%:
Stationary Mode
The Power Dock will still work when the battery is disconnected and the Power Dock is receiving power just from the Micro USB cable. The Battery Level Indicator LEDs will be flashing erratically, this is expected:
The Power Dock essentially acts like the Expansion Dock in this mode.
Checking the Battery Level
The power-dock2 application allows you to turn on the Battery Level indicator LEDs as well as output the current voltage of the battery on the screen. You can monitor the voltage on the command line while it is in Battery mode or Stationary mode. However, for the Batttery Indicator LEDs, it will only take effect when Power Dock is in the Battery mode.
Install
To install the power-dock2 application, run the following commands:
opkg update
opkg install power-dock2
Usage
The application will turn on the Battery Level Indicator LEDs, allowing you to visually check the battery charge level as well as read the battery voltage level using the onboard ADC. To do this simply enter the following command:
power-dock2You’ll see the following output in the screen:
root@Omega-2757:/# power-dock2
Battery Voltage Level: 4.10 V
And the battery LEDs will turn on for 5 seconds:
Controlling the GPIOs
The GPIOs on the dock can be controlled using a number of tools we’ve included in the Omega firmware. You find more on how you can control the Omega’s GPIOs in the article on using the Omega’s GPIOS